# Workplace App
The Workplace App is used for people and site management. People/Cards/Users can be added to the Kahu system and edited from inside the Workplace App. This includes which of the building's systems the person can access, for example whether they can use the booking kiosk to book a desk. Another use of the Workplace App is to edit the neighbourhoods and desks in the site, allowing for customisation of title and colour for neighbourhoods, and disabled statuses for desks. It can also be used to manage room bookings via the booking calendar.
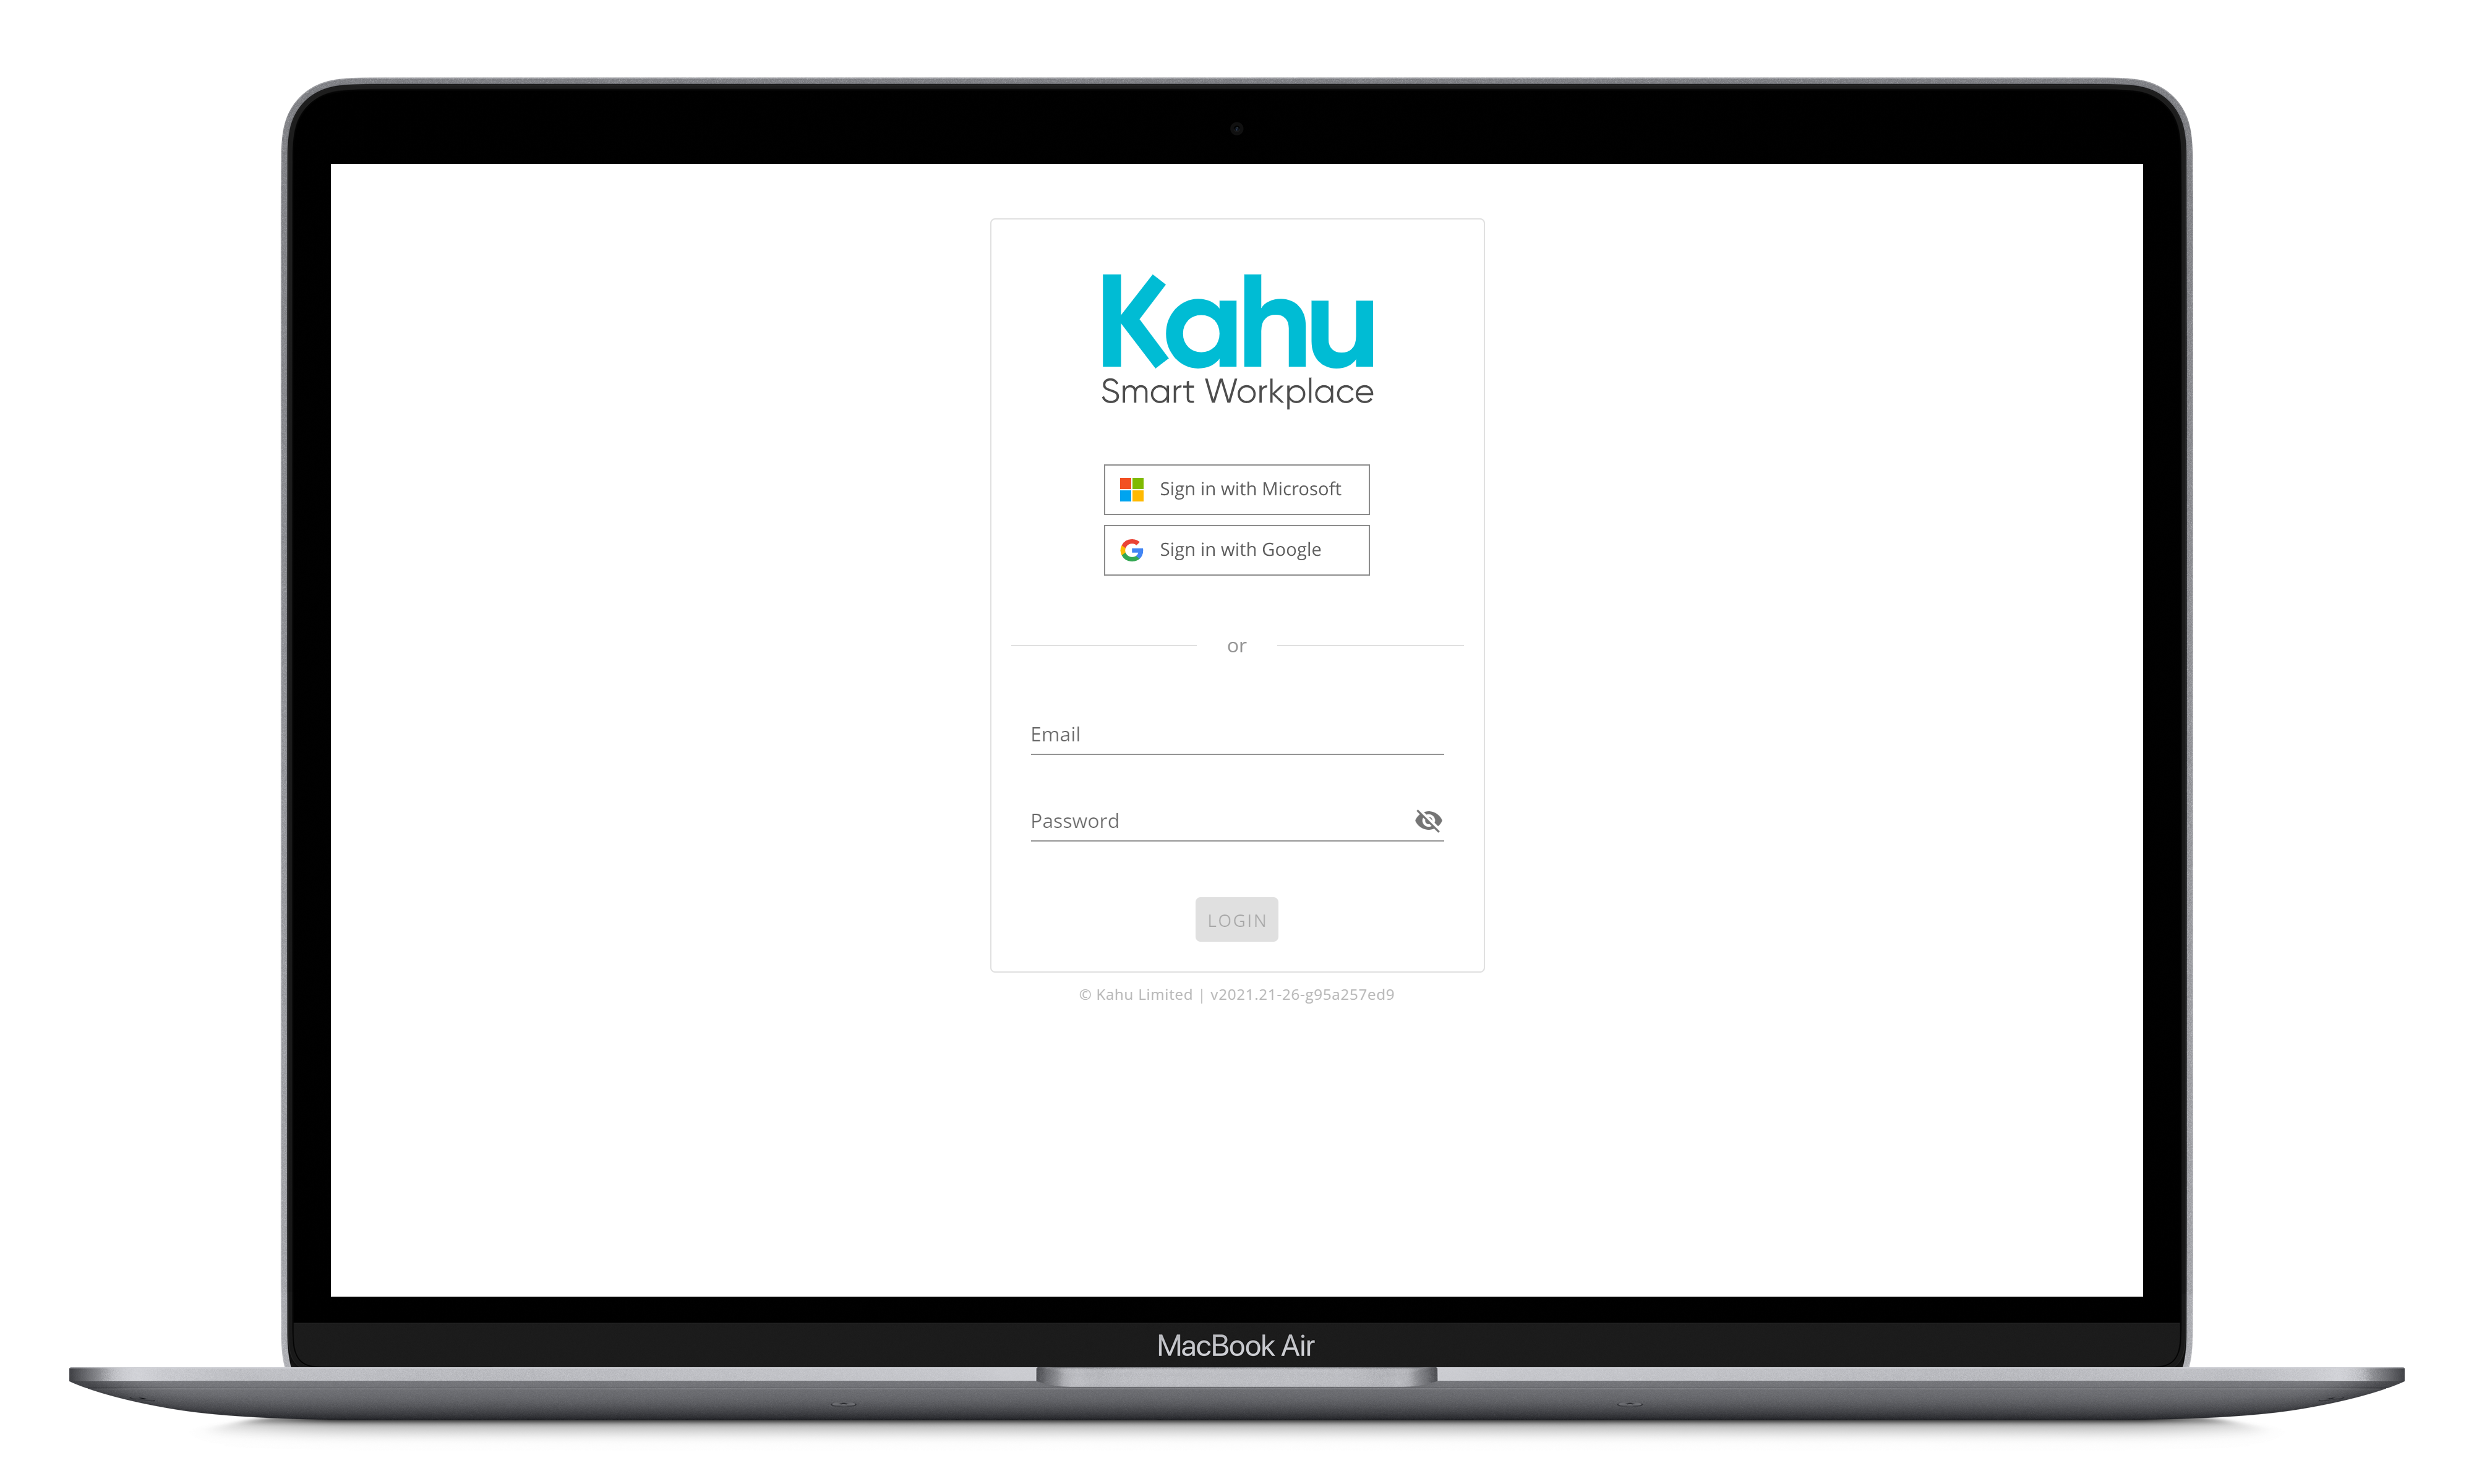
The app can be found at: app.kahu.work - login to get started. If you do not have a Kahu login, please speak to your administrator.
# Login
Logging in to Kahu can be done with a Microsoft account, a Google account, or a Kahu account. Just select the relevant option from the login page. To login with a Microsoft or a Google account your administrator will have to set this up for your organisation.
# Account
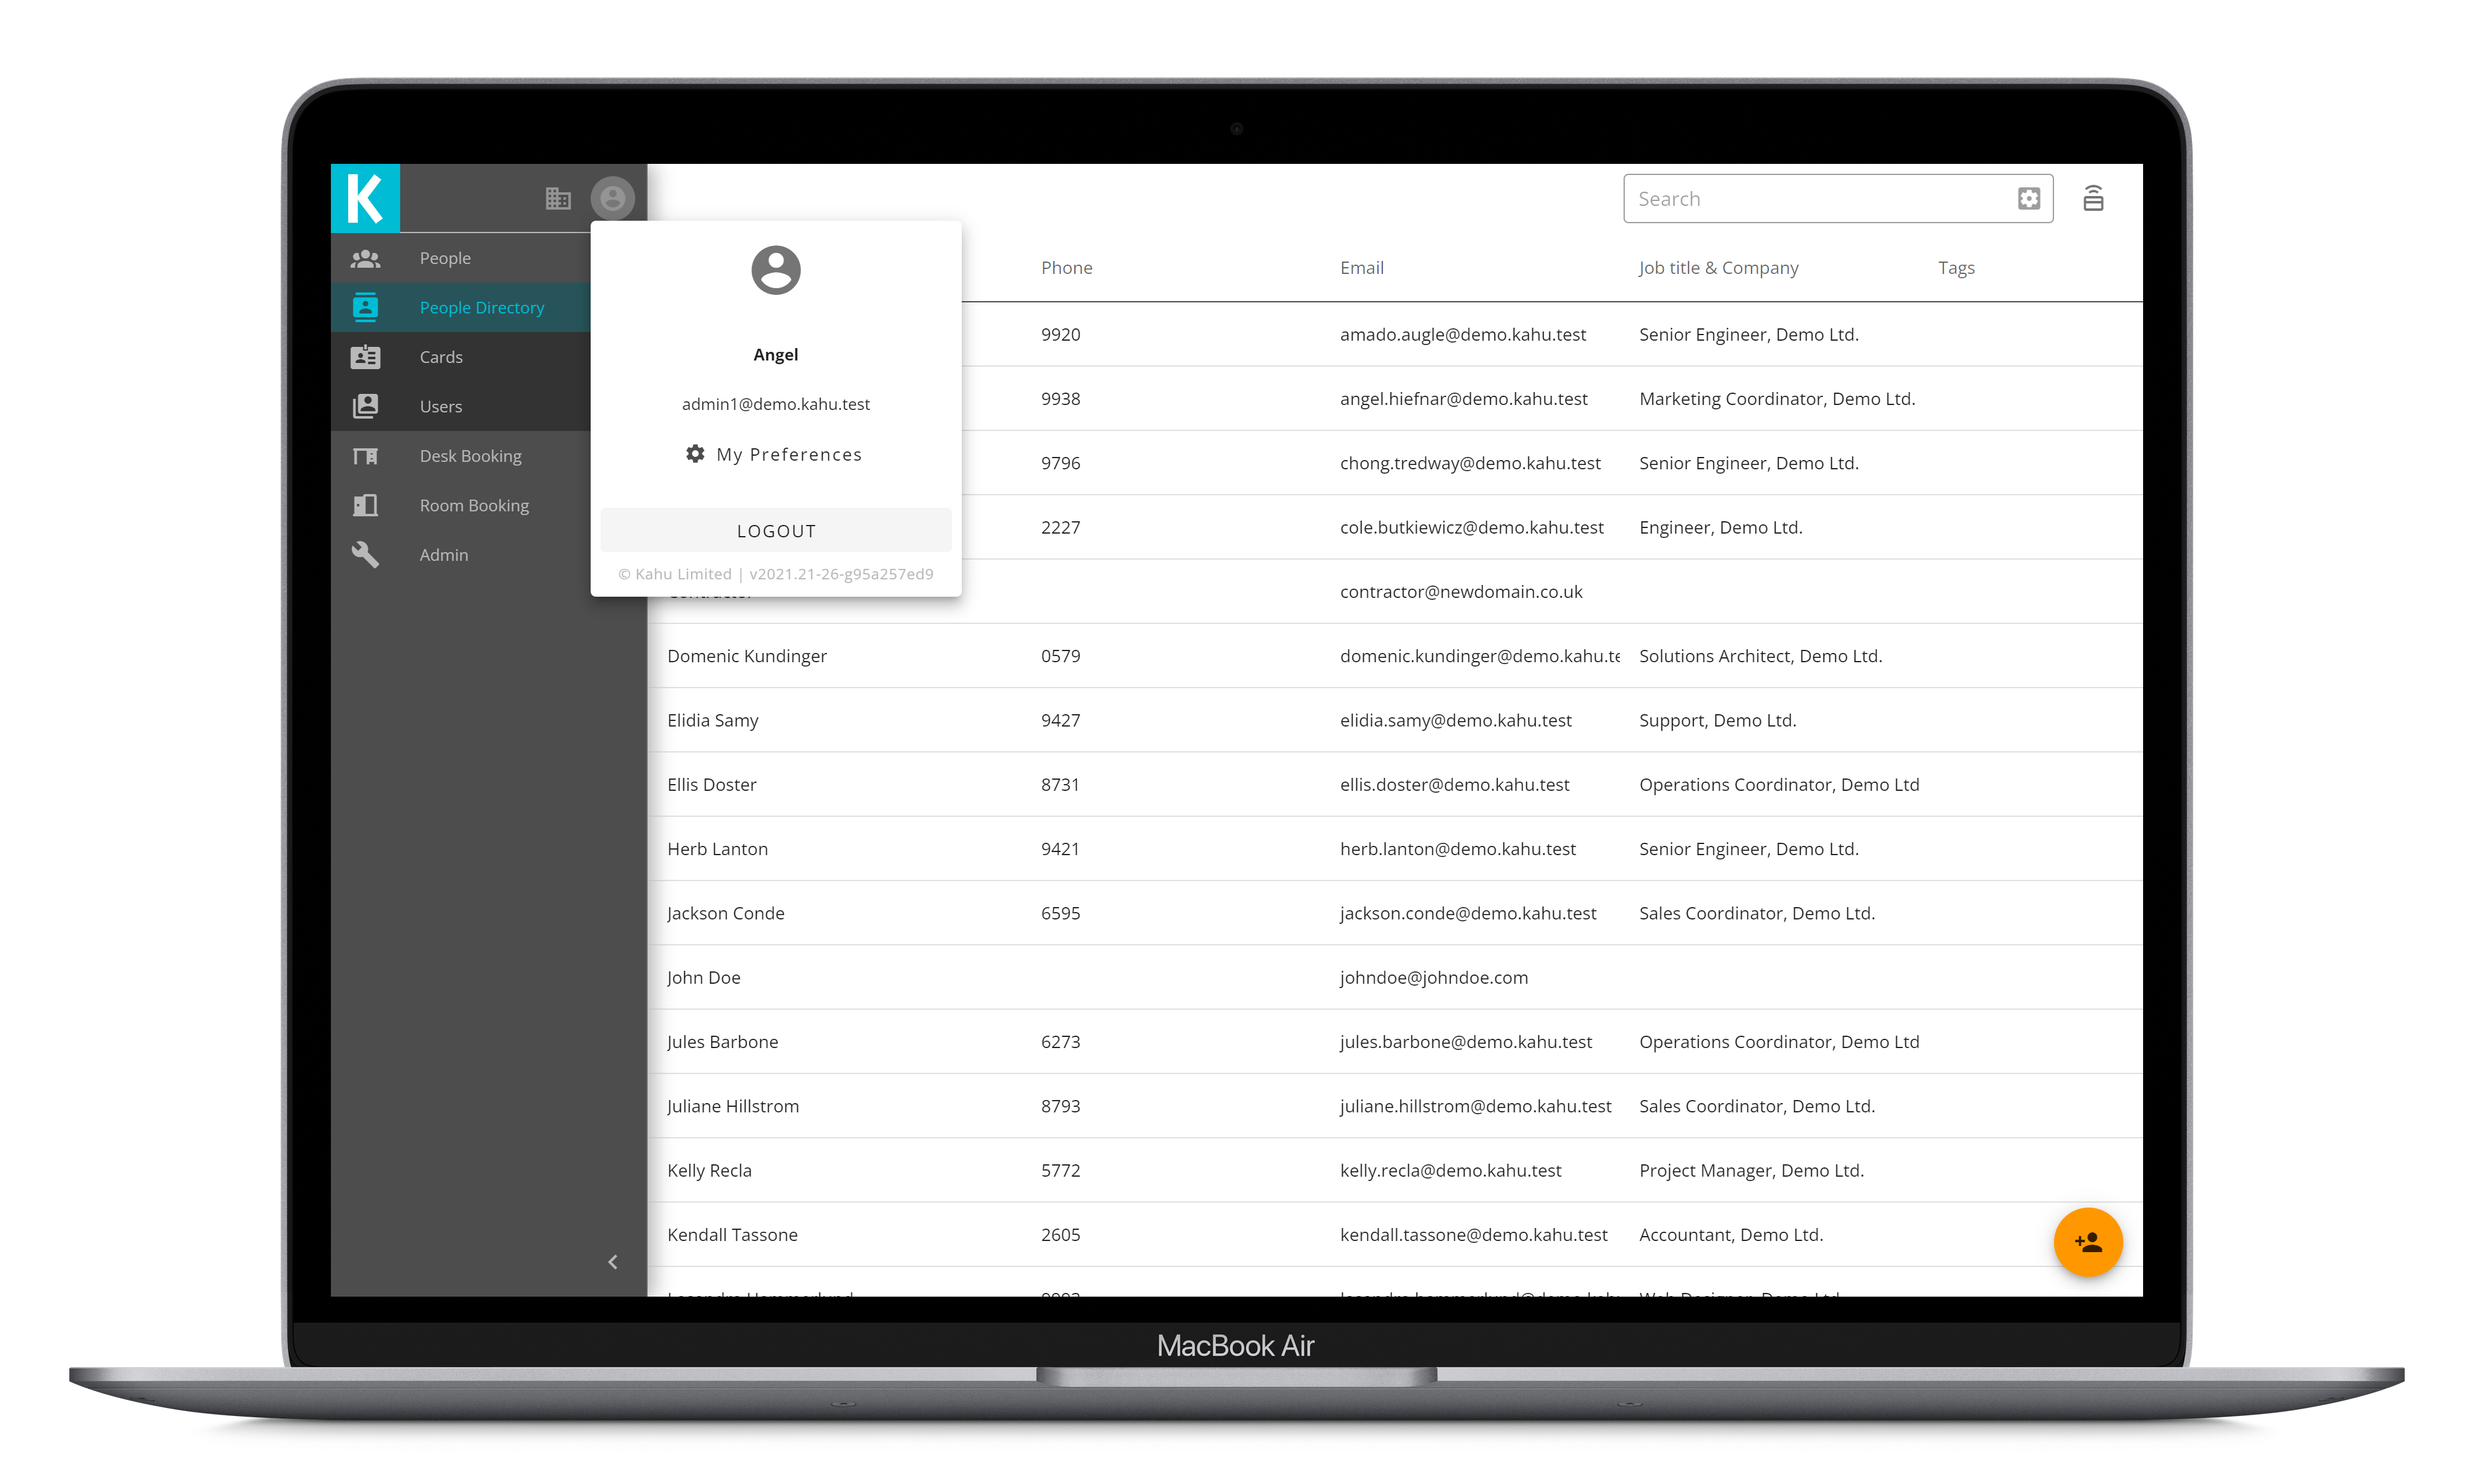
To see your account details click the button in the sidebar. This will show your name, email address, and the option to logout.
# Preferences
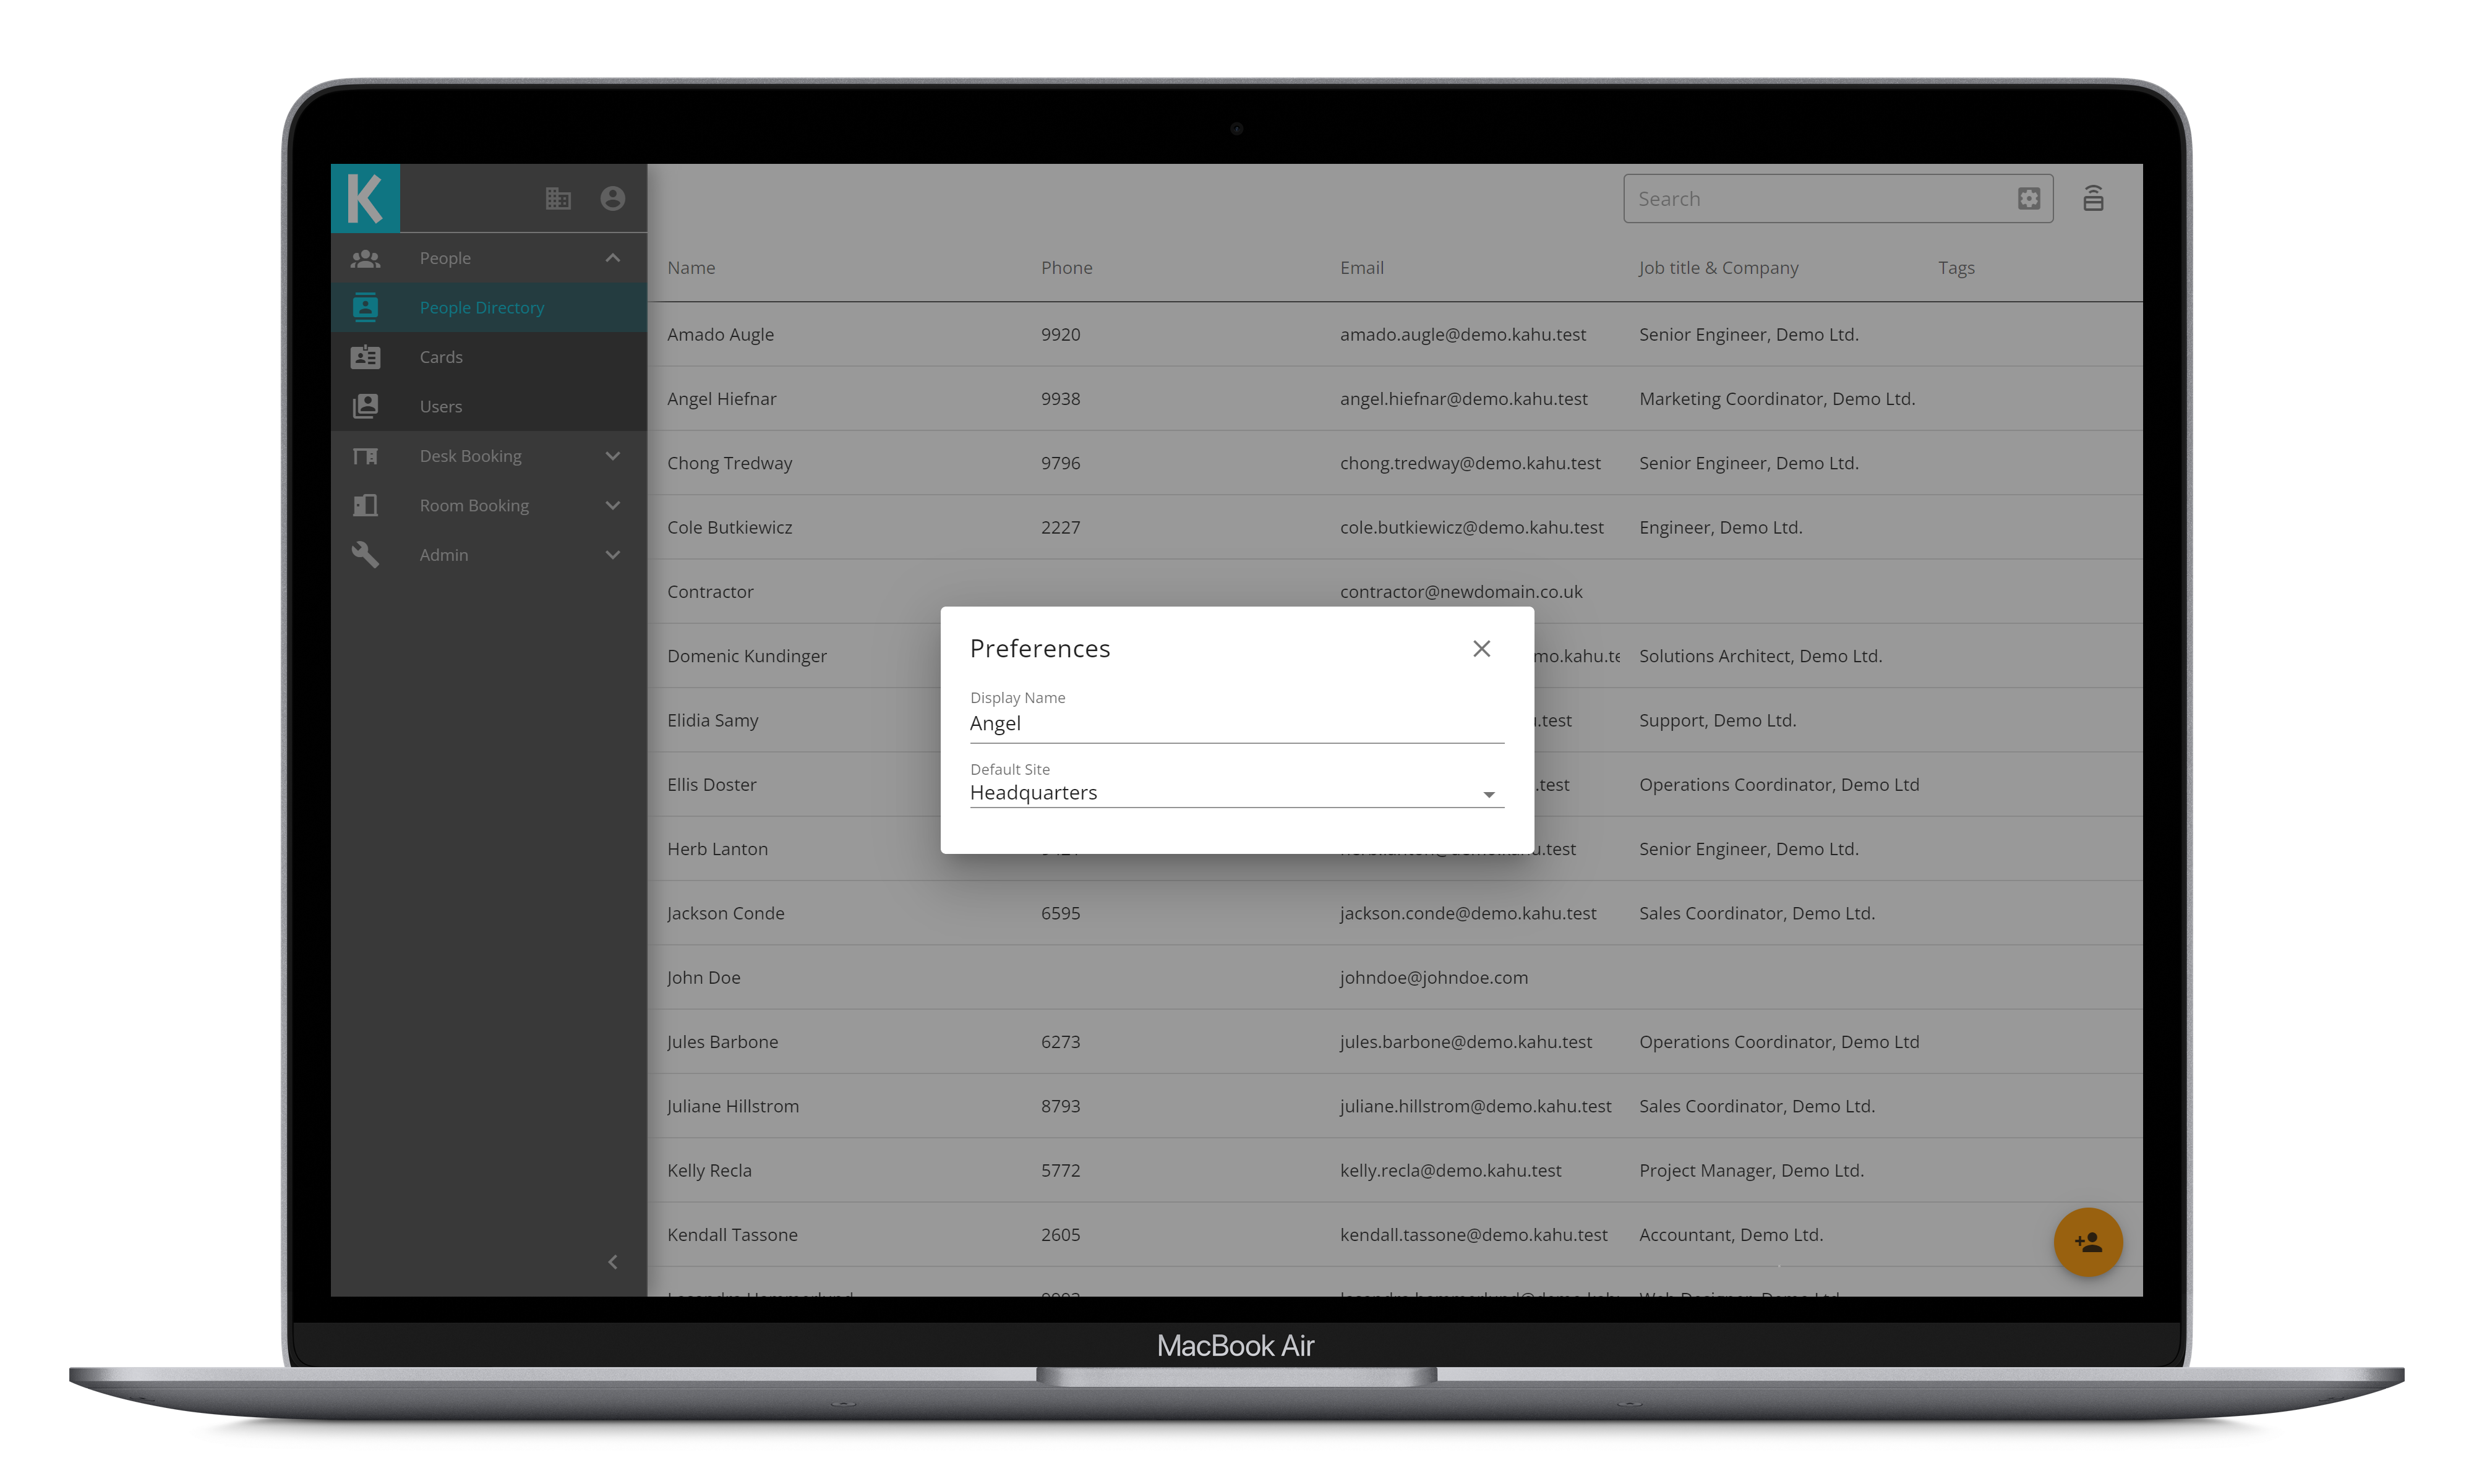
To edit your preferences, from the account menu click the My Preferences button. This will open a dialog where you can set your display name, and set your default site (this is the site shown when you first load the app).
# Sites
The Workplace App supports multi-site organisations. Sites are buildings, offices, or locations that your organisation manages. Once you are logged in you will be viewing your default site (your default site is set by your administrator, please contact them if it needs changing). To check which site is selected, hover over the site selection button in the sidebar.
To change the site, click the site selection button. You will be presented with a small menu with the available sites; click the site you wish to switch to.
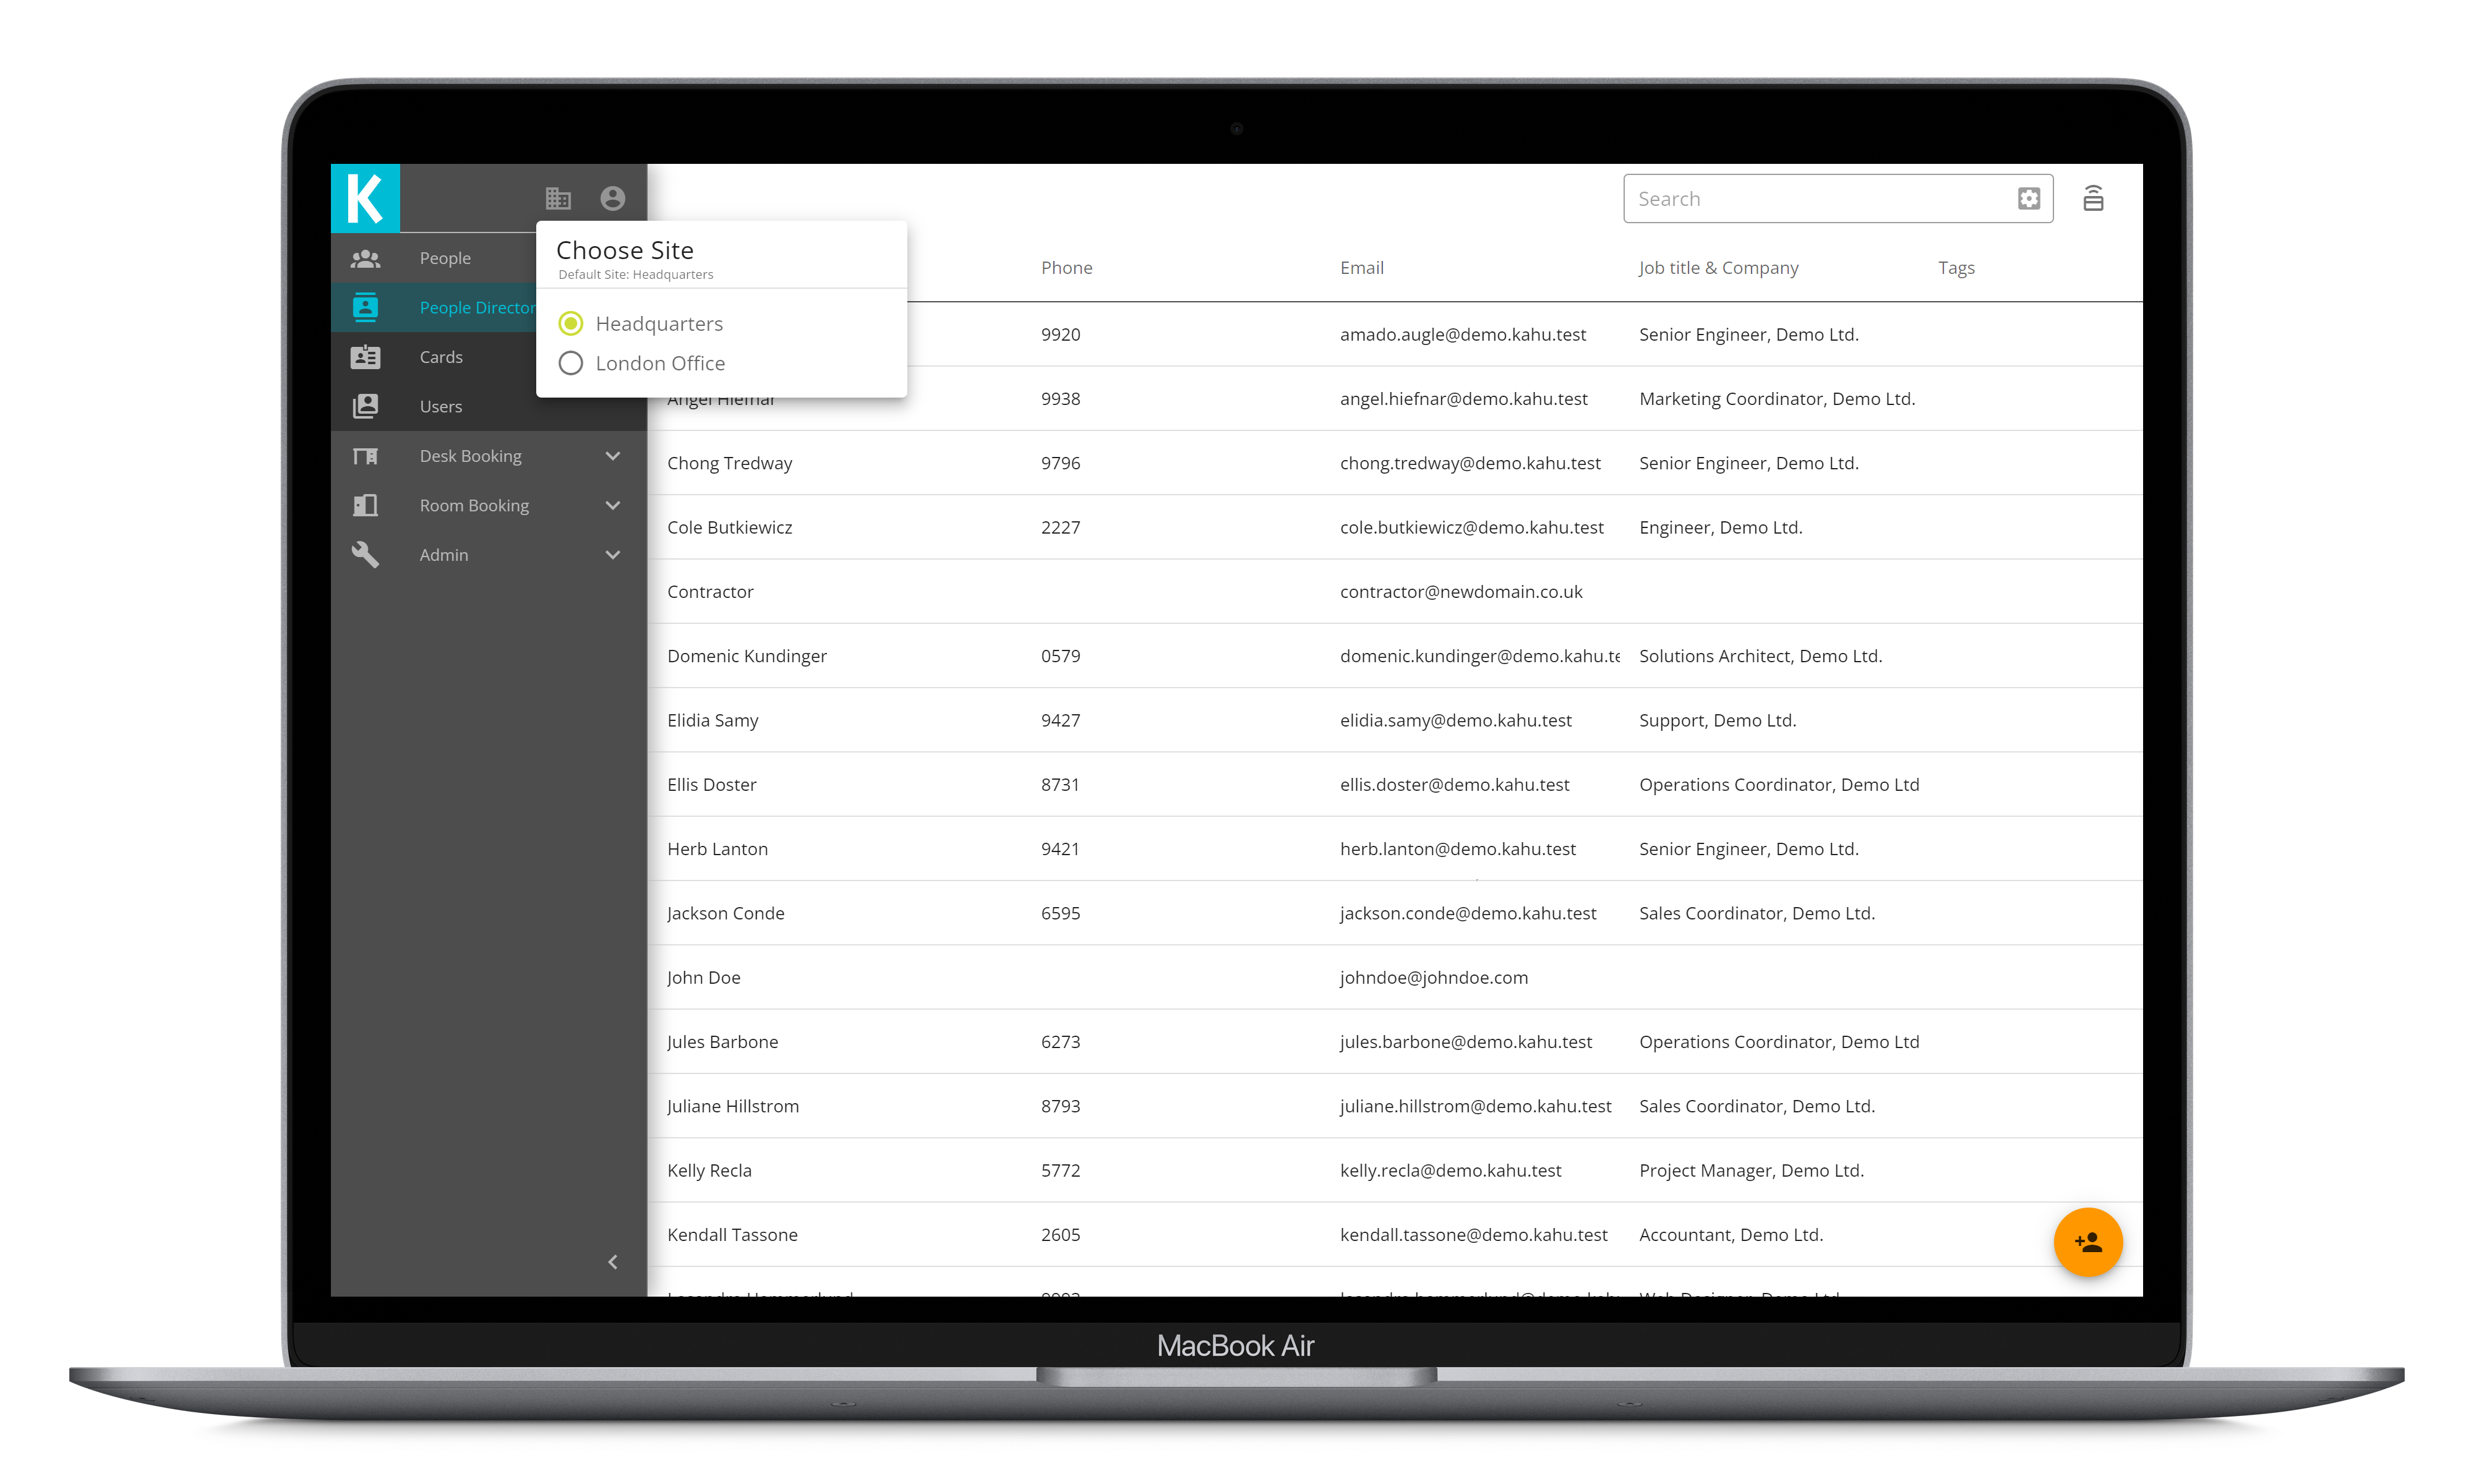
The site you have selected will be referred to in this documentation as the active site.
Note: If you change site while using the app it will reset to your default site next time you load the app.
# People
# Directory
The default view when the app is loaded is the Directory. This is where everyone based at the active site will be listed.
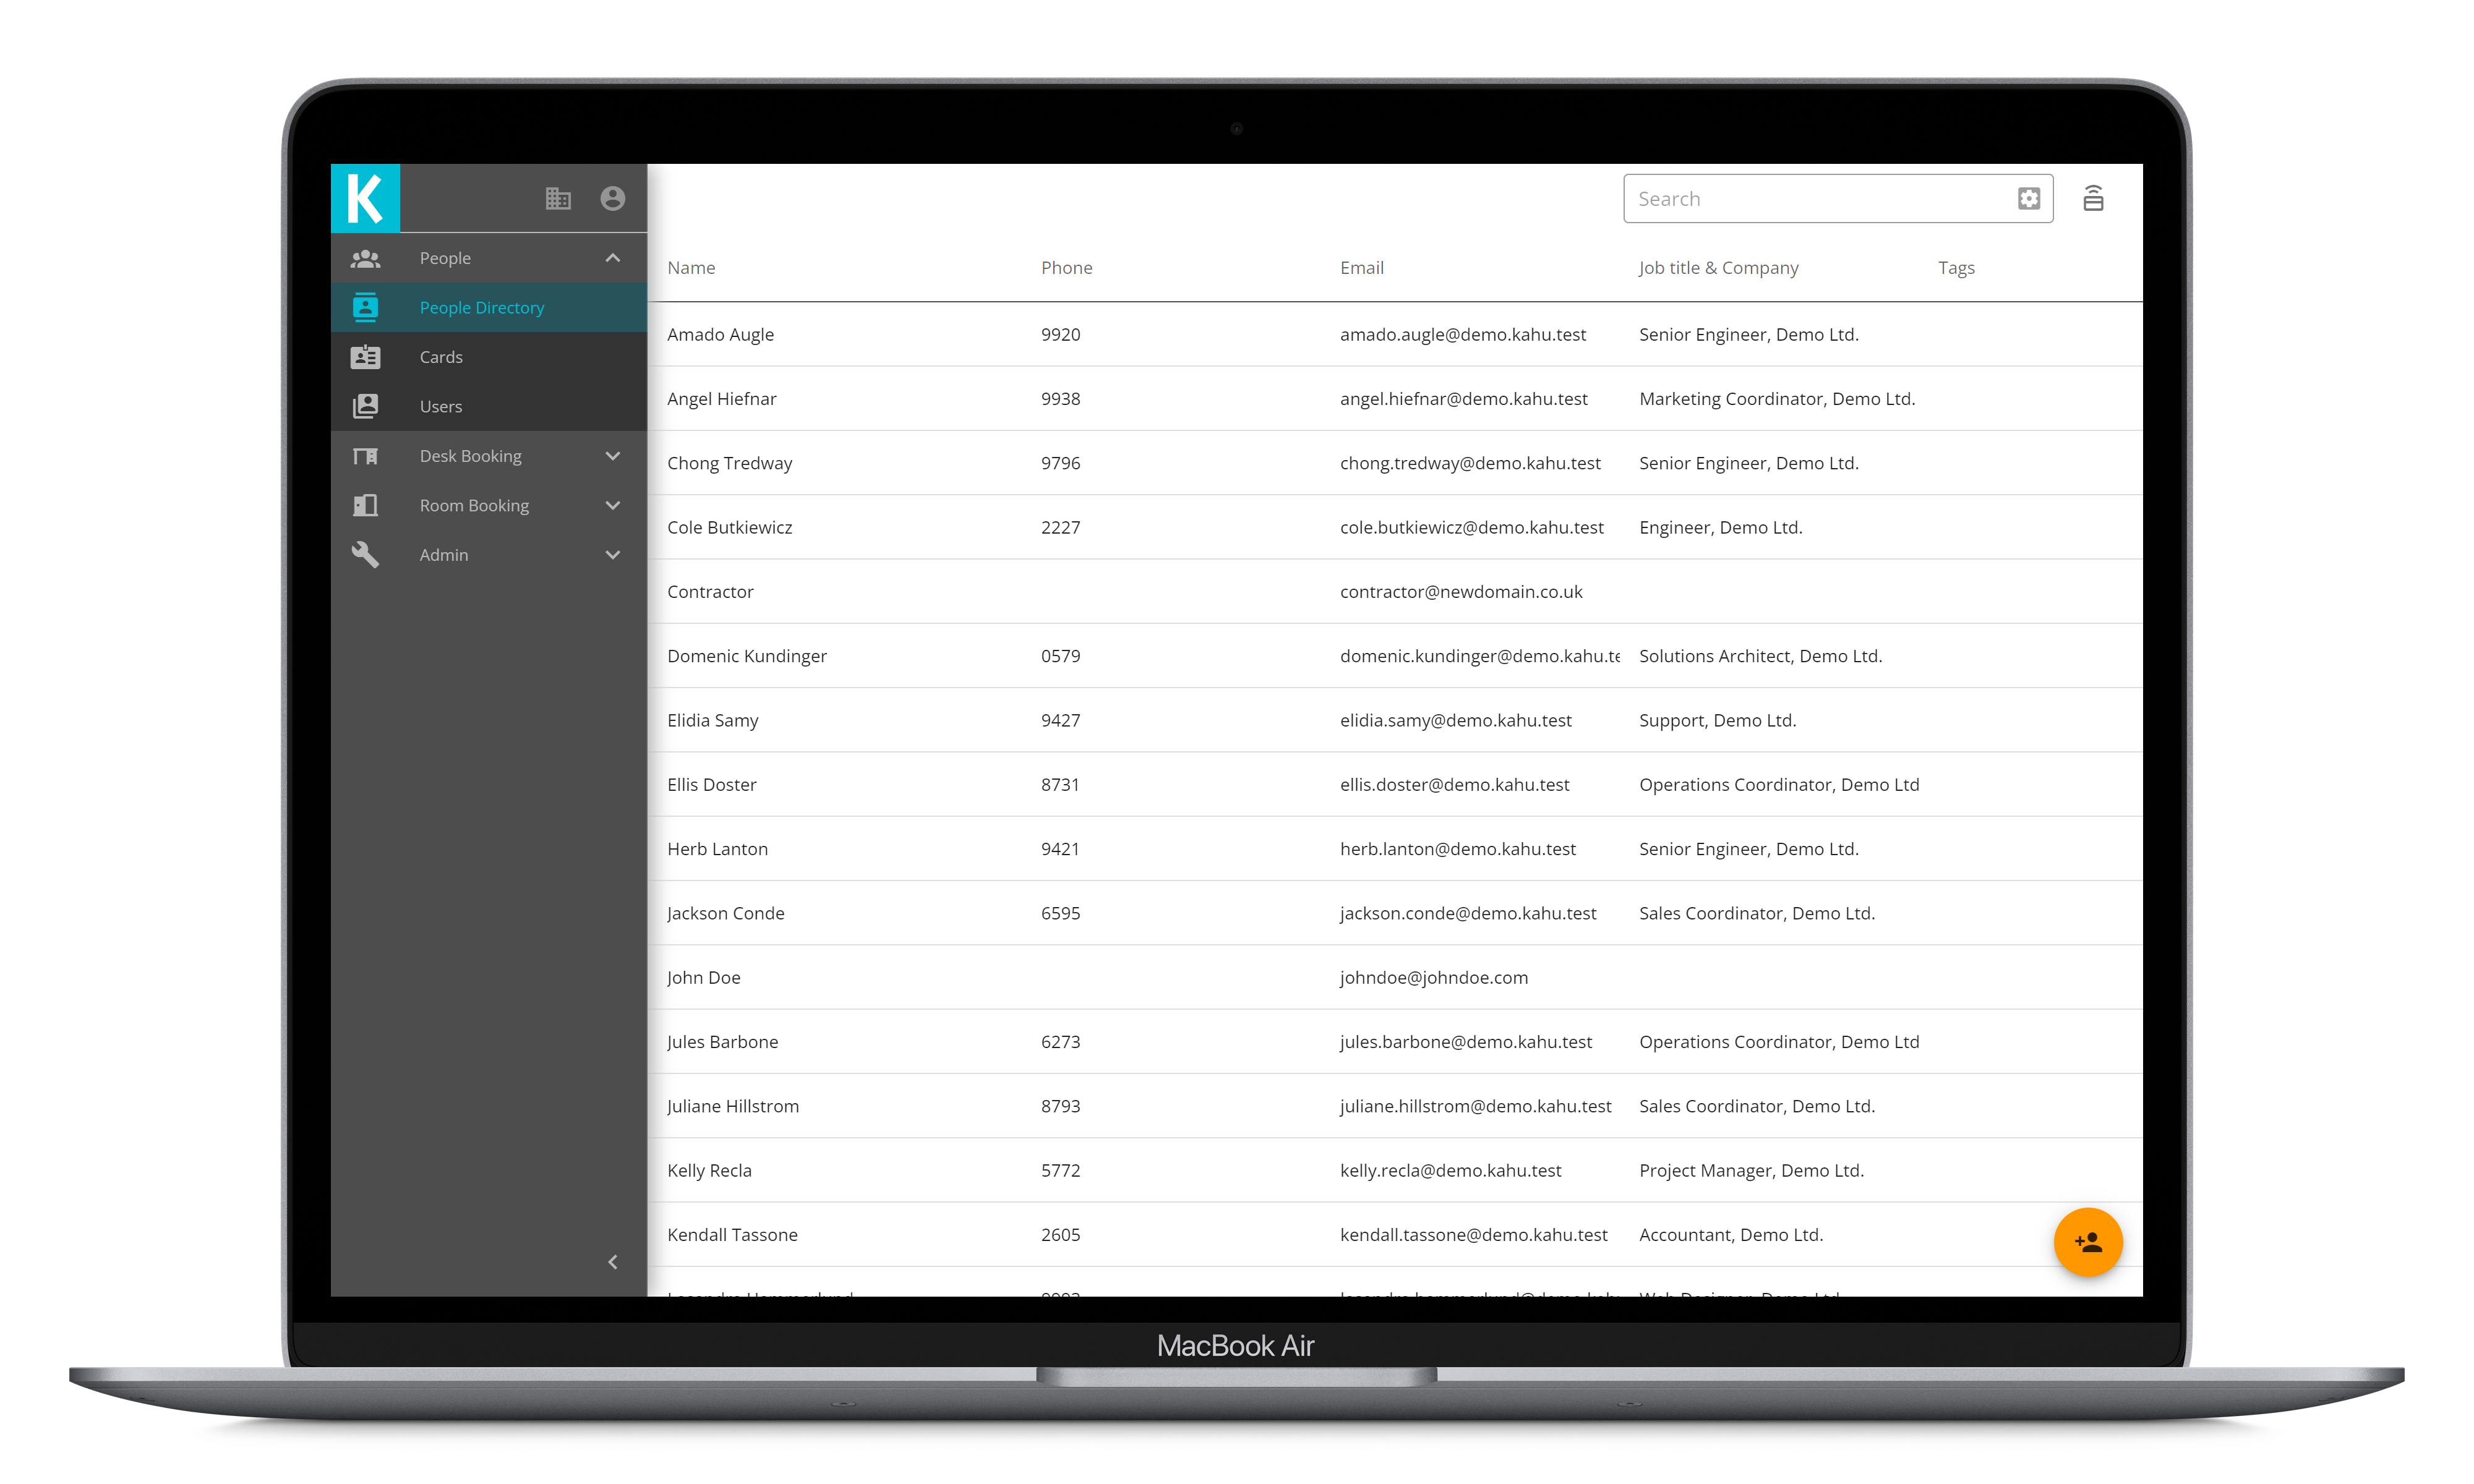
To view more detail about a person, or change their permissions, click anywhere on the row.
# Search
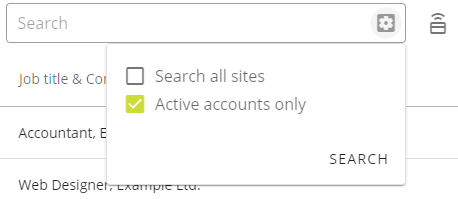
To search for people type their name in the box and press enter. By default this will search people based at the active site. To change the search settings click the button. You will be presented with a small menu with the available search options.
It is also possible to find someone by scanning their card. To do this click the button next to the search box. Scan the card, and if someone has that card assigned to them you will be taken to their person view. If no one is found you will see a message that it has not been assigned to anyone.
Note: to be able to search by card you need the Kahu Card Reader software installed, and a Kahu provided USB card reader. For more information please contact us.
# Person View
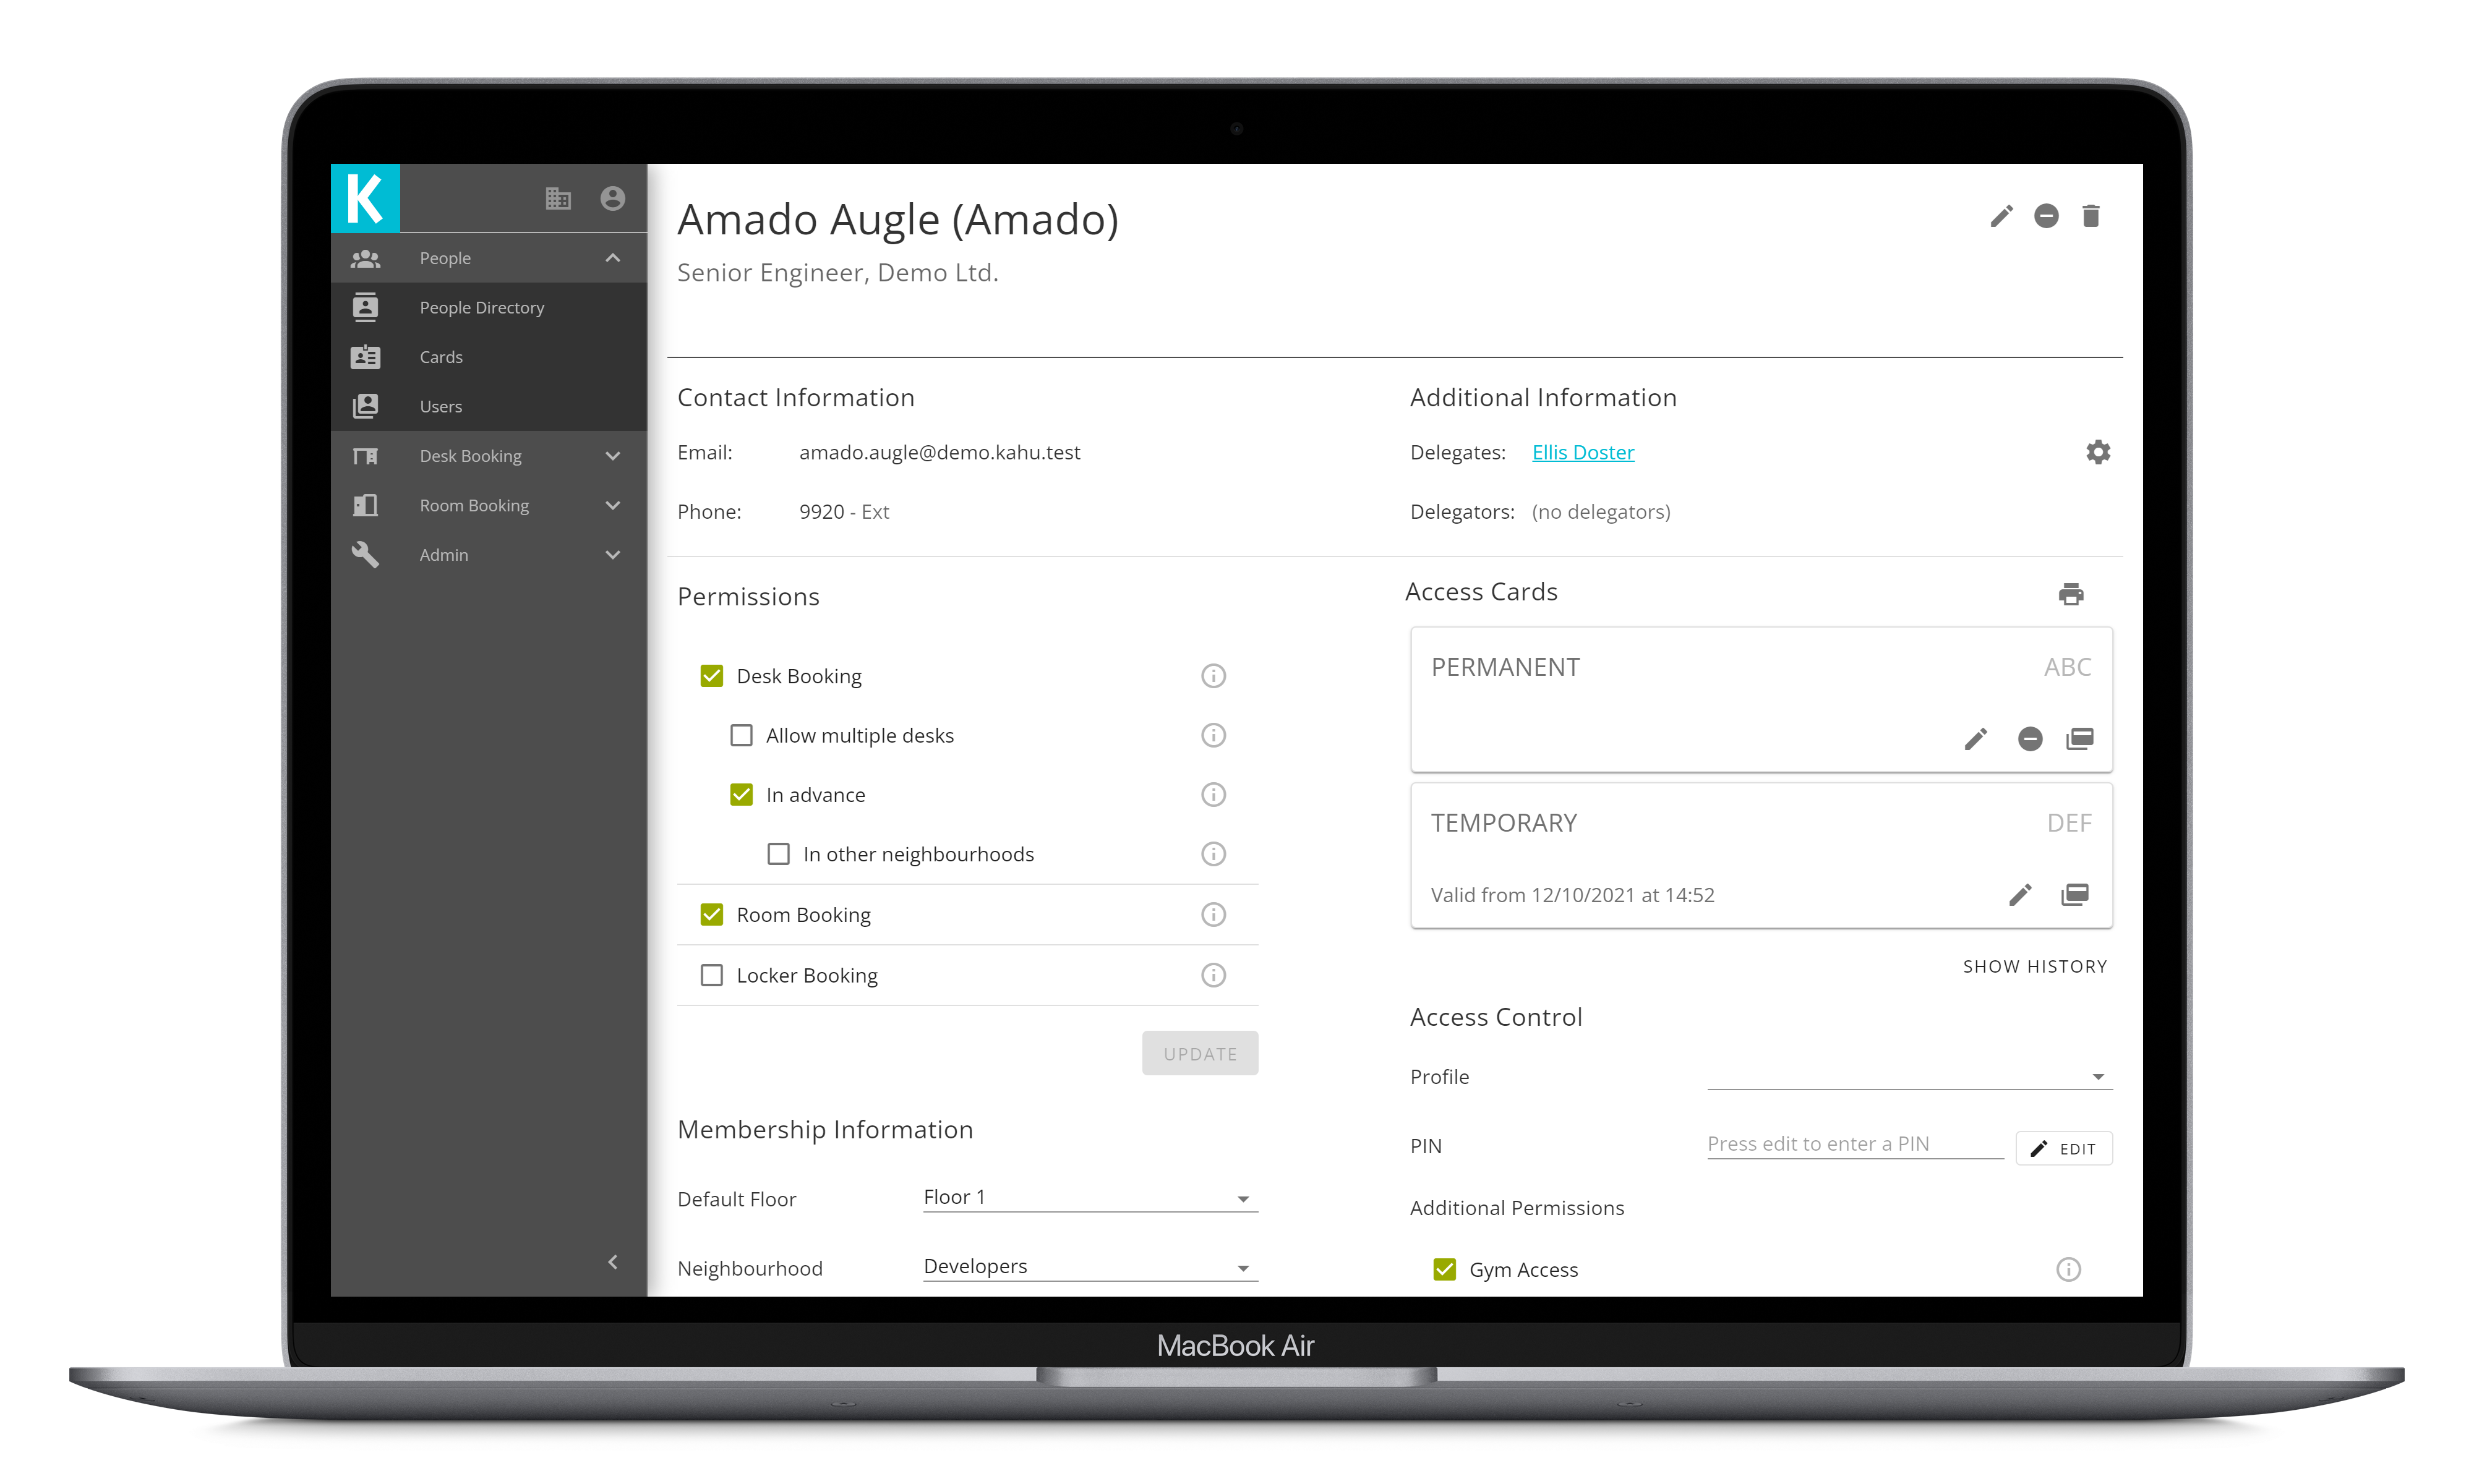
The person view shows details about the person, including their name and contact information; use the Directory to find people.
# Site Permissions
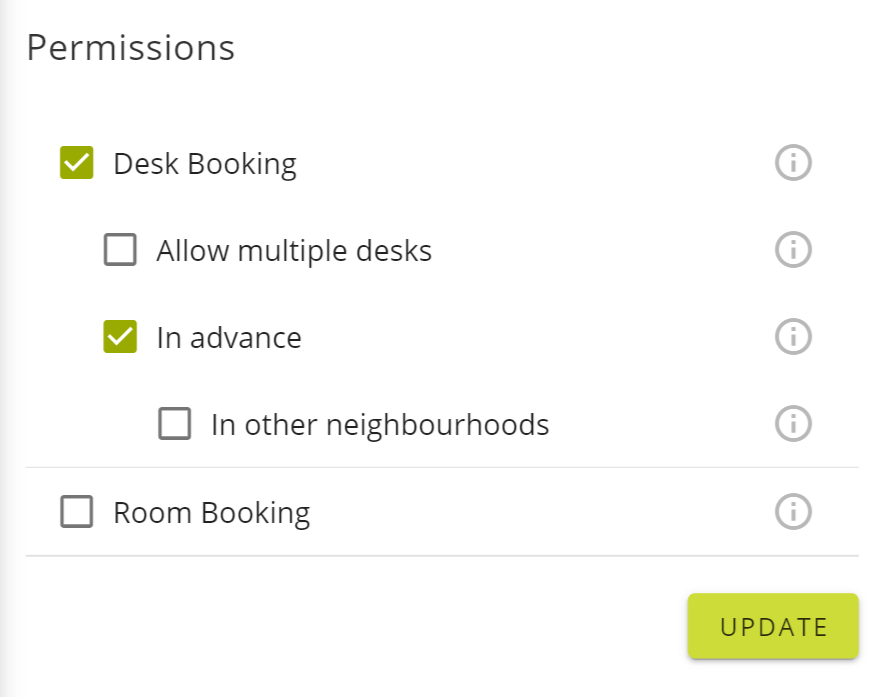
The person view shows the permissions editor. This is used for configuring which systems of the active site a person can access. For example in the following screenshot it can be seen that August cannot use Desk Booking or Room Booking at the active site.

To change someone's permissions click the checkboxes as appropriate, and click update. Note that when some permissions are enabled there may be associated permissions which can then be selected. For example when someone has Desk Booking permission, they can also have the permission to book multiple desks. This will only show when desk booking is selected. The screenshot below shows the "Allow multiple desks" option.
# Access Cards
Access cards are used for multiple applications, including allowing people access to the building. The access cards section allows you see which card is currently assigned, and gives the options for replacing the card or issuing a temporary one. To manage cards in the system, see the Cards section.
Note: to be able to assign cards you need the Kahu Card Reader software installed, and a Kahu provided USB card reader. For more information please contact us.
# Assigning New Cards
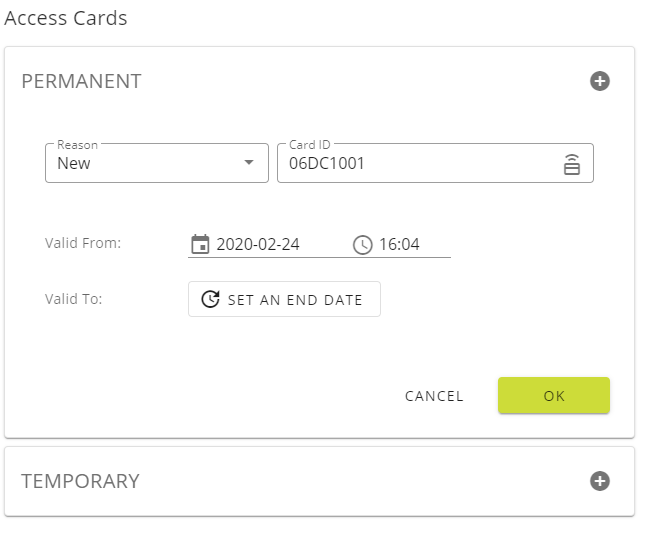
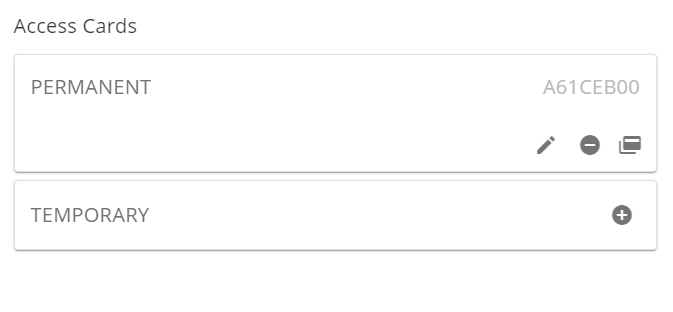
The screenshot below shows the view when the person has no cards assigned:

To assign a new card click the button. You will be presented with a small form to fill in. The first action is to scan a card.
- Scan a card
- Set the access start date
- Optionally set an access end date
- Press OK
If you need to scan another card, click the button.
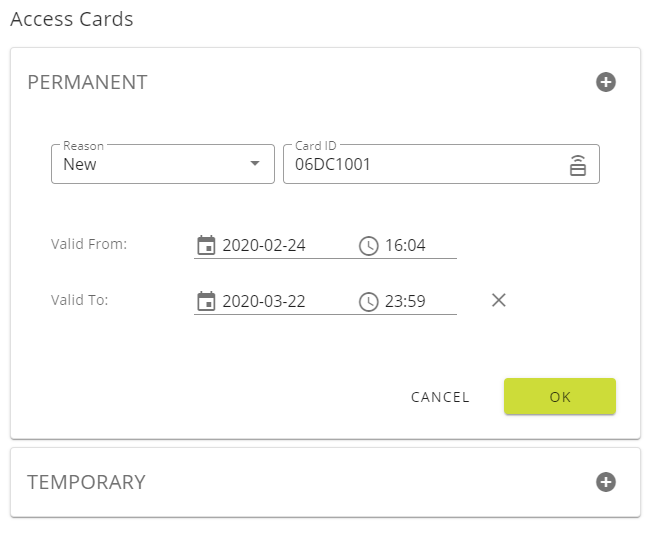
The end date is useful if the person needs access until a certain date (for example, someone on a fixed term contract). If no end date is set then the card will be valid indefinitely. To set an end date press "set an end date", and another date field will be shown. To remove the end date press the button.
If the card is already assigned to someone else a warning will be shown, which can be seen below.
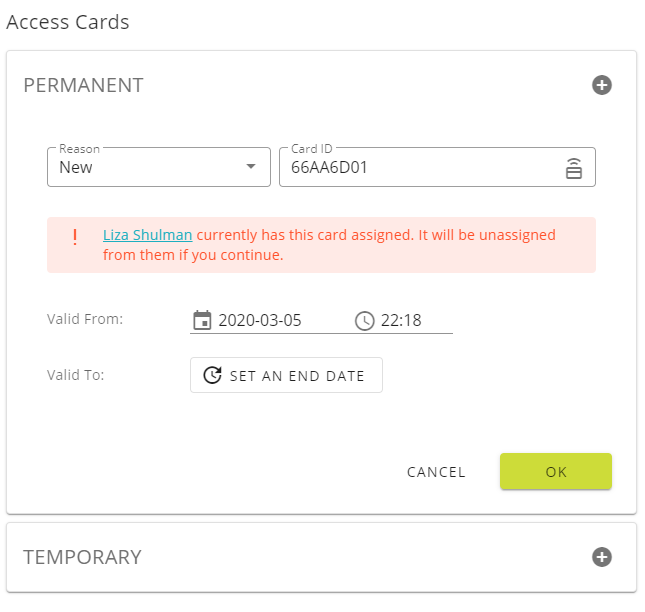
Once assigned the card number will show in the Access Cards section.
# Replacing a Card
If a person needs their card replacing this can be done in the person view. From the Access Cards section click the button. Scan the new card, and confirm the replacement.
# Editing a Card
When editing a card all that can be changed is the validity period. To change the card, see Replacing a Card. Click the button, choose the new validity date, and press OK.
# Disabling a Card
It is possible to disable a card so it cannot be used. This is useful if the card is lost, for example. When issuing someone a temporary card their permanent card is automatically disabled. To manually disable a card click the button.
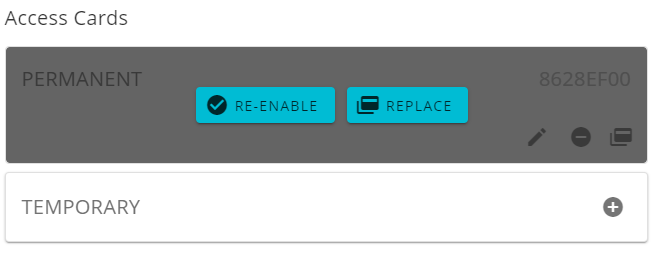
When a card is disabled it will show greyed out, with options to re-enable or replace.
# Temporary Cards
If someone has lost their card it is possible to issue a temporary card. Temporary cards are also used for visitors. To issue a temporary card click the button. By default temporary cards are set to be valid for the rest of the day. Temporary cards can be replaced or edited in the same way that permanent cards can.
Note: If there is a valid permanent card when a temporary card is issued it will be disabled automatically. If the person finds their permanent card or needs it re-enabling, this must be done manually.
# Card Printing
If you wish to print an access card for a person, click the button next to the "Cards" header. This will open a dialog with your printing options.
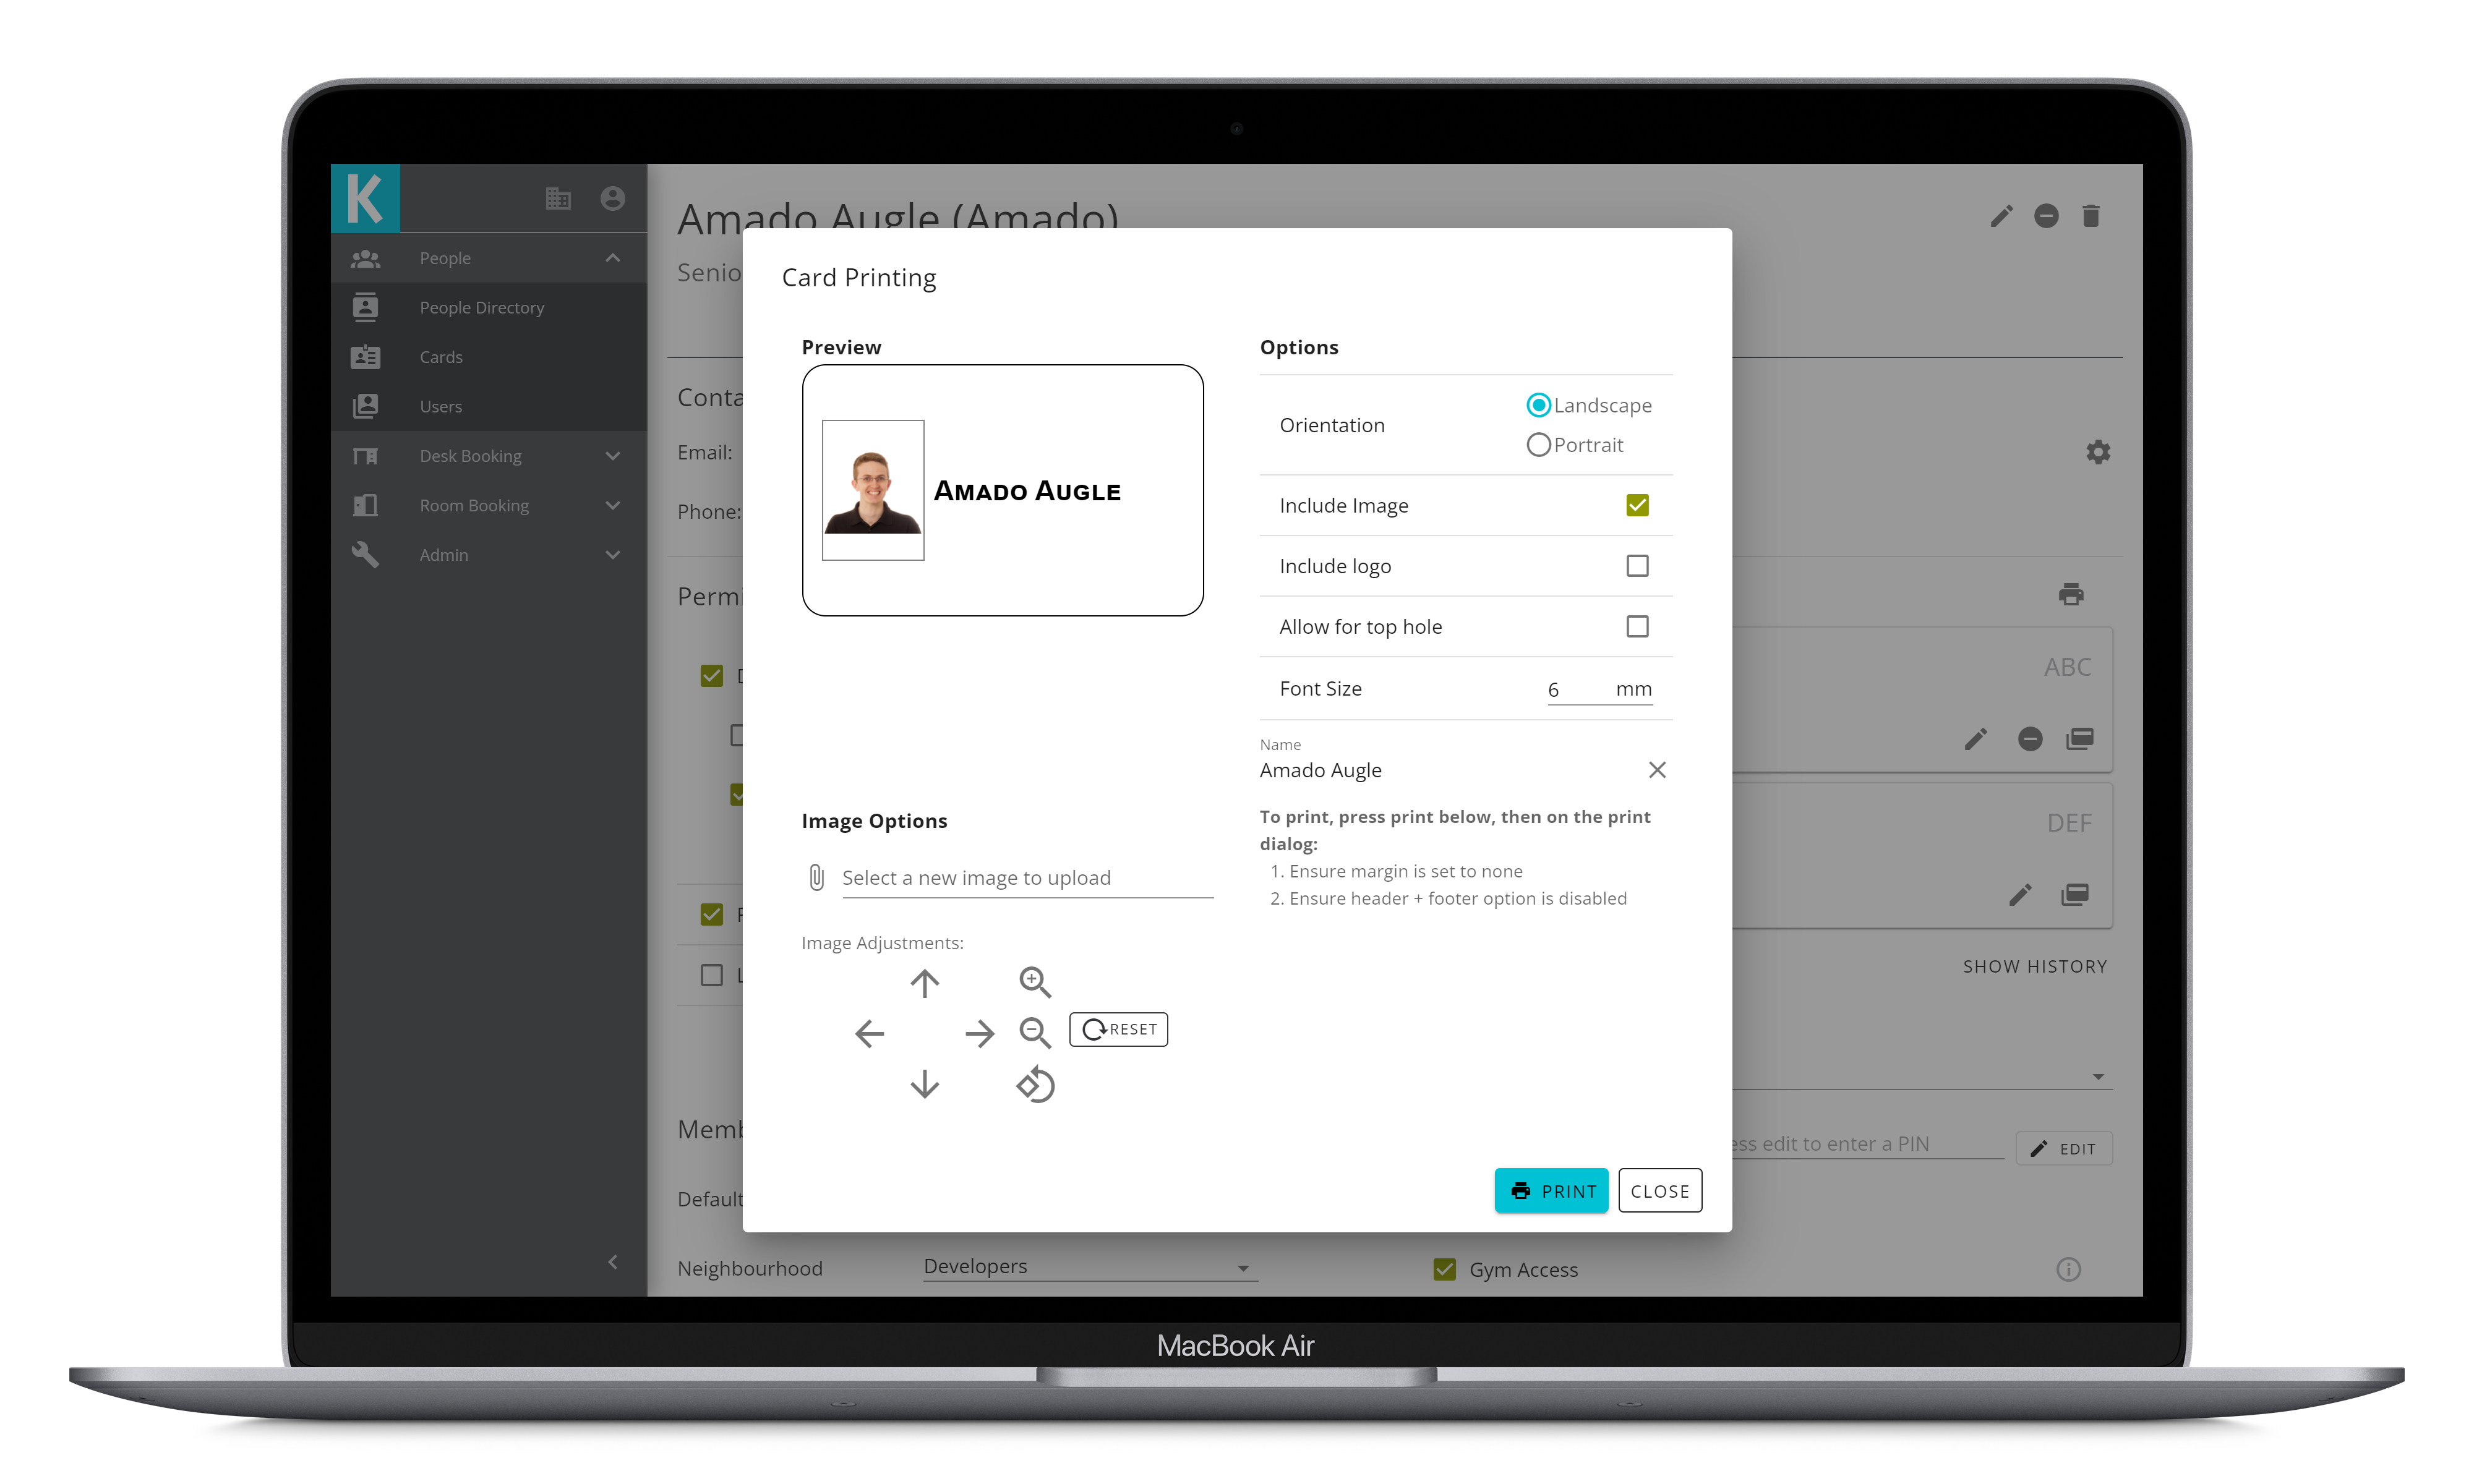
# Uploading an Image
To add an image to the card, click on the field marked "Select a new image to upload". This will allow you to browse for an image for this person. Using the controls under the "Image Adjustments" section will allow you to move/scale the image to fit inside the box on the print preview.
# Options
| Option | Description |
|---|---|
| Orientation | This is the orientation that the card will be printed in, either landscape or portrait. |
| Include Image | Whether to include the person's image on the card or not. |
| Include Logo | Whether to include the company's logo on the card or not. |
| Allow for top hole | When printing in portrait, add a space at the top so the image isn't in the space of the card's hole. |
| Font Size | How big the text should be on the card in mm. |
| Name | Automatically filled to be the person's name, but can be manually edited if required. |
# Membership Information
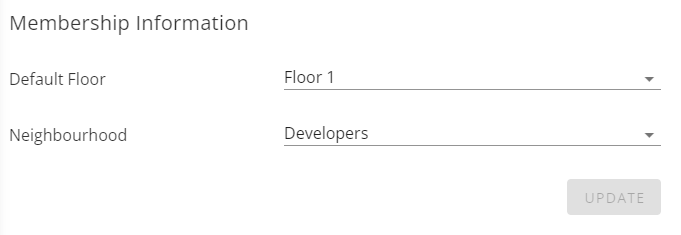
# Default Floor
Setting a person's default floor will cause the user app to load in to that floor whenever the person is viewing that site.
# Neighbourhood
This option will set the neighbourhood for the person. This will limit the desks that the person can book to the desks that are in the selected neighbourhood (this can be overridden with the "In other neighbourhoods" permission).
# Access Control
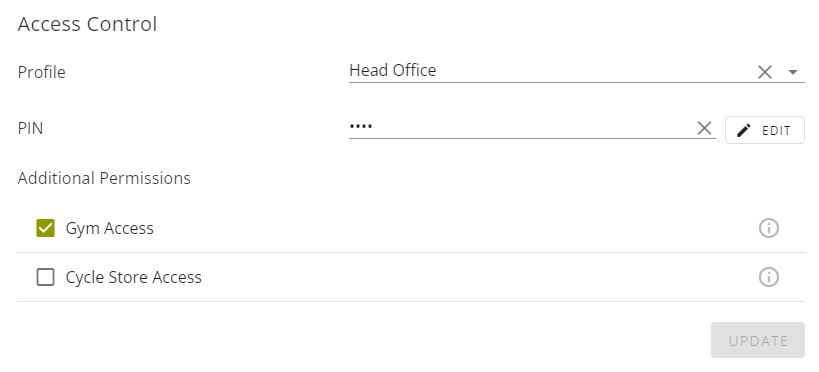
# Profile
If you have any access control profiles set up, you will see these in the dropdown here. Selecting one and saving will give this person any permissions that are included in that profile.
# PIN
Some rooms may require a PIN as well as the card swipe, this can be set up in the PIN field. Clicking "Edit" will allow you to enter a PIN for this person. If you need to remove a PIN, you can click the button next to the PIN.
# Additional Permissions
If a site has any additional access control permissions, they will be shown in this section. To grant a person these permissions, click the checkboxes as appropriate, and click update.
# Delegated Access
Kahu allows delegated people to book resources on behalf of others via the User App. Permissions for this are managed through the People View in the Workplace App.
# Delegates
Delegates are people who have access to book on behalf of the person. Clicking the will open up a dialog that allows you to add people as delegates. After searching for a person, you will be presented with a checkbox for "Desk Booking" permissions, clicking this will give the selected person the option to book on behalf of the user.
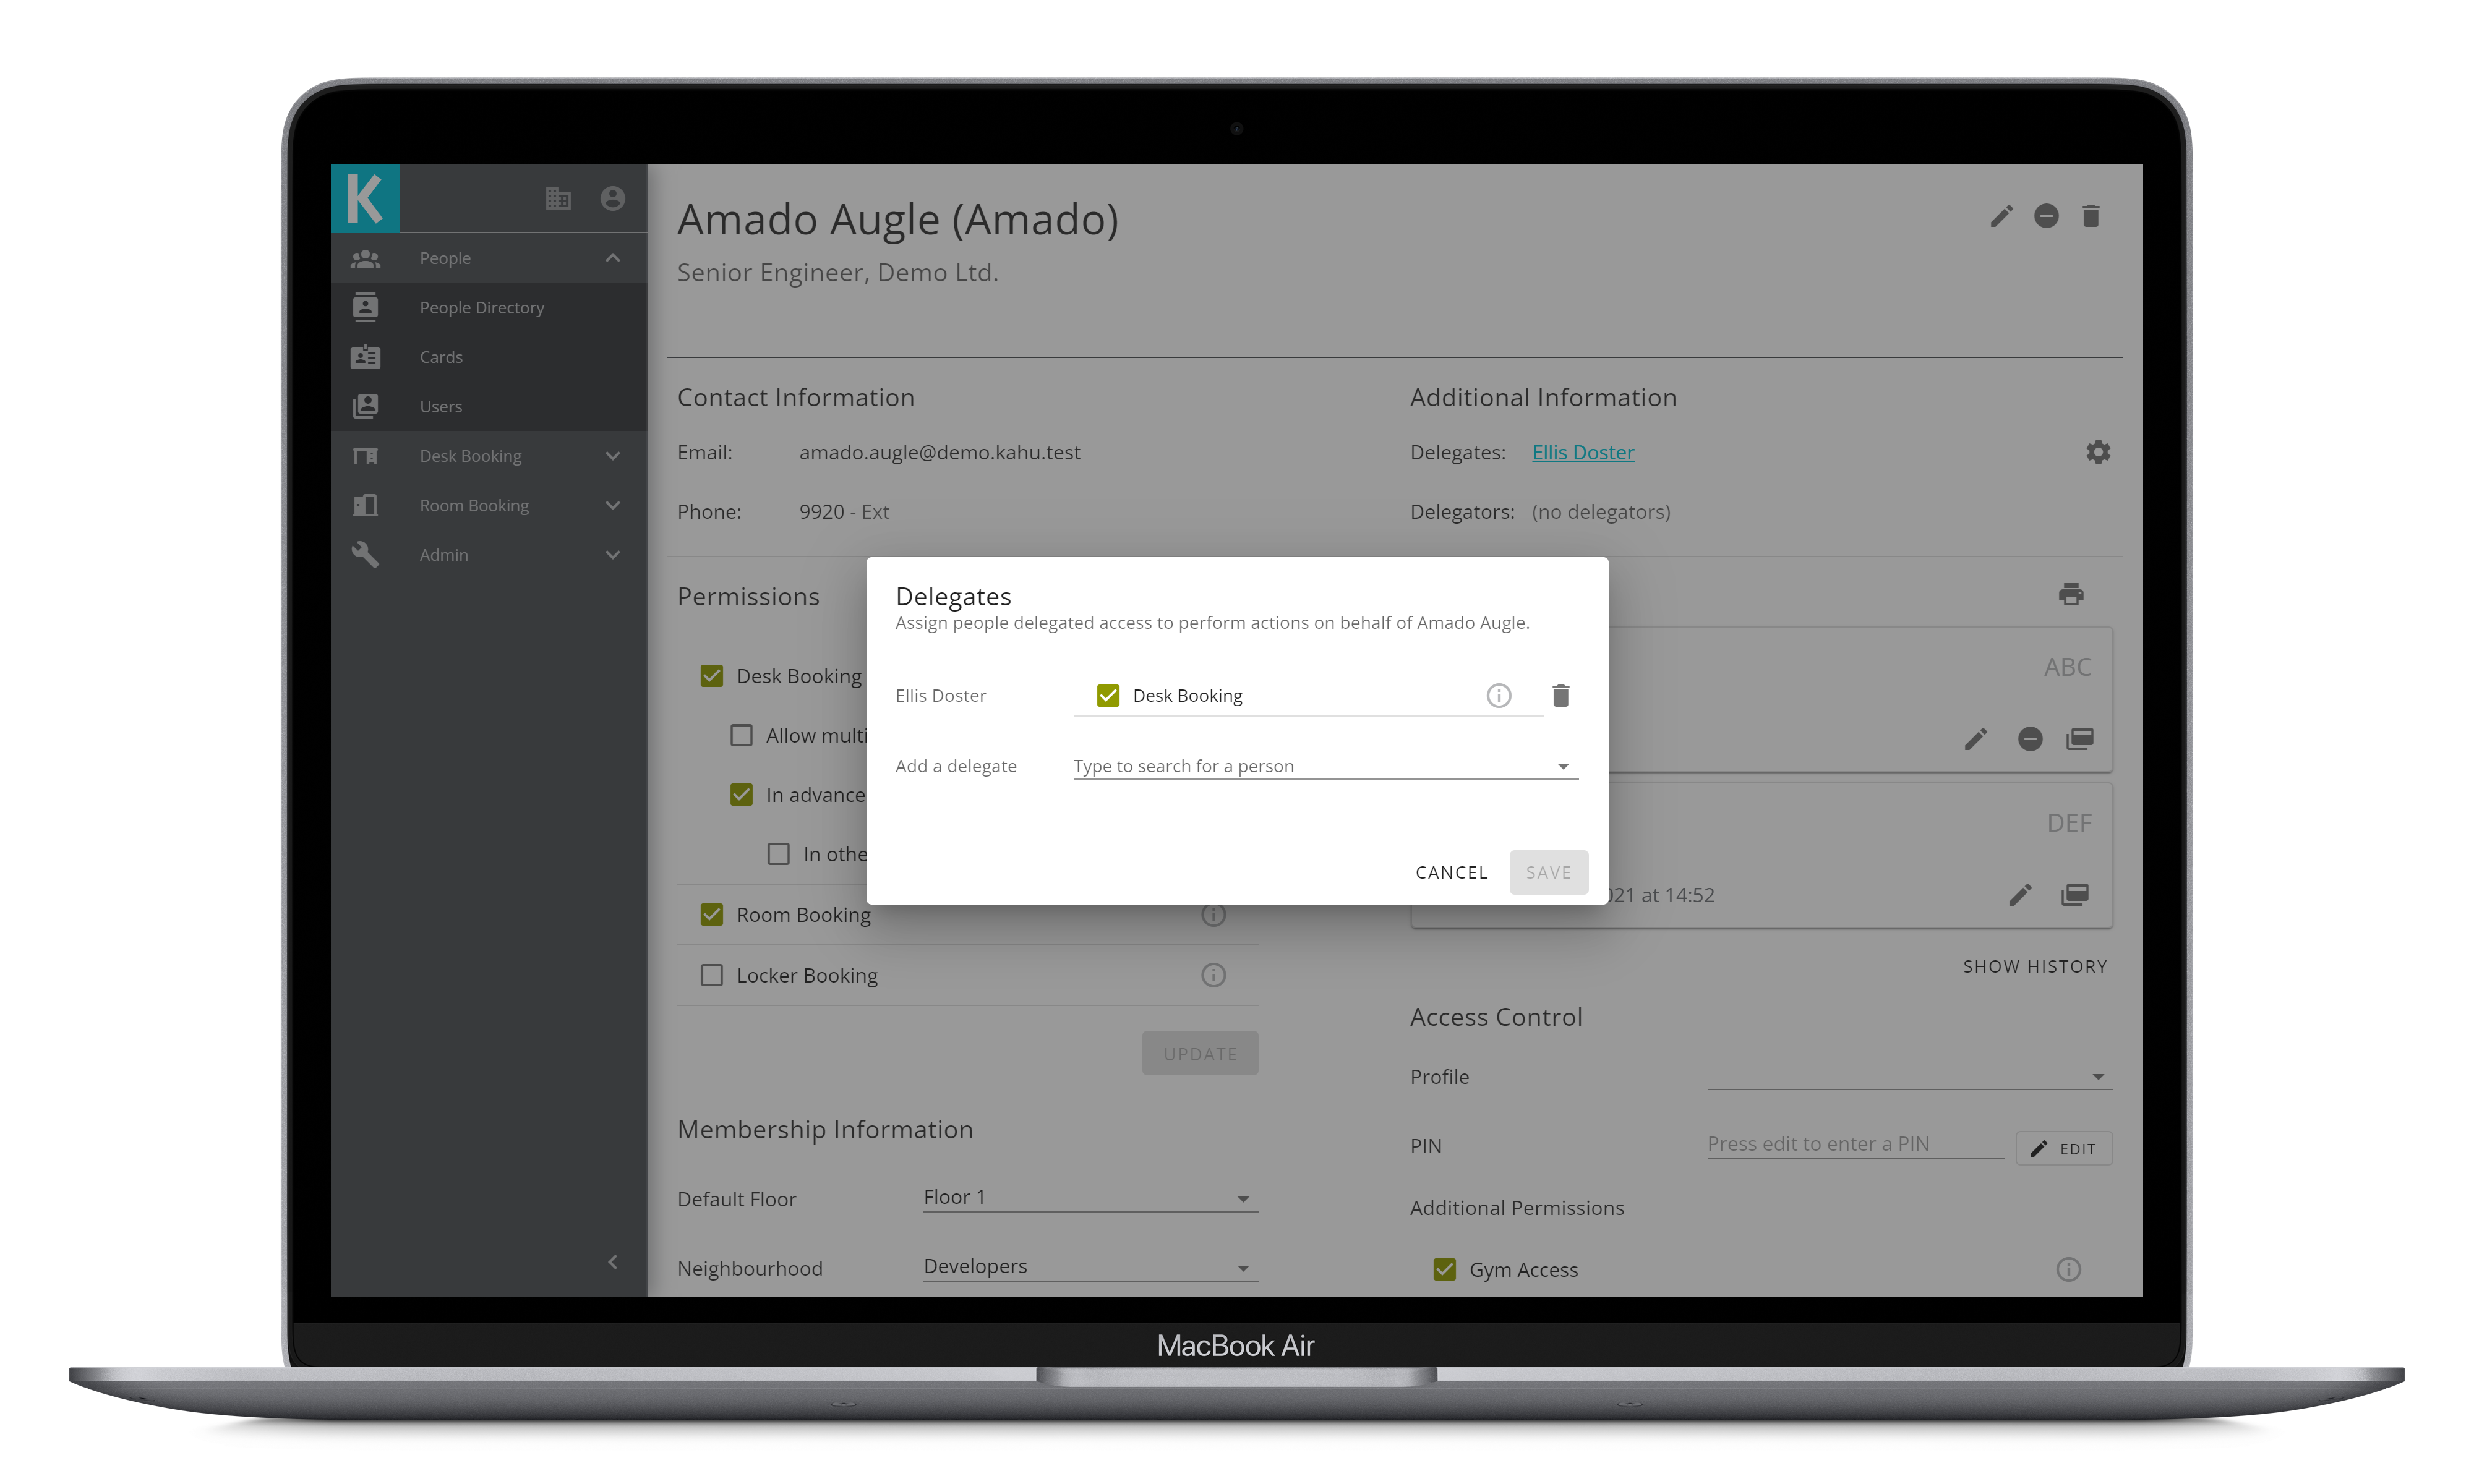
Clicking the button will remove this person as a delegate.
# Delegators
The delegators section under additional information is a list of people that the person has access to book on behalf of. This list is automatically generated depending on other peoples "Delegates" settings.
# Deleting a Person
If you are an administrator you are able to delete people from the system; this is permanent. If you are able to delete people you will see the button on the Person View. Click this, and press confirm.
# Inactive
If you need to remove someone from the system you can mark them as inactive. This will stop them showing up in the Directory and search results, and they will be unable to use any of the Kahu systems. To mark someone as inactive, click the button. You will see the inactive tag appear in the person view.
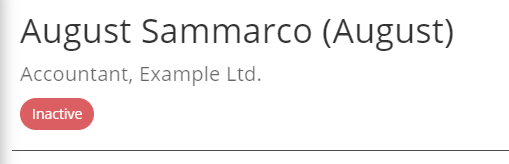
To re-enable a person click the button from the person view.
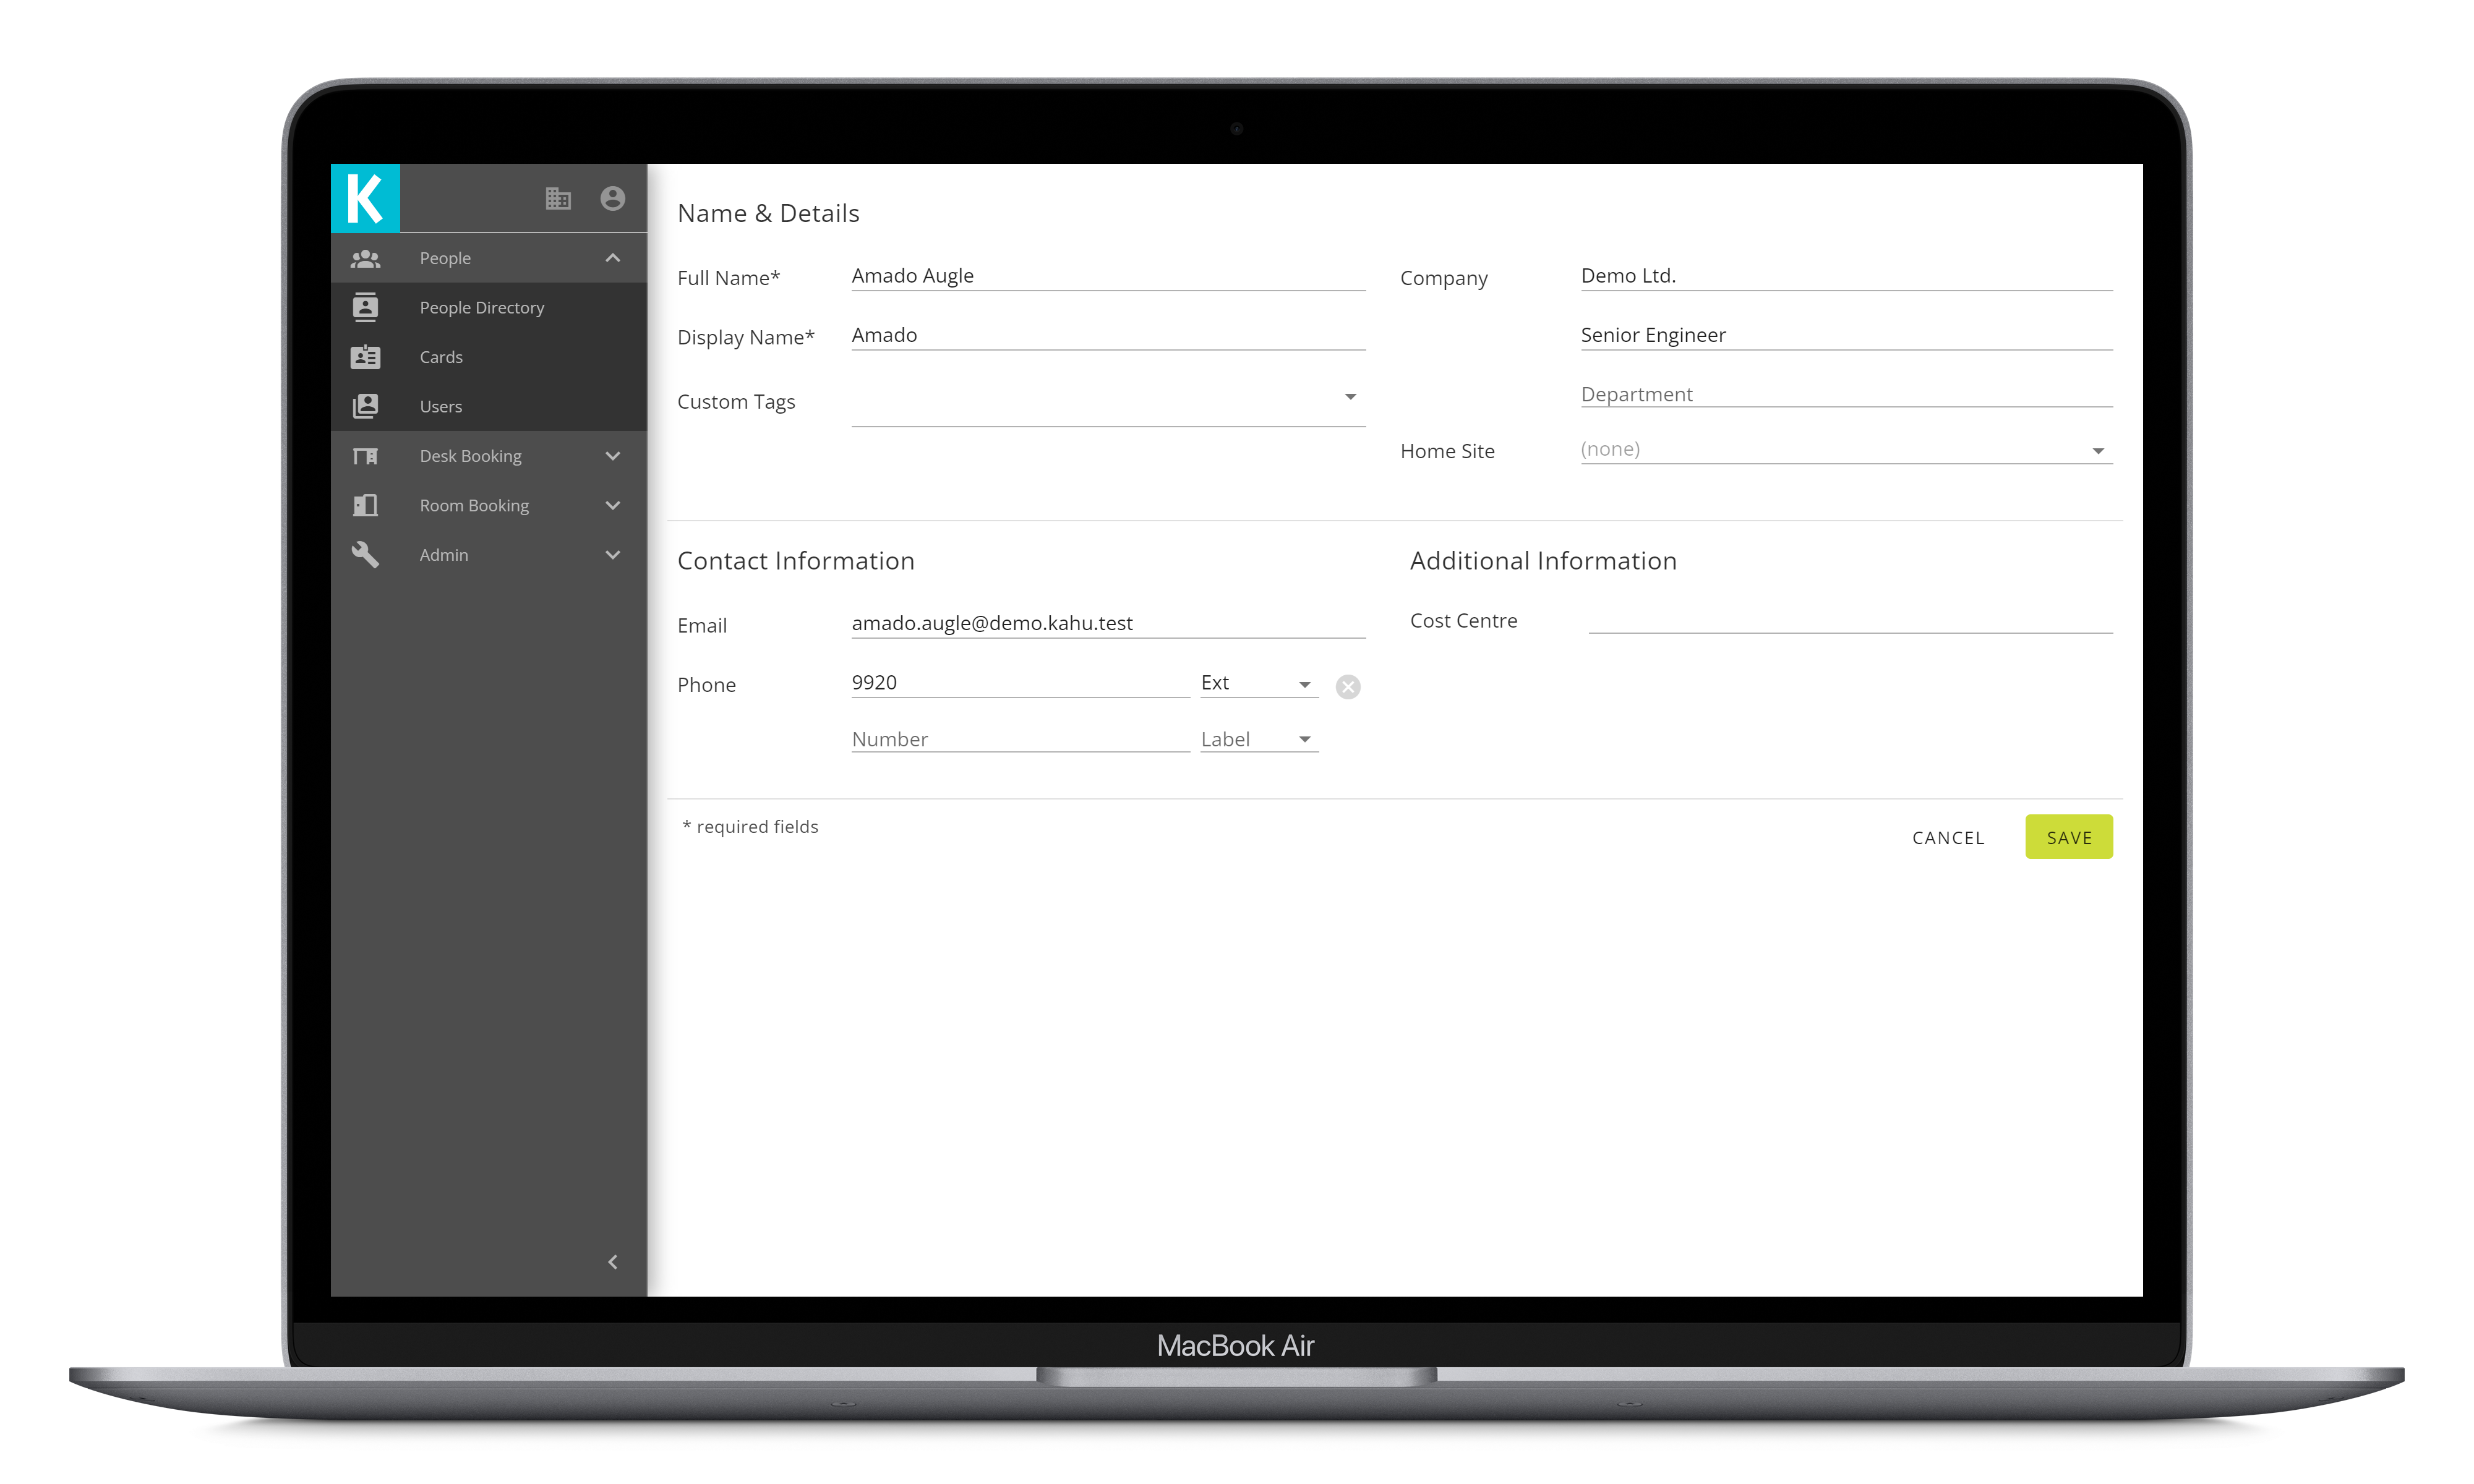
# Person Edit
To edit a persons details click the button from the Person View. You will be presented with a form. Edit details as needed, and click save.
| Field | Description |
|---|---|
| Display Name | A person's display name is what they like to be called. This is used across the Kahu apps, for example when booking a desk there is a greeting which includes the person's display name. By default this will be set to the person's first name. |
| Custom Tags | Anything can be added as a custom tag. For example, you may want to tag people who have access to a specific facility such as a gym. |
| Home Site | The site where the person is typically located. This will be used by Kahu to customise their experience by, for example, using this site as the persons default. |
| Cost Centre | Cost Centre is useful for tracking where a person's expenses should be accounted for. Note: this is currently not used by other systems. |
# New Person
To add a new person into the system, click the button from the Directory.

You will be taken to the New Person form, where you can fill in the person's details, and click create. Once they have been created you will be redirected to their person view page, where you can then set their permissions and assign them a card.
# New Guest
If you wish to create an account for an external user, use the New Person form as before. Then, when you are redirected to their Person View page, you will see a button in the top right, clicking this will email the external user with a link to set their password for Kahu.

# Cards
Cards are used in Kahu for authentication. For example at a Booking Kiosk a user can swipe their card to book their desk. There are a few different ways in which cards are used. Some cards are non-transferable, they may have the person's picture printed on the card along with their name. Some cards are transferable, and may have a more generic name associated with them instead; for example "Contractor 1". Other transferable cards are temporary cards, which may be assigned to someone just for the day if they have forgotten their main card. To assign cards to people, see the Access Cards section.
To manage cards in the system, use the Cards list; to see this list select the Cards option in the sidebar. By default you will be presented with a list of transferable cards.
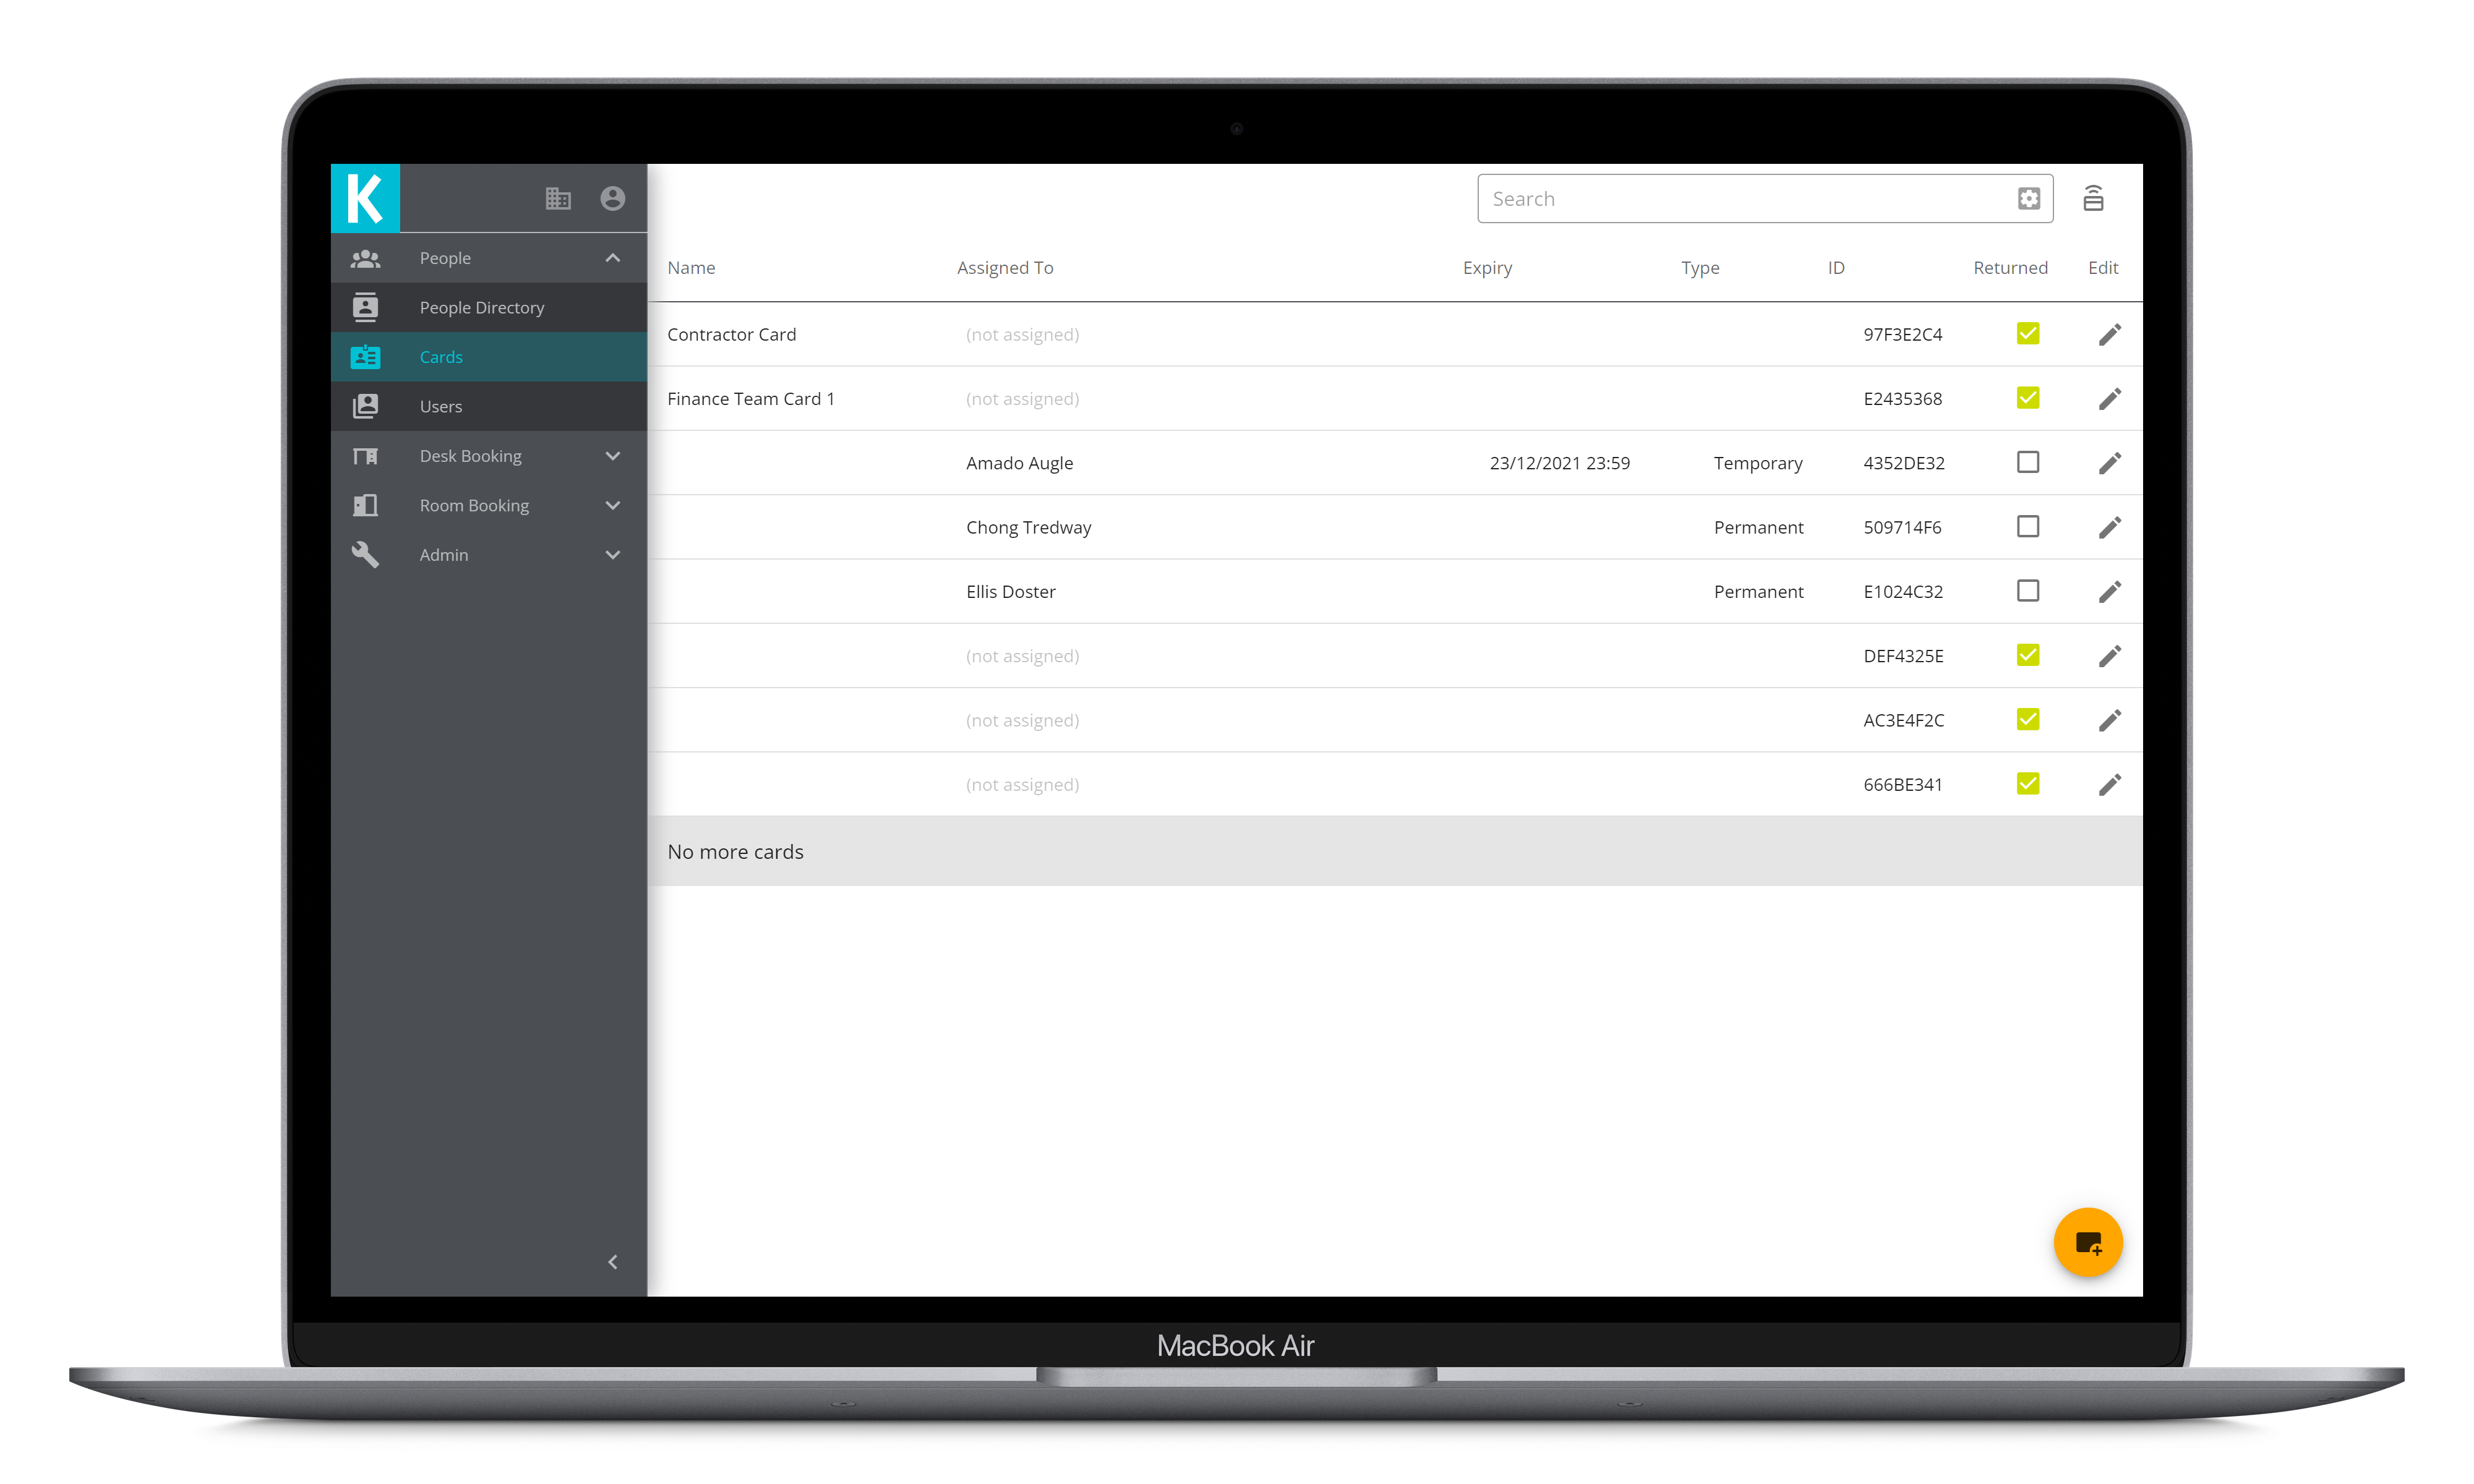
The list includes the cards name, who it is assigned to, the expiry date (if there is one), the type of card (permanent or temporary), the ID, and whether the card has been returned. If the card expires today, there will be an orange warning . If the card has already expired there will be a red warning .
To view more detail about a card, or to make changes, click anywhere on the row.
# Search
To search for cards use the search box in the top corner. Cards can be searched for by card name and by assignee's name. By default this will search for cards which are in use at the active site. To change the search settings click the button. You will be presented with a small menu with the available search options.
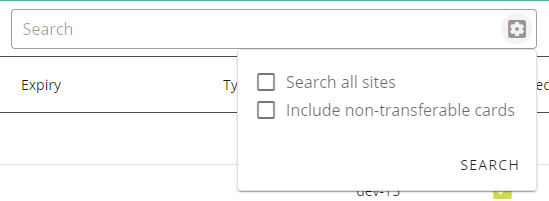
For example, the following screenshot shows a search for all cards whose name includes Contractor. This is useful for checking who has those cards assigned at a glance.

# Card View
The card view shows details about a card, including its name, who it is assigned to, and any tags. It also includes an option to see the history. Use the cards list to find cards.
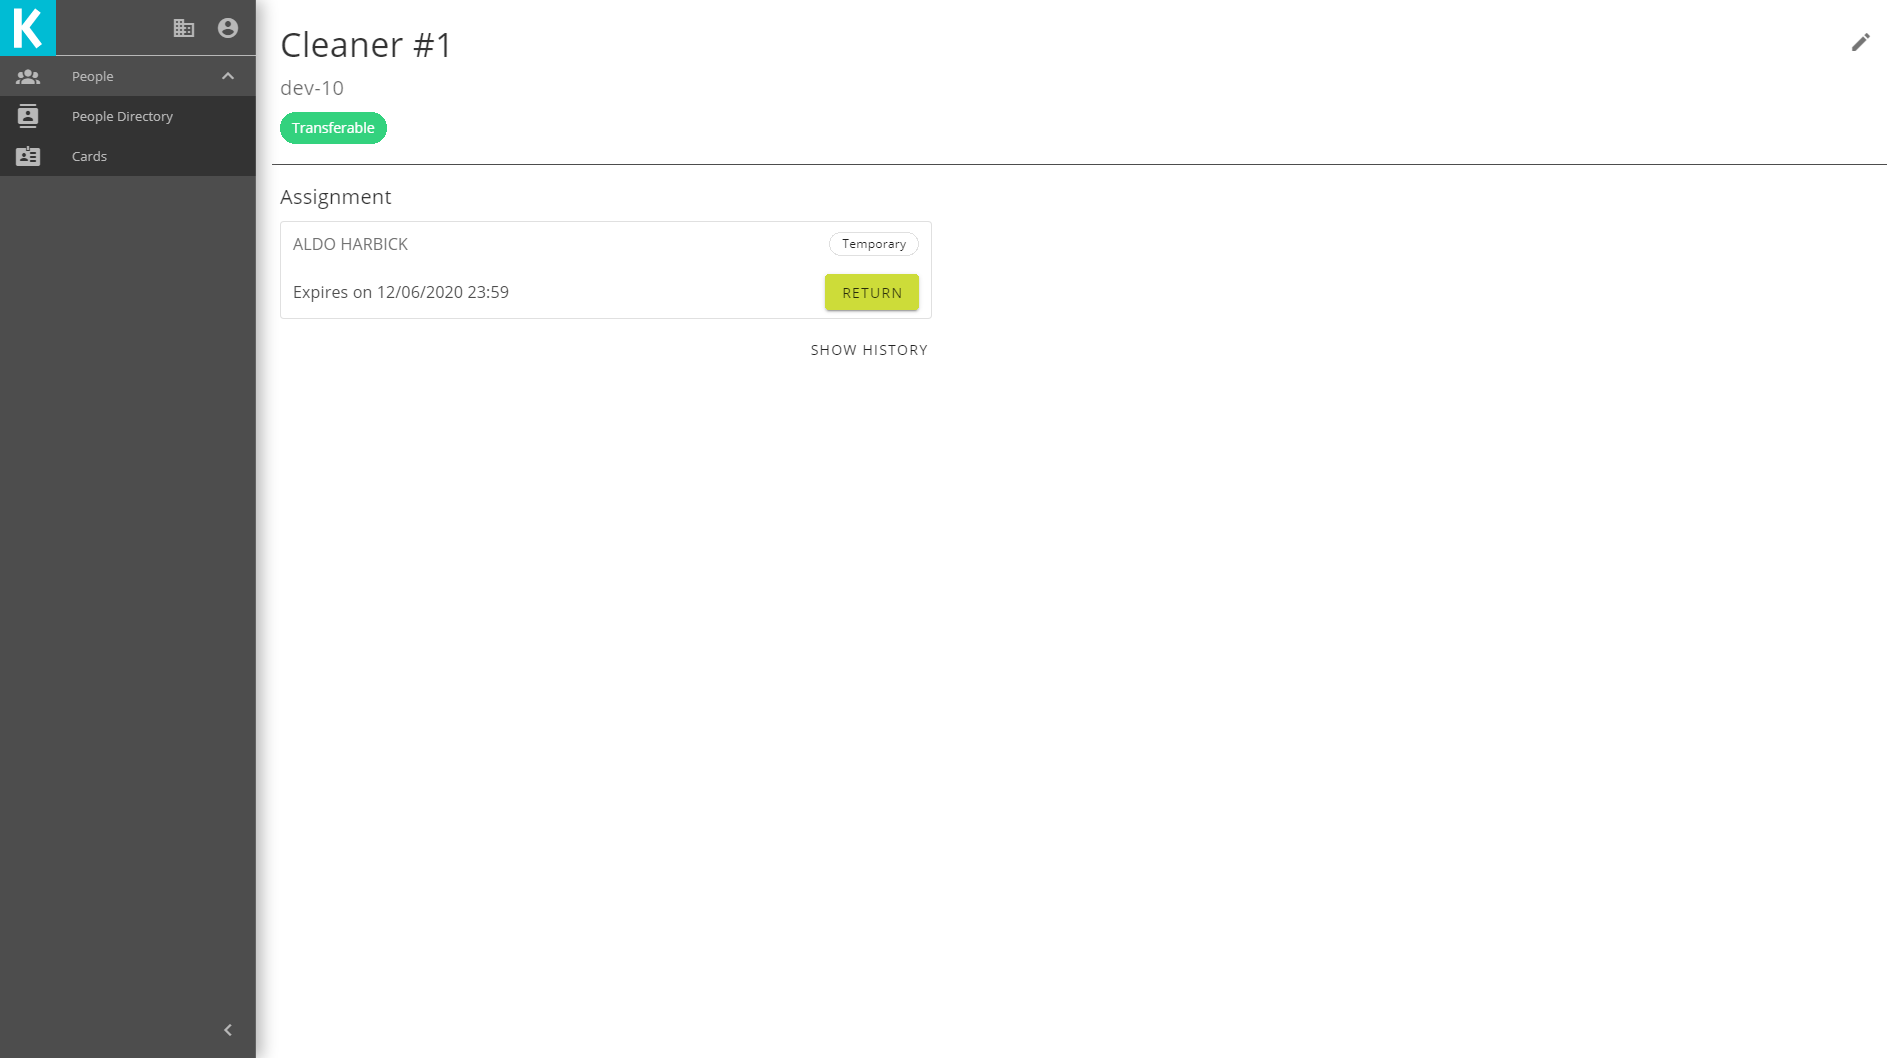
If the card is assigned to someone and they have just returned the card, you can remove their assignment by clicking return.
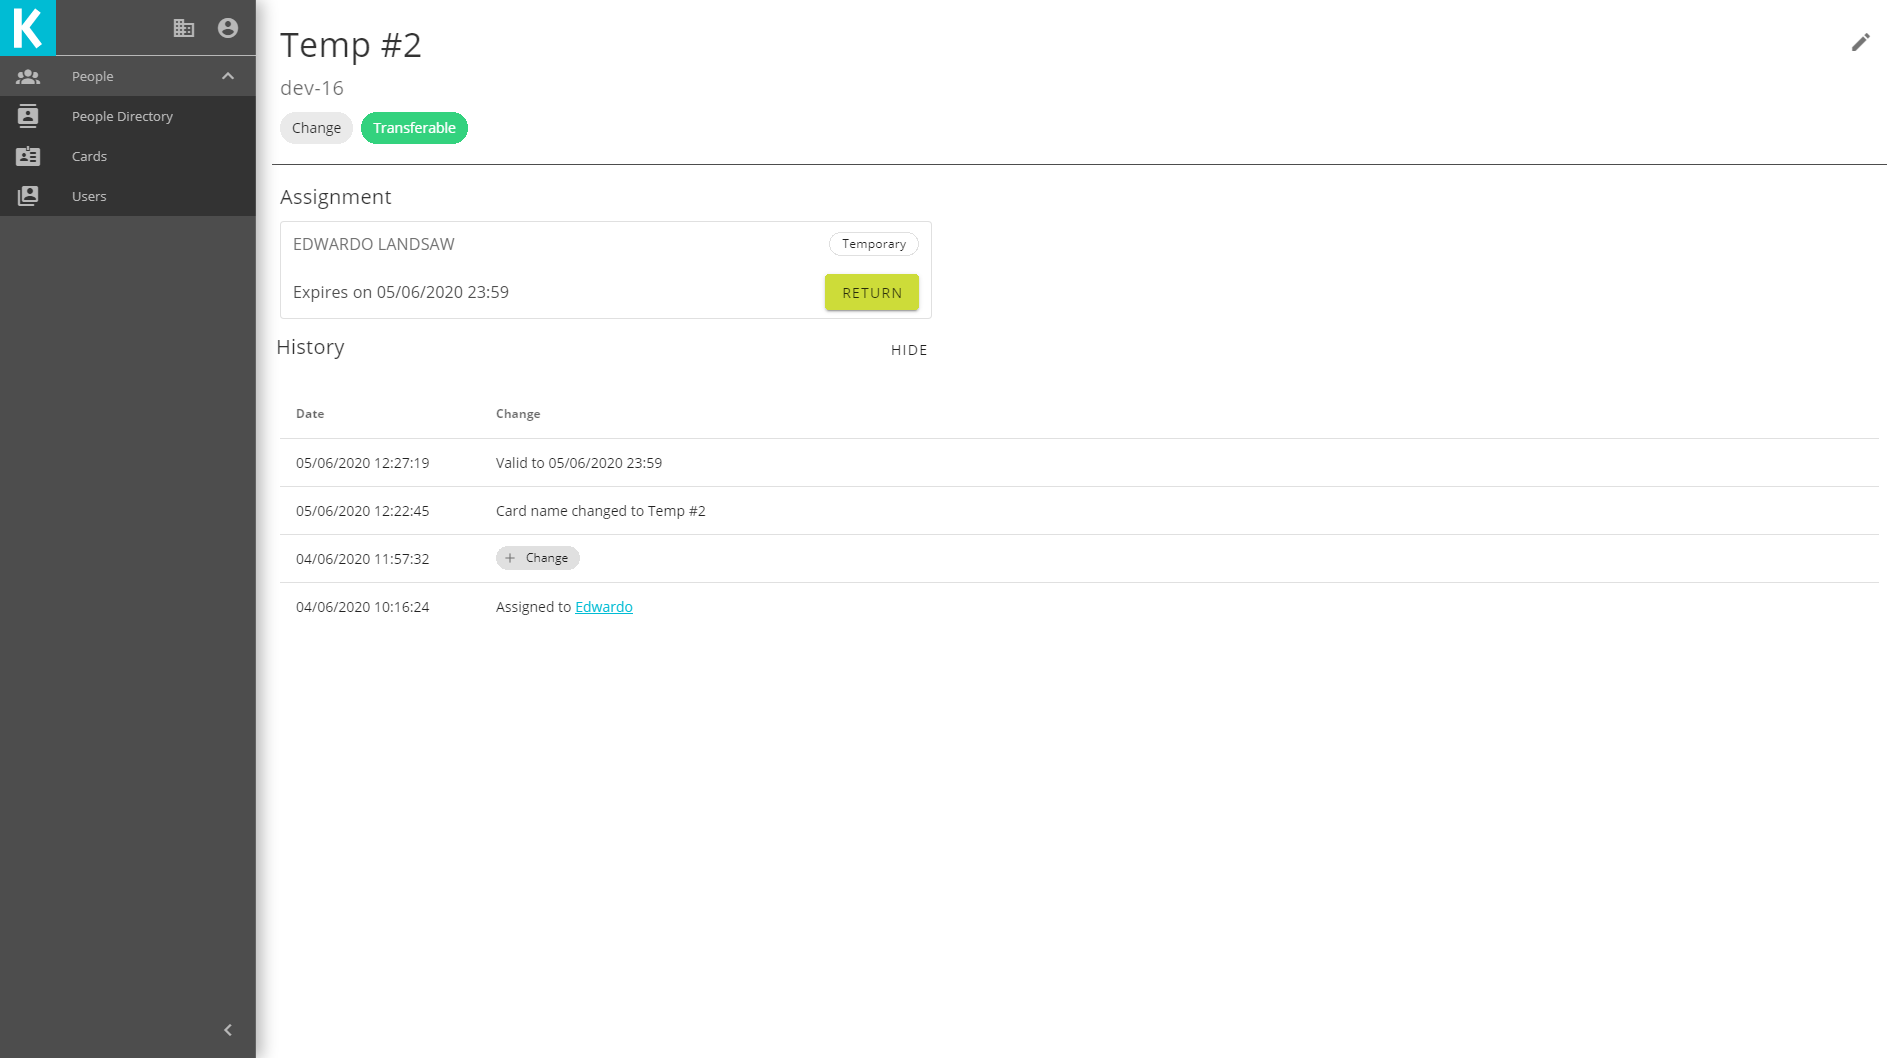
# Card History
The card view includes a button to show history. When this is clicked it shows a list of the most recent changes, and an option to load more. It shows all changes to a card, including name changes and assignment changes.
# Card Edit
To edit a card, from the card view click the button.
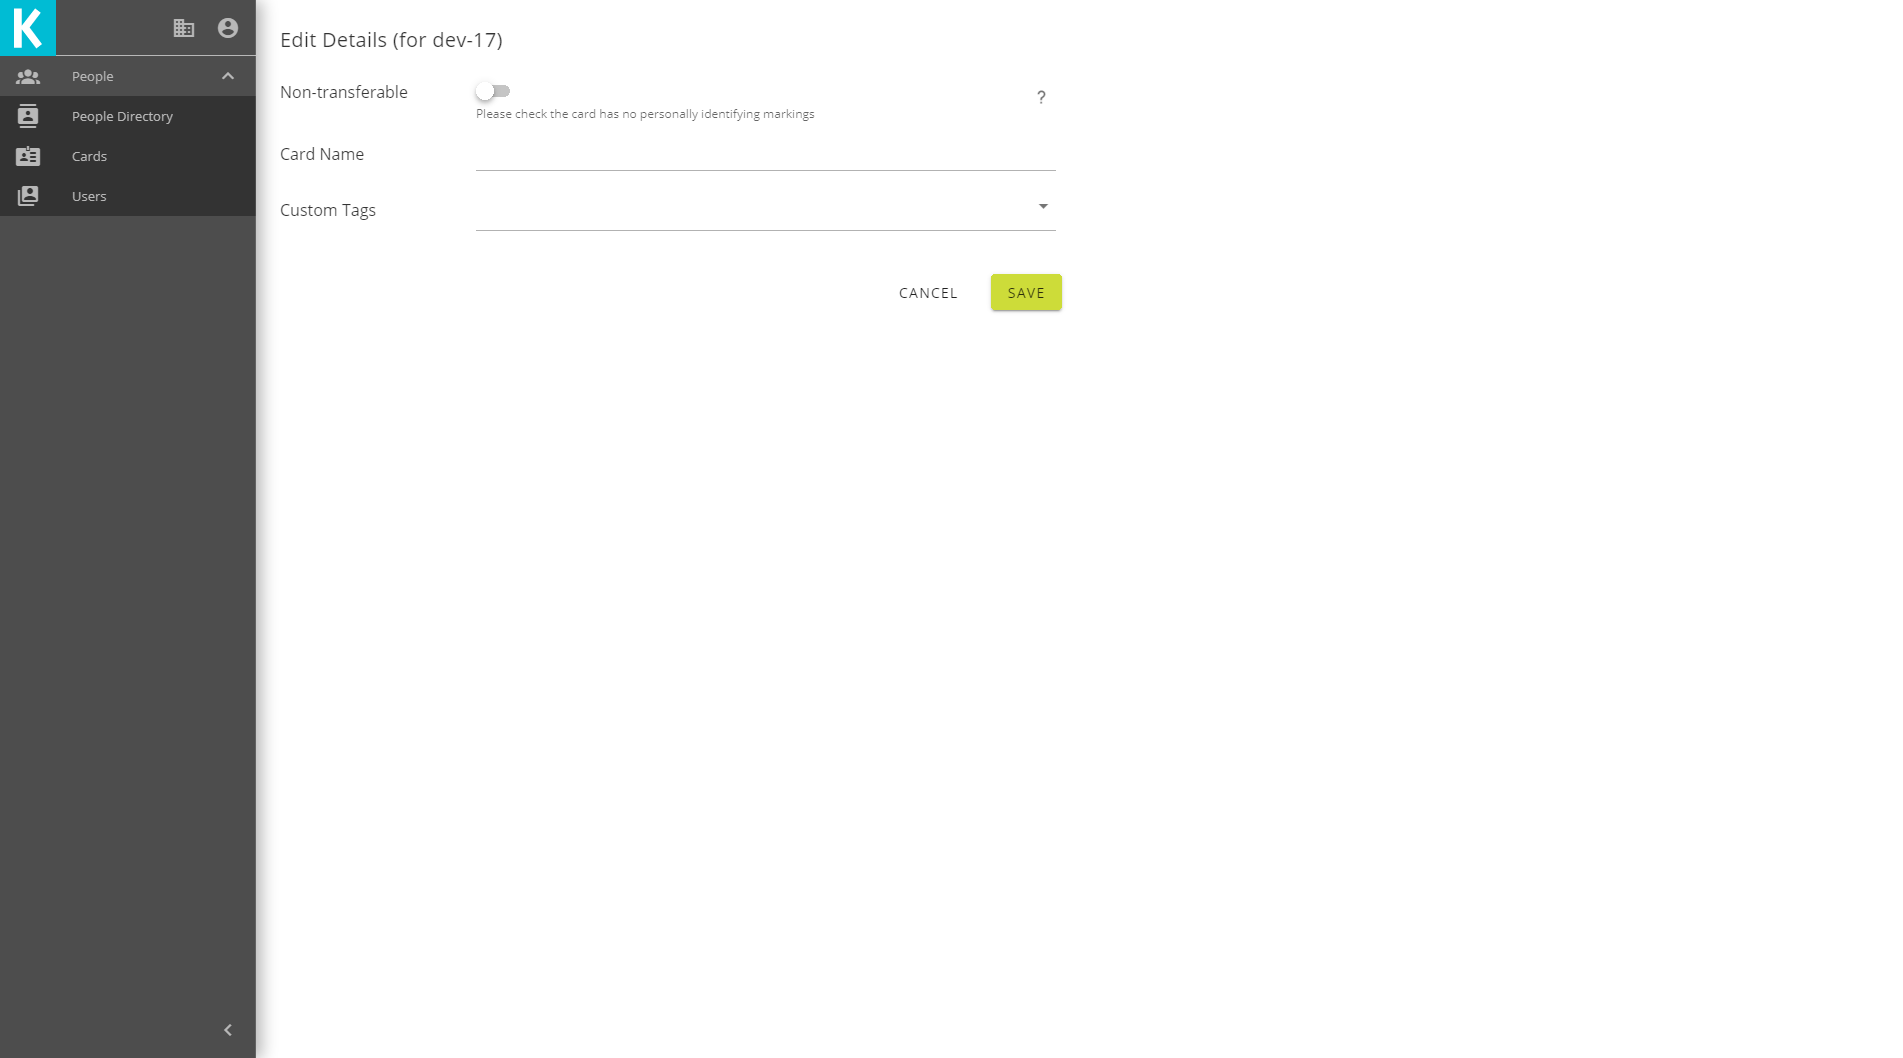
This will show a form to edit the card's details, including the card name and tags. It is also possible to change whether a card is non-transferable. Once you have made any changes, click save.
# New Card
To create a new card, click the button from the card list. You will be taken to the new card form (which is similar to the card edit form), where you can scan the card, fill in the card's details, and click create.
# Users
Users are people who have access to log into the Kahu Workplace App. The actions they can perform in the app are based on their user permissions, including editing the permissions of other Kahu users if allowed. Not all people that can use Kahu systems are users and have an account, but most resident staff are likely to; for example the Kahu Booking Kiosks can be used with an access card without needing an account.
If you are a Workplace App admin you can manage Workplace App users for your organisation. To see the users list, select the Users option in the sidebar. You can search for users with the search box, by either name or email address.
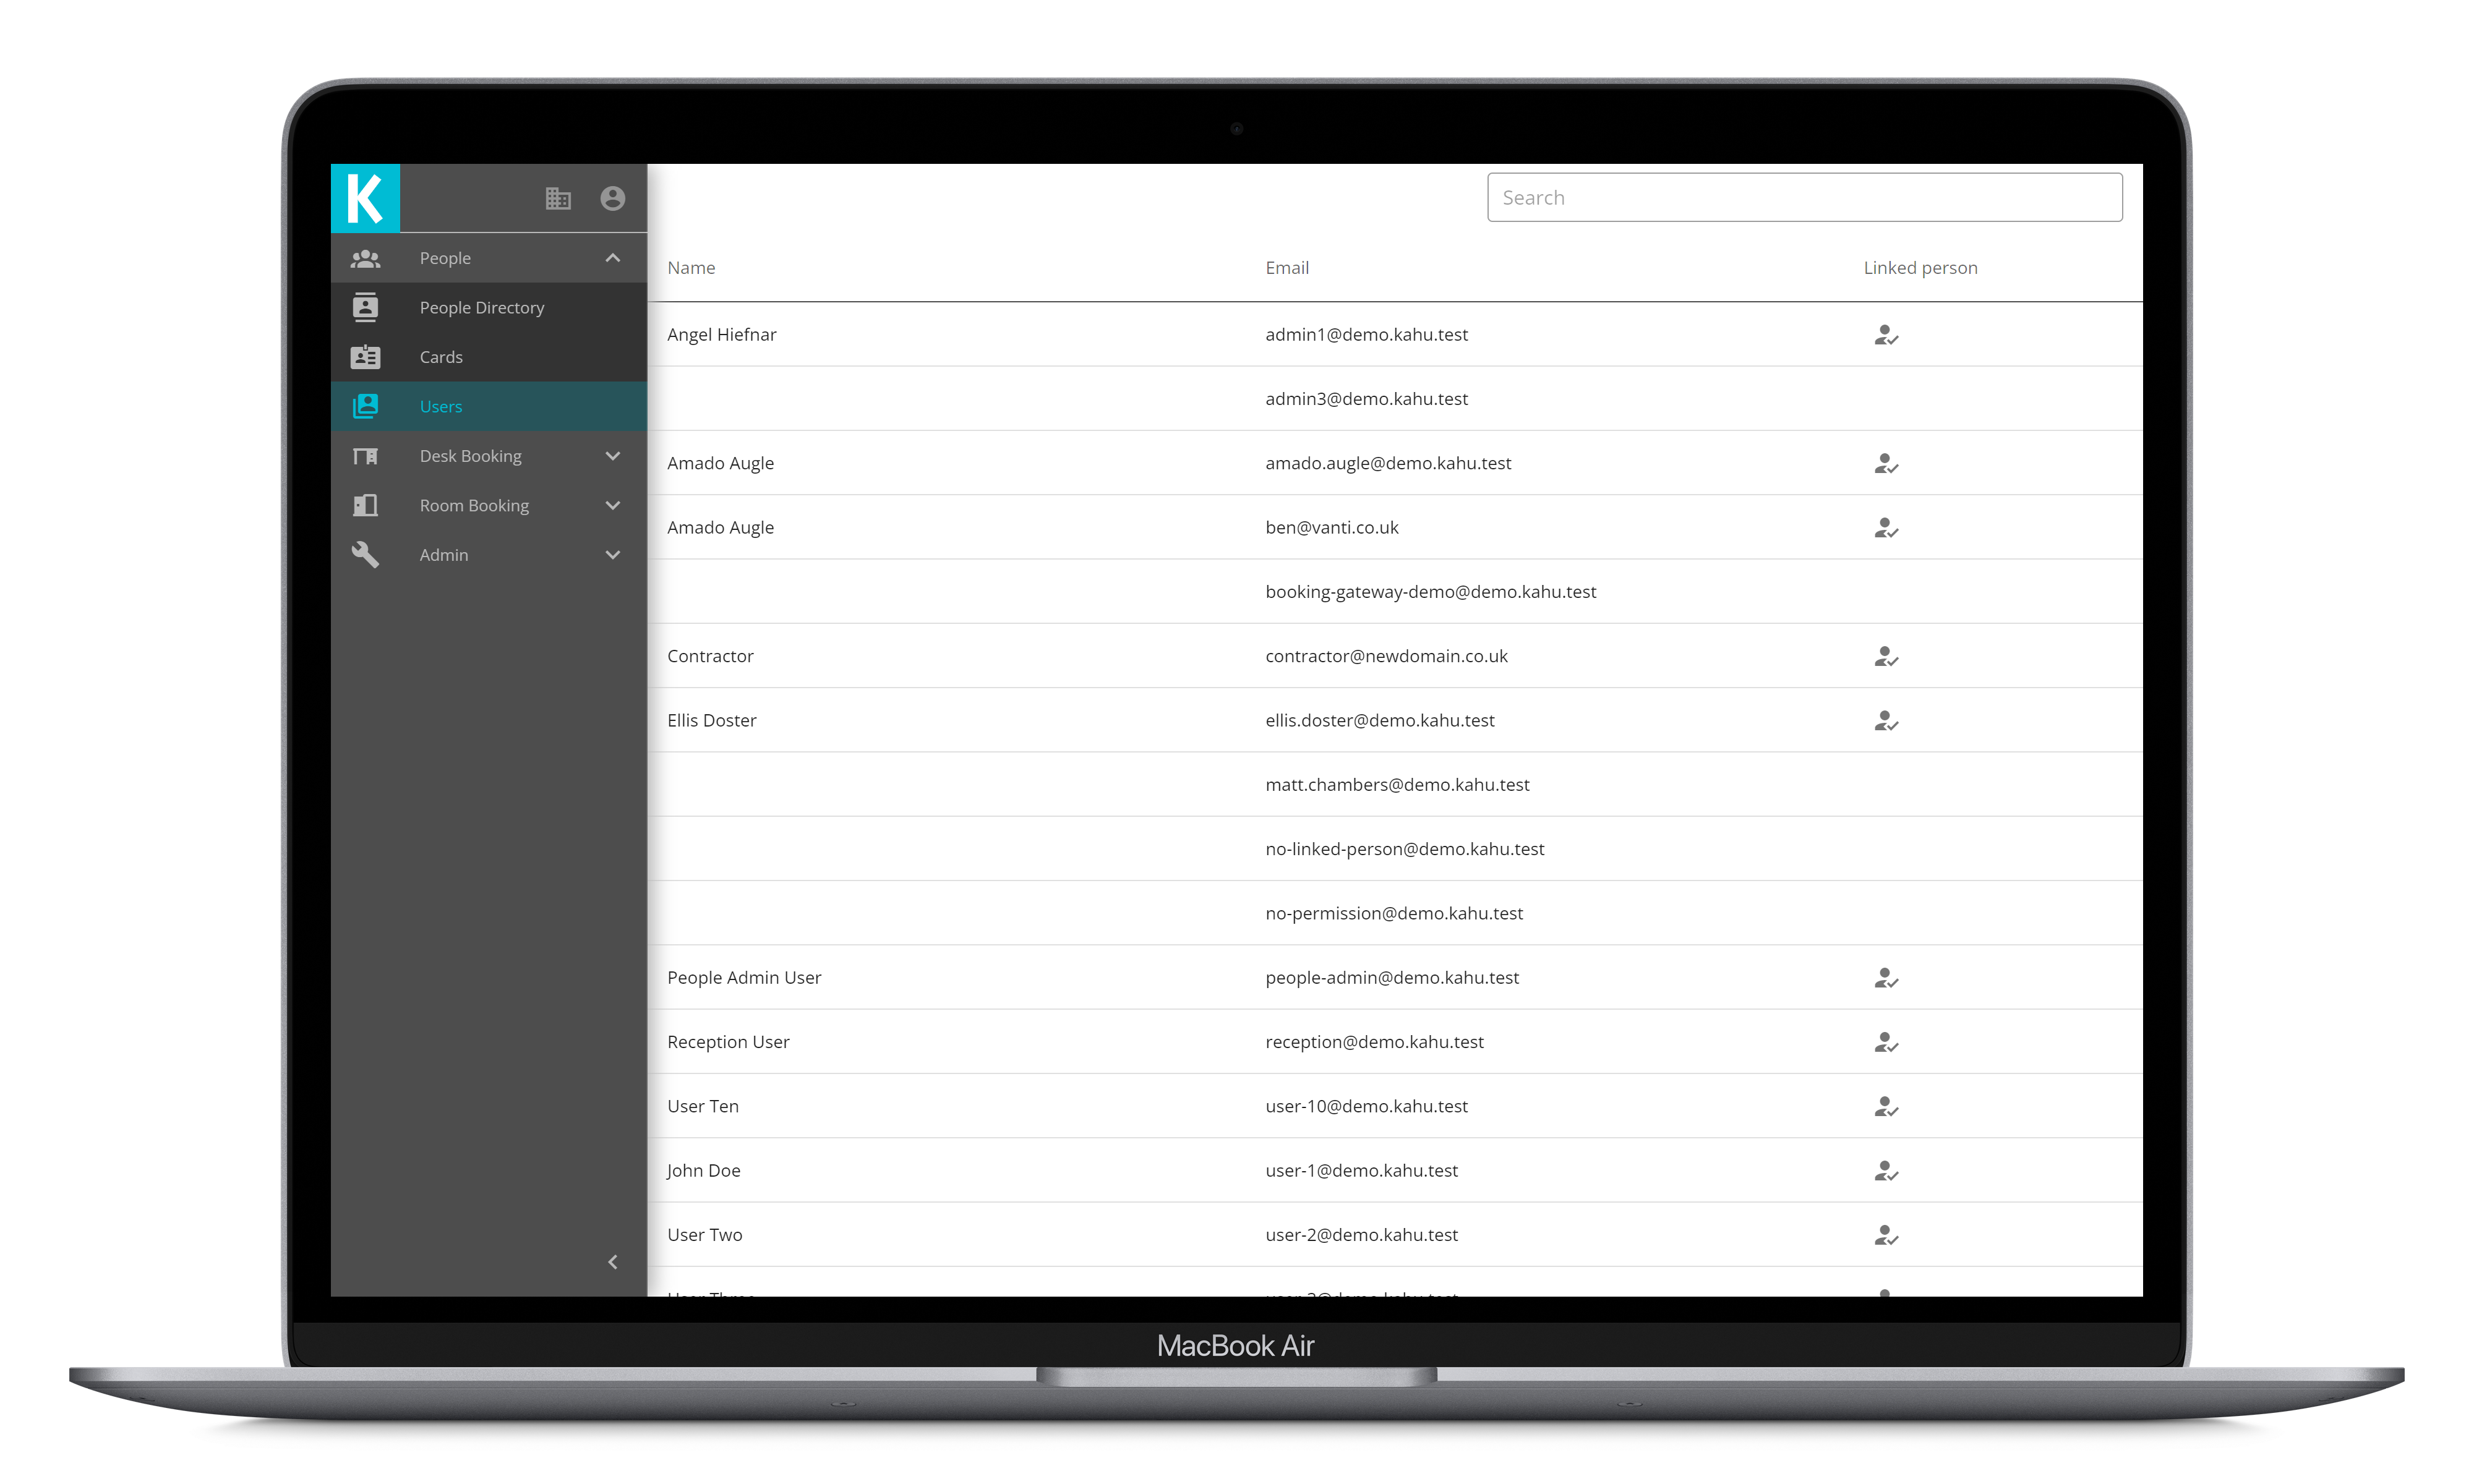
The user list shows the user's name, their email, and whether they are linked to a person in the Directory. To view more detail about a user, or change their security roles, click anywhere on the row.
# User View
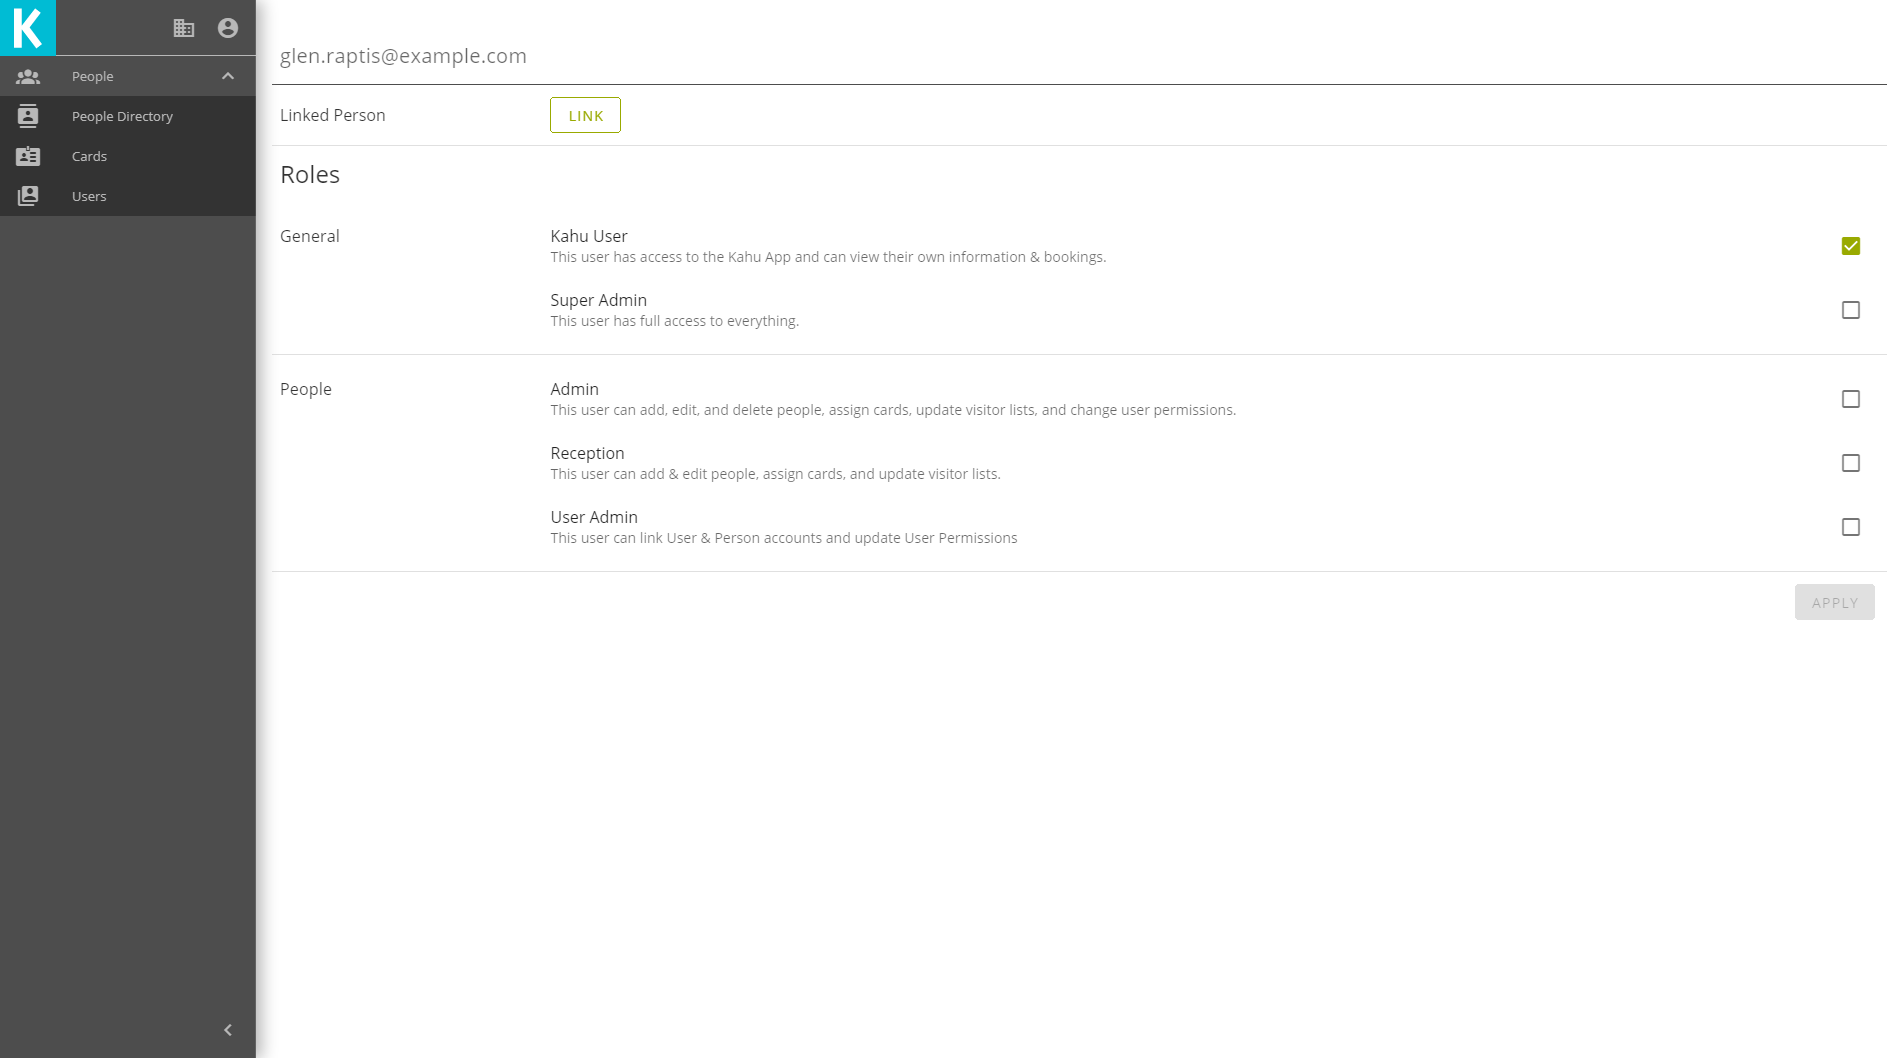
The user view shows details about a user, including their email and security roles. Use the users list to find users.
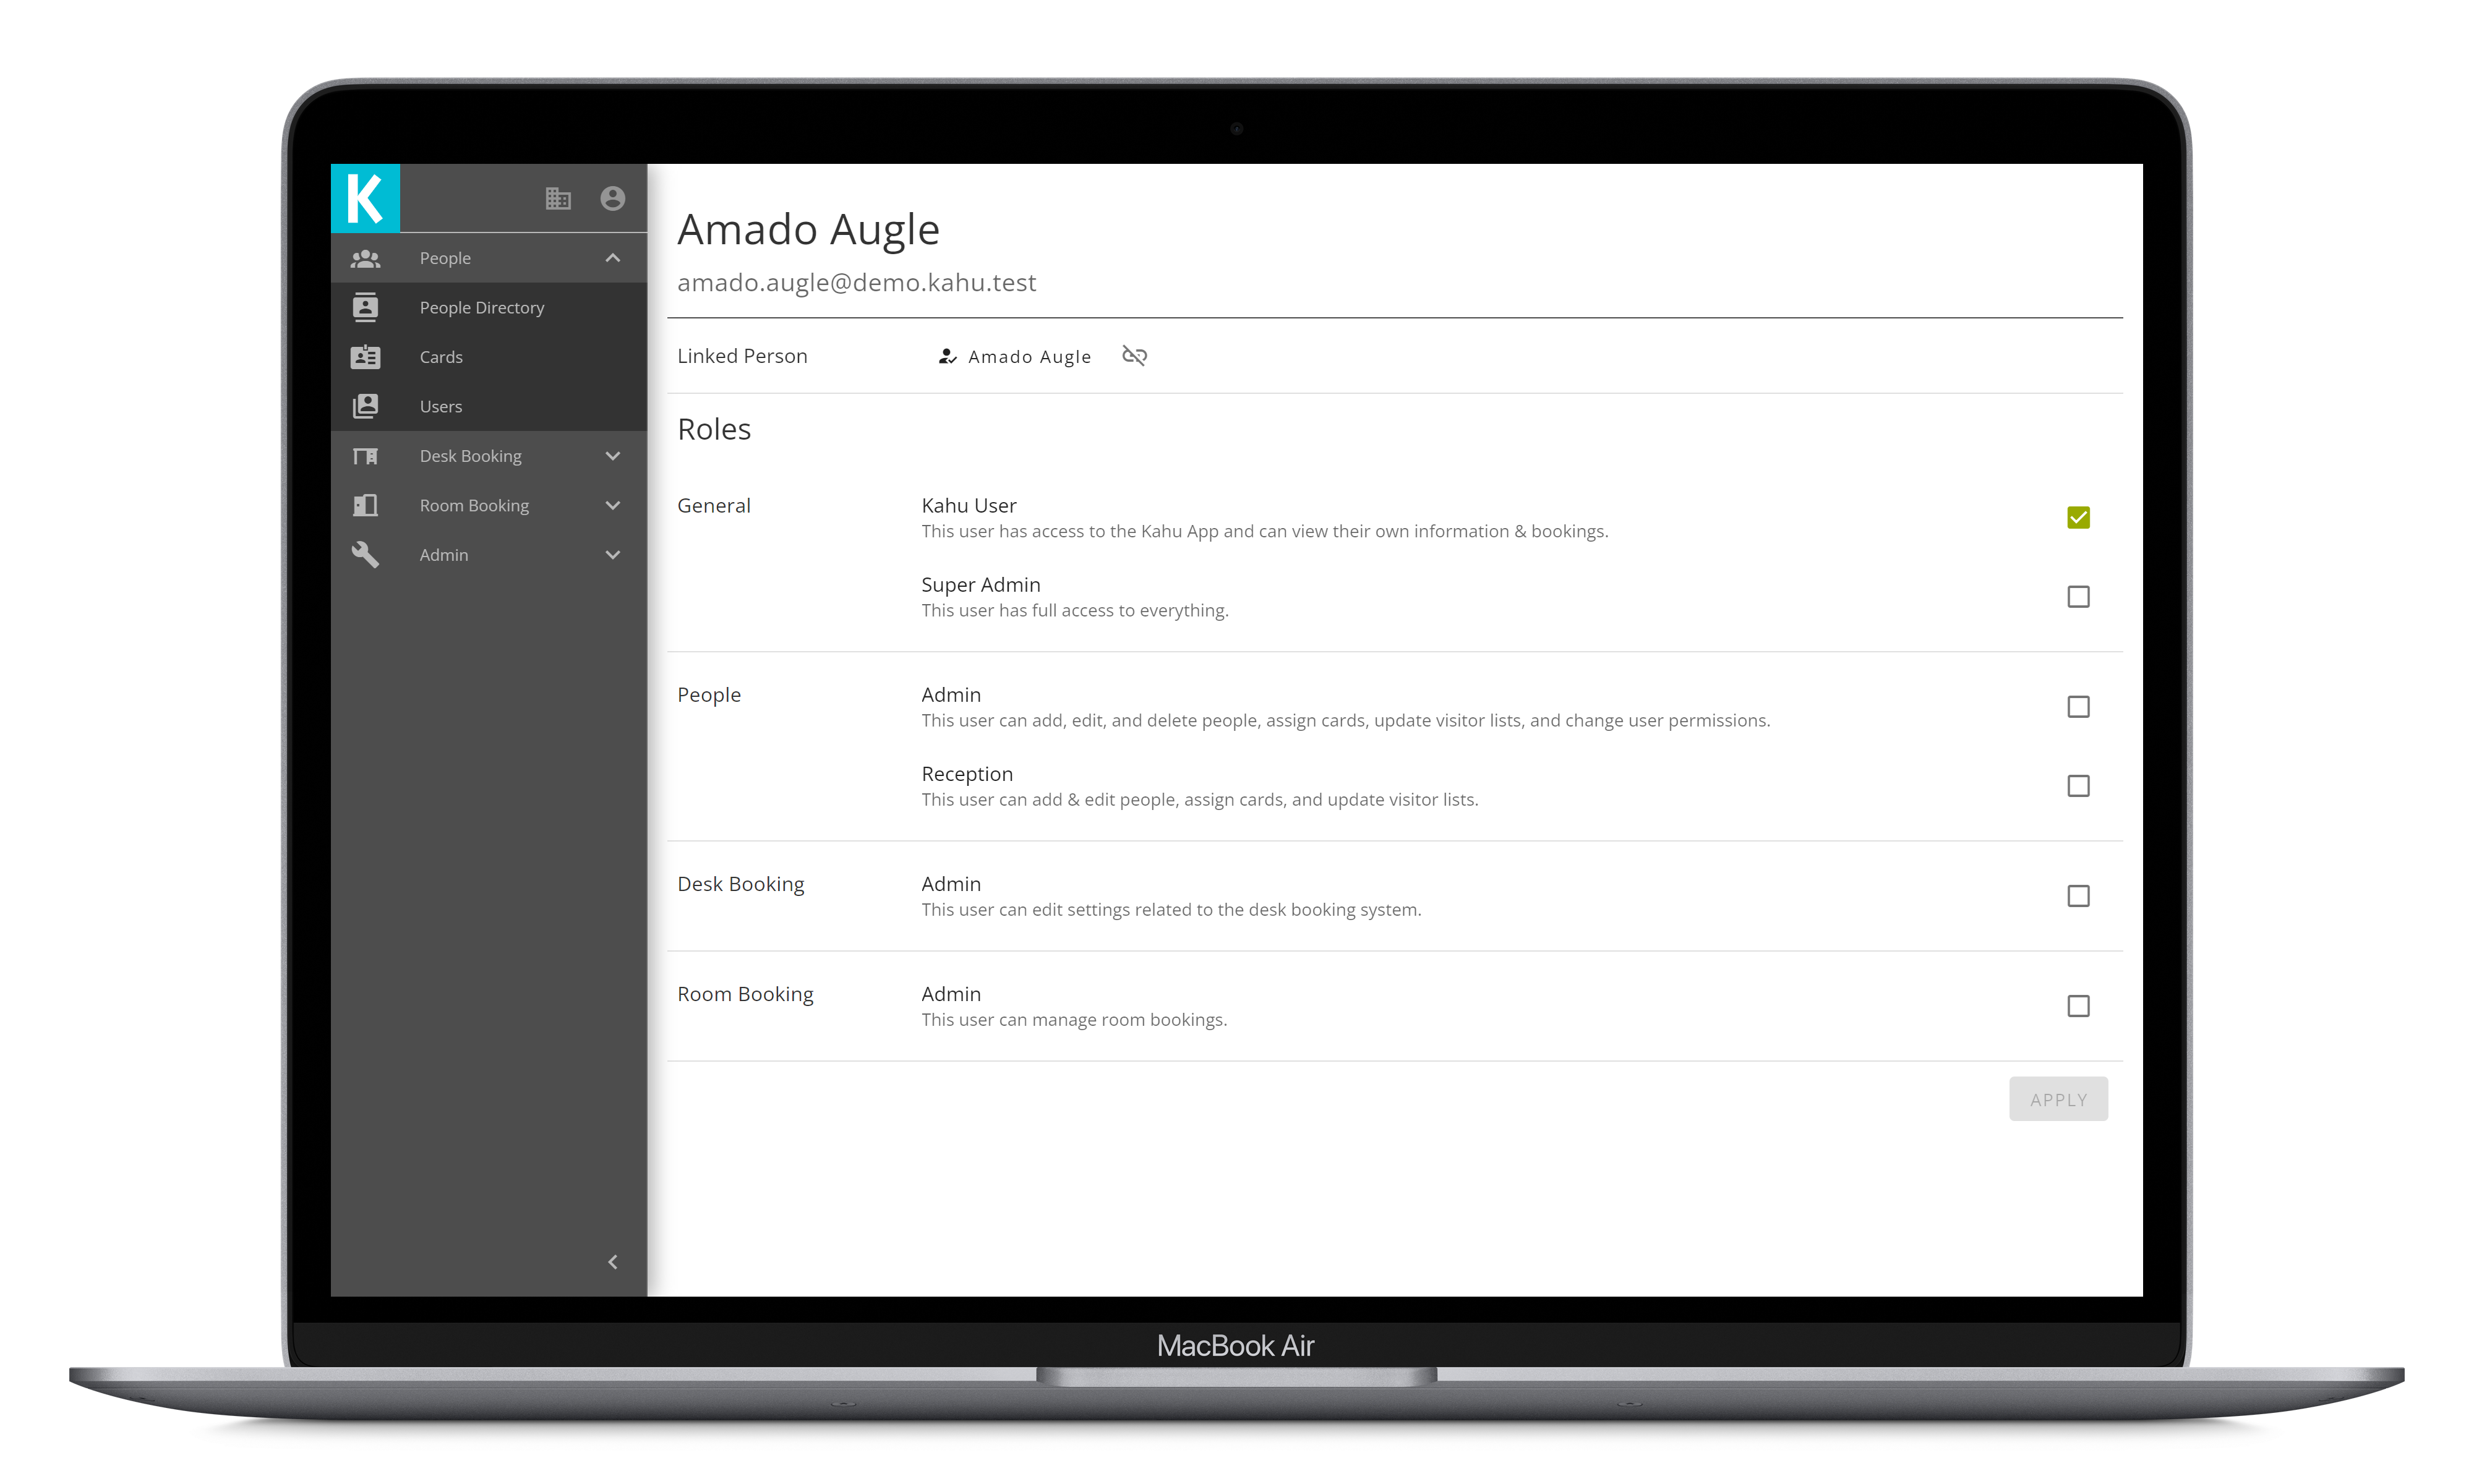
# User Roles
To edit a user's security roles click the role checkboxes as appropriate, then click apply. When changes have been made and not yet applied, the apply button will be highlighted.
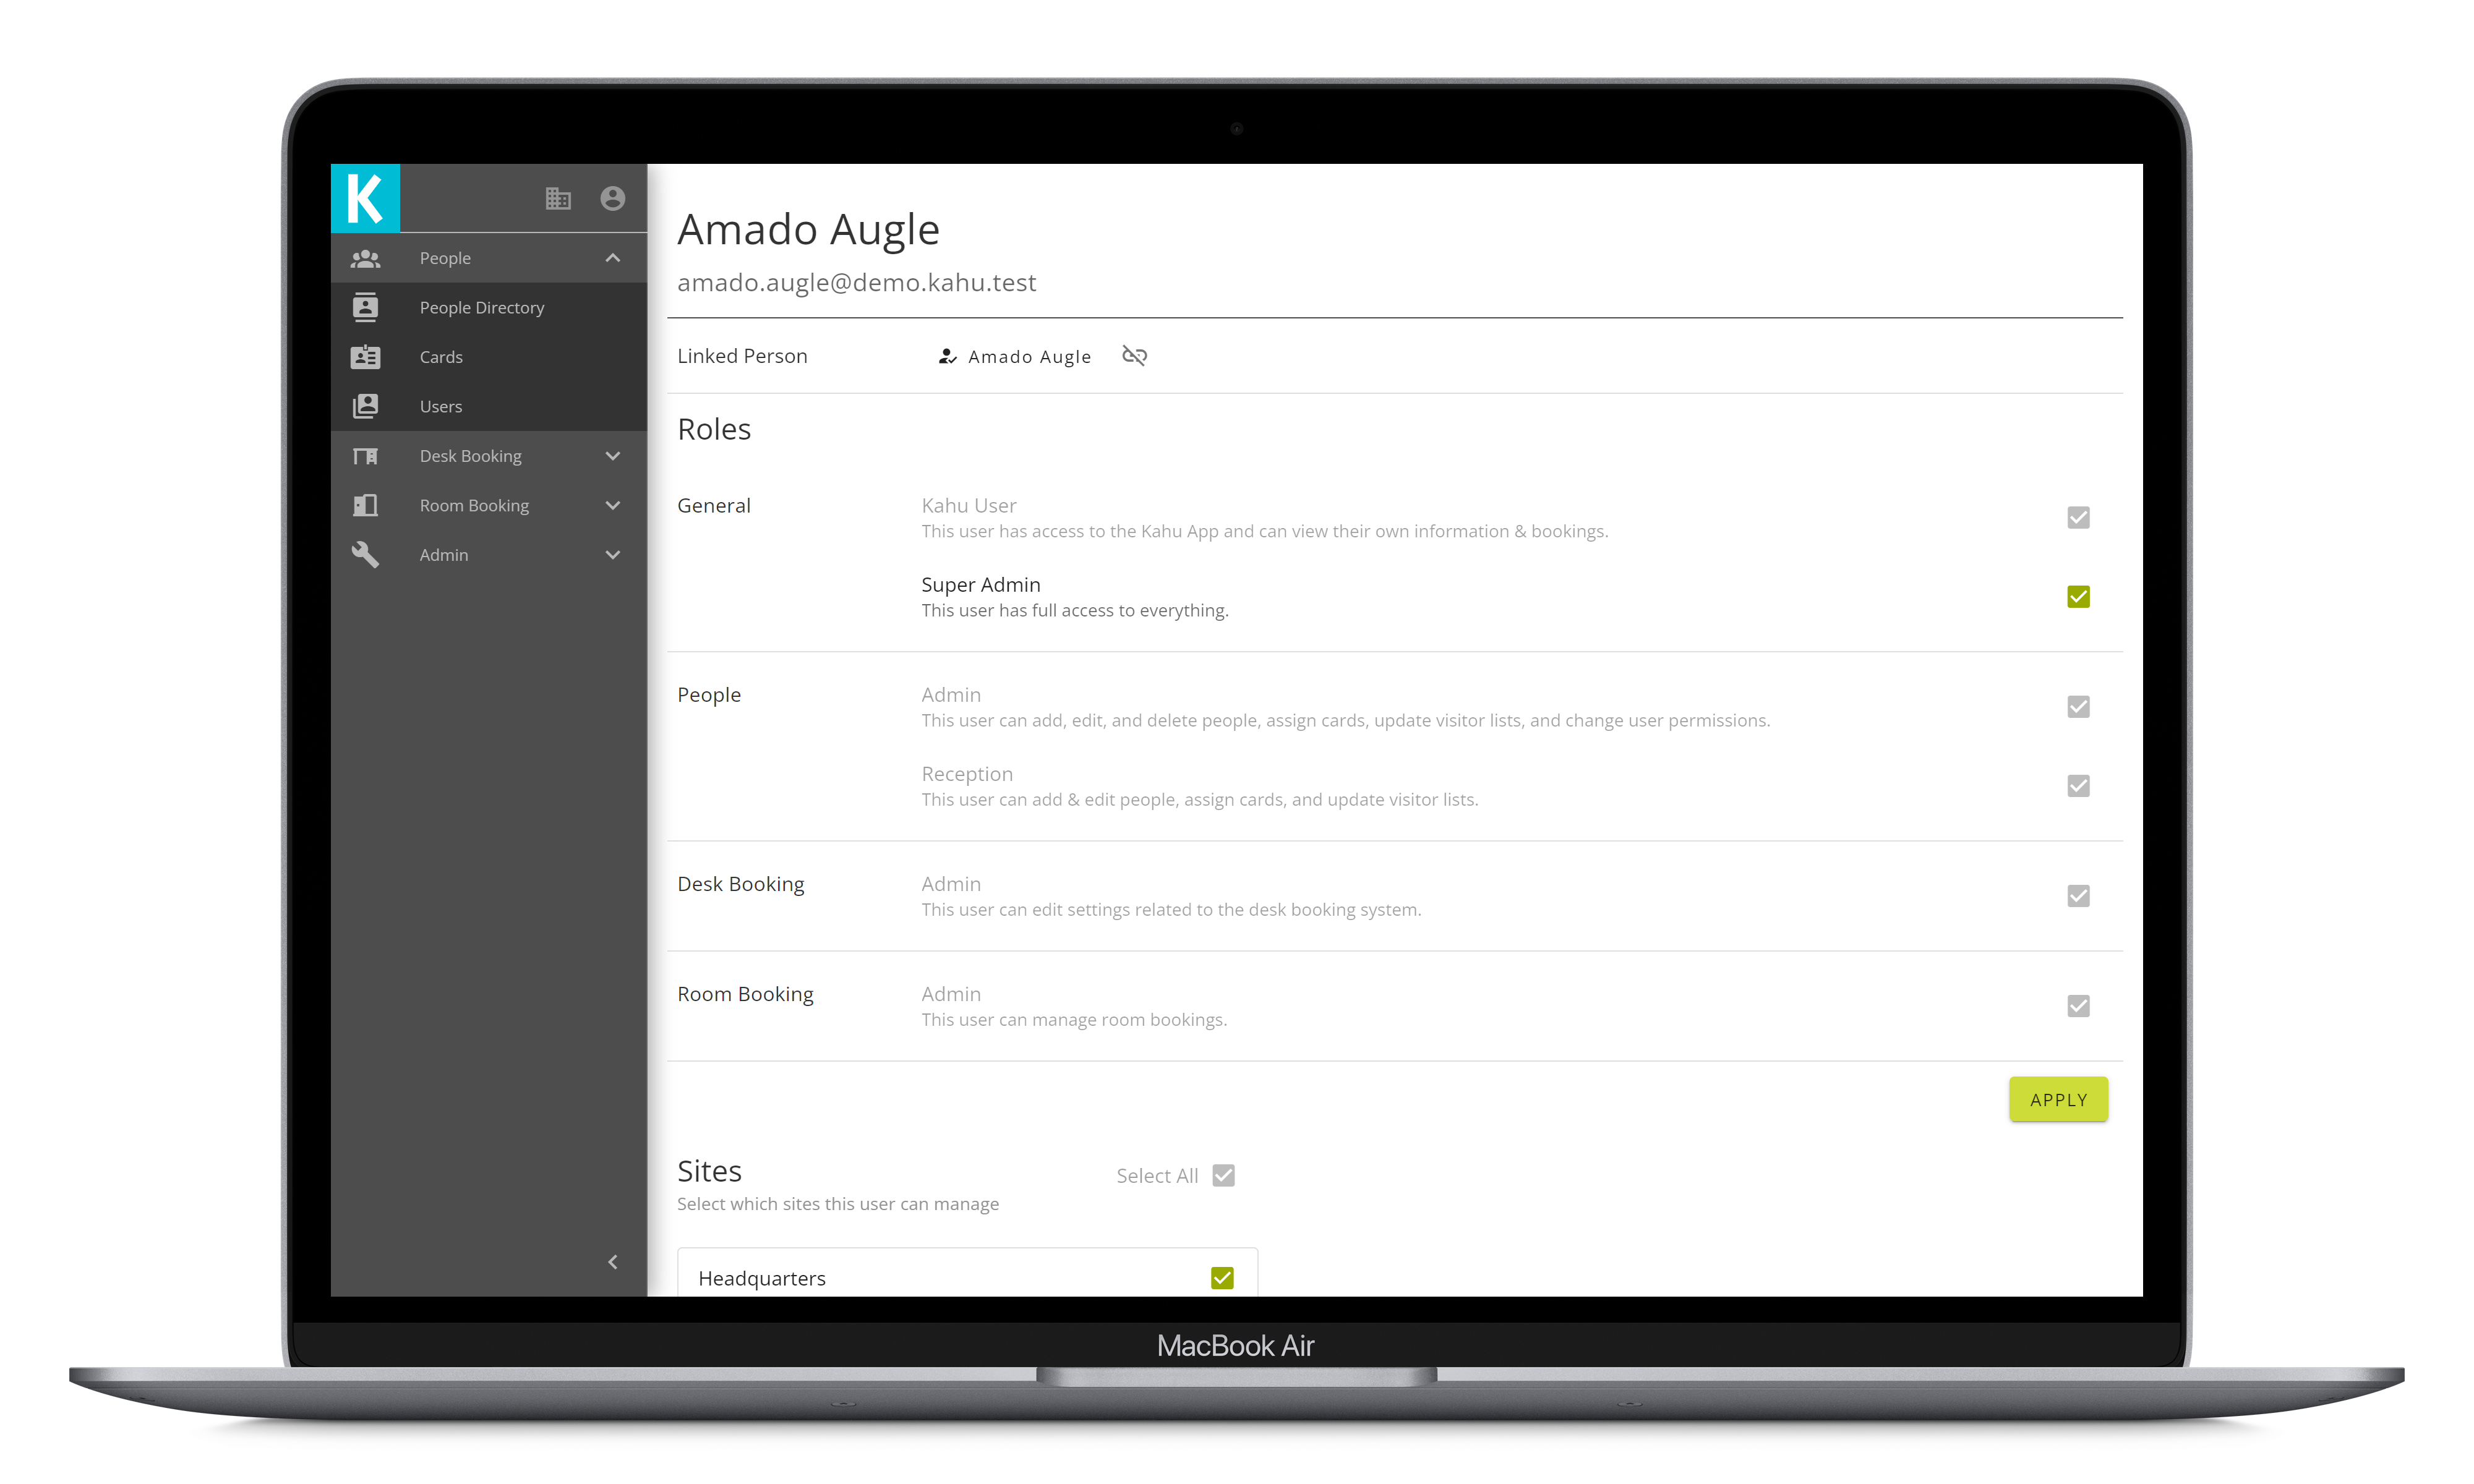
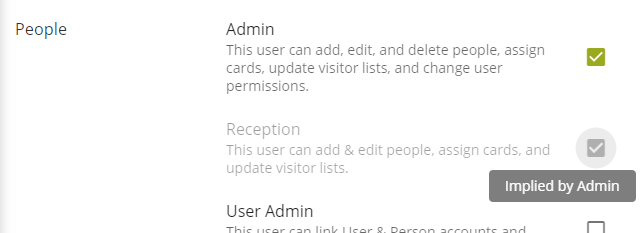
Note that some roles imply other roles, these will be shown selected and greyed-out; hovering over the checkboxes will show which role it is implied by. For example the People Reception role is implied by the People Admin role; as shown below.
# User Sites
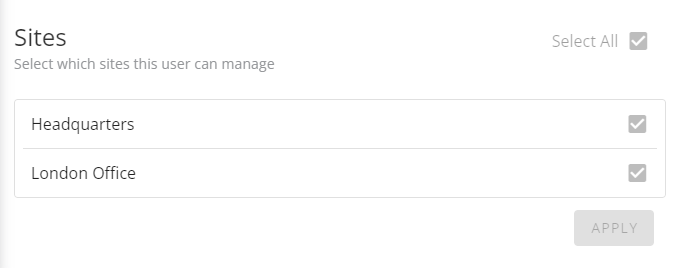
If a user is assigned a role that has site admin permissions, an additional checkbox list will appear with a full list of sites. Checking the sites in this list will give the selected user admin access at those sites.
# User Linking
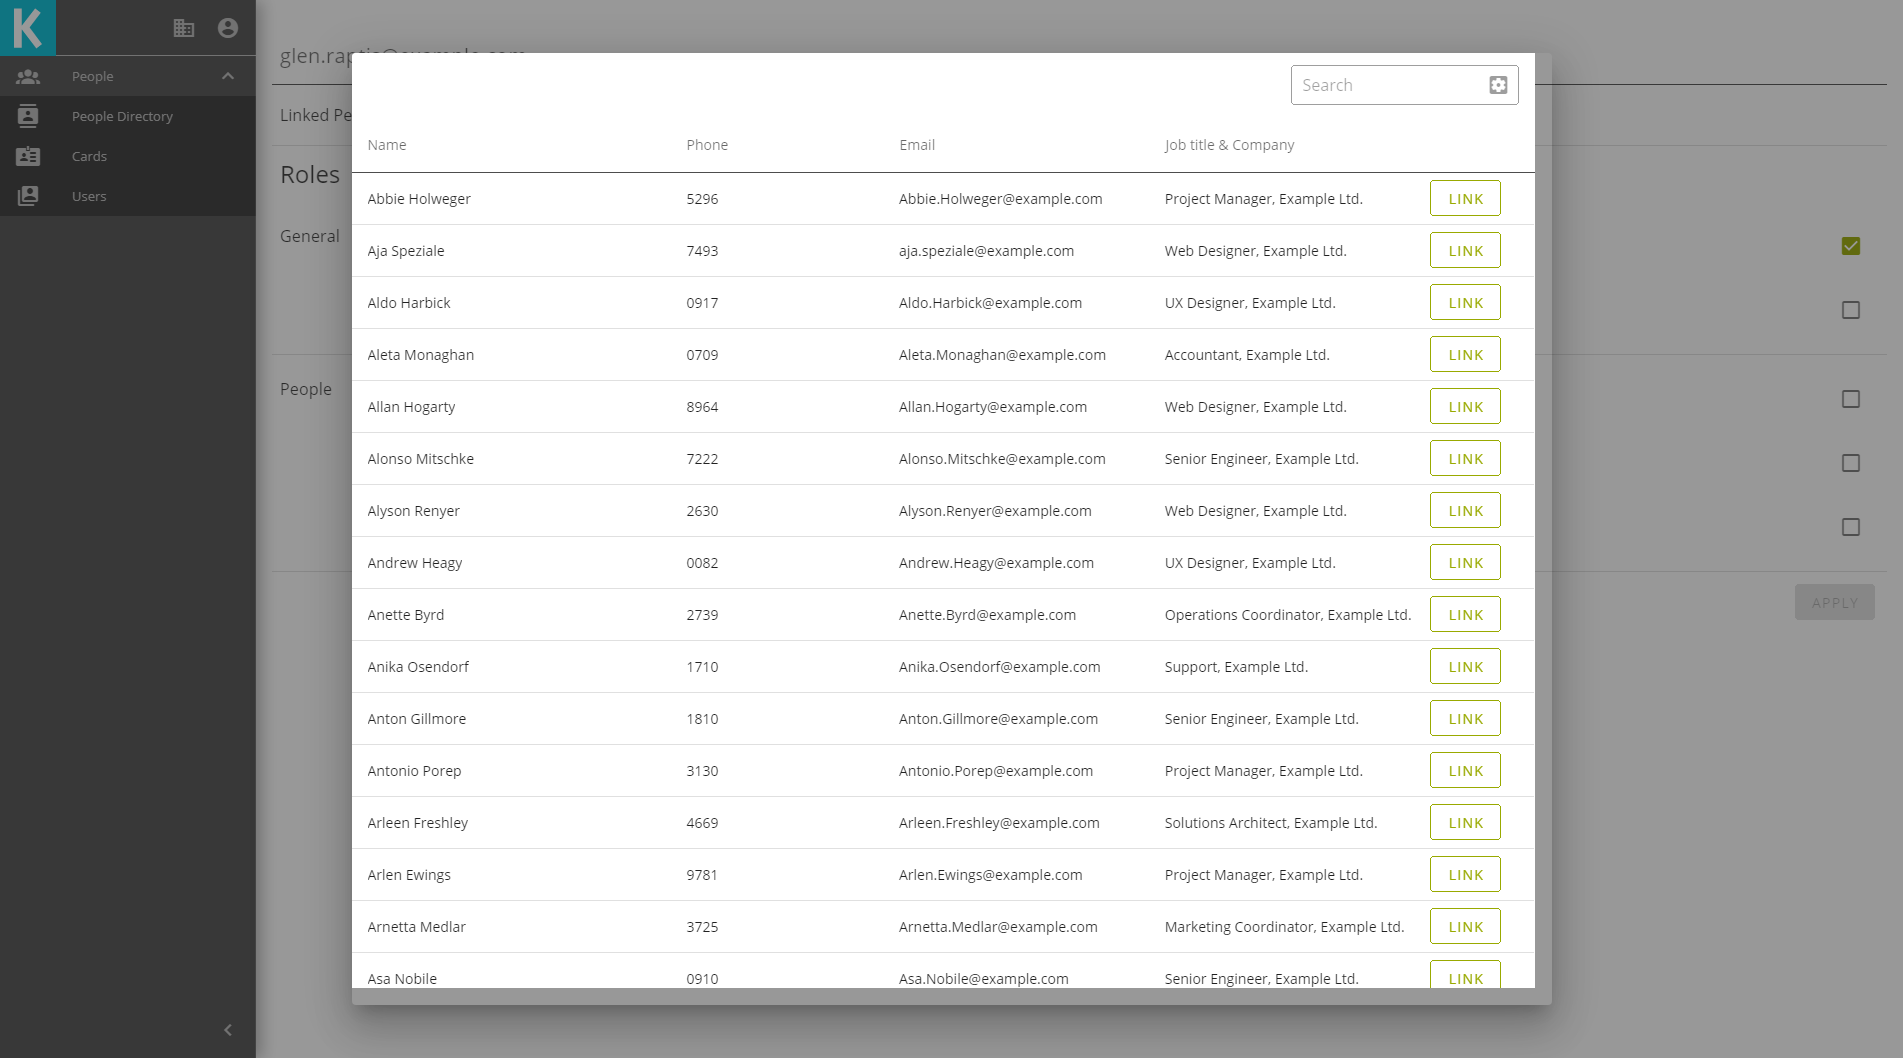
Users can be linked to a person in the Directory. Users must be linked before they can access certain functionality, such as viewing their bookings from the User App. If a user is linked, it will be shown on the user view, next to the Linked Person label. Otherwise, there will be a link button. To link a person to this user, click the link button.
This will bring up a dialog with a list of people, similar to the Directory. Use the search box to find the correct person, then click link to link them to the user.
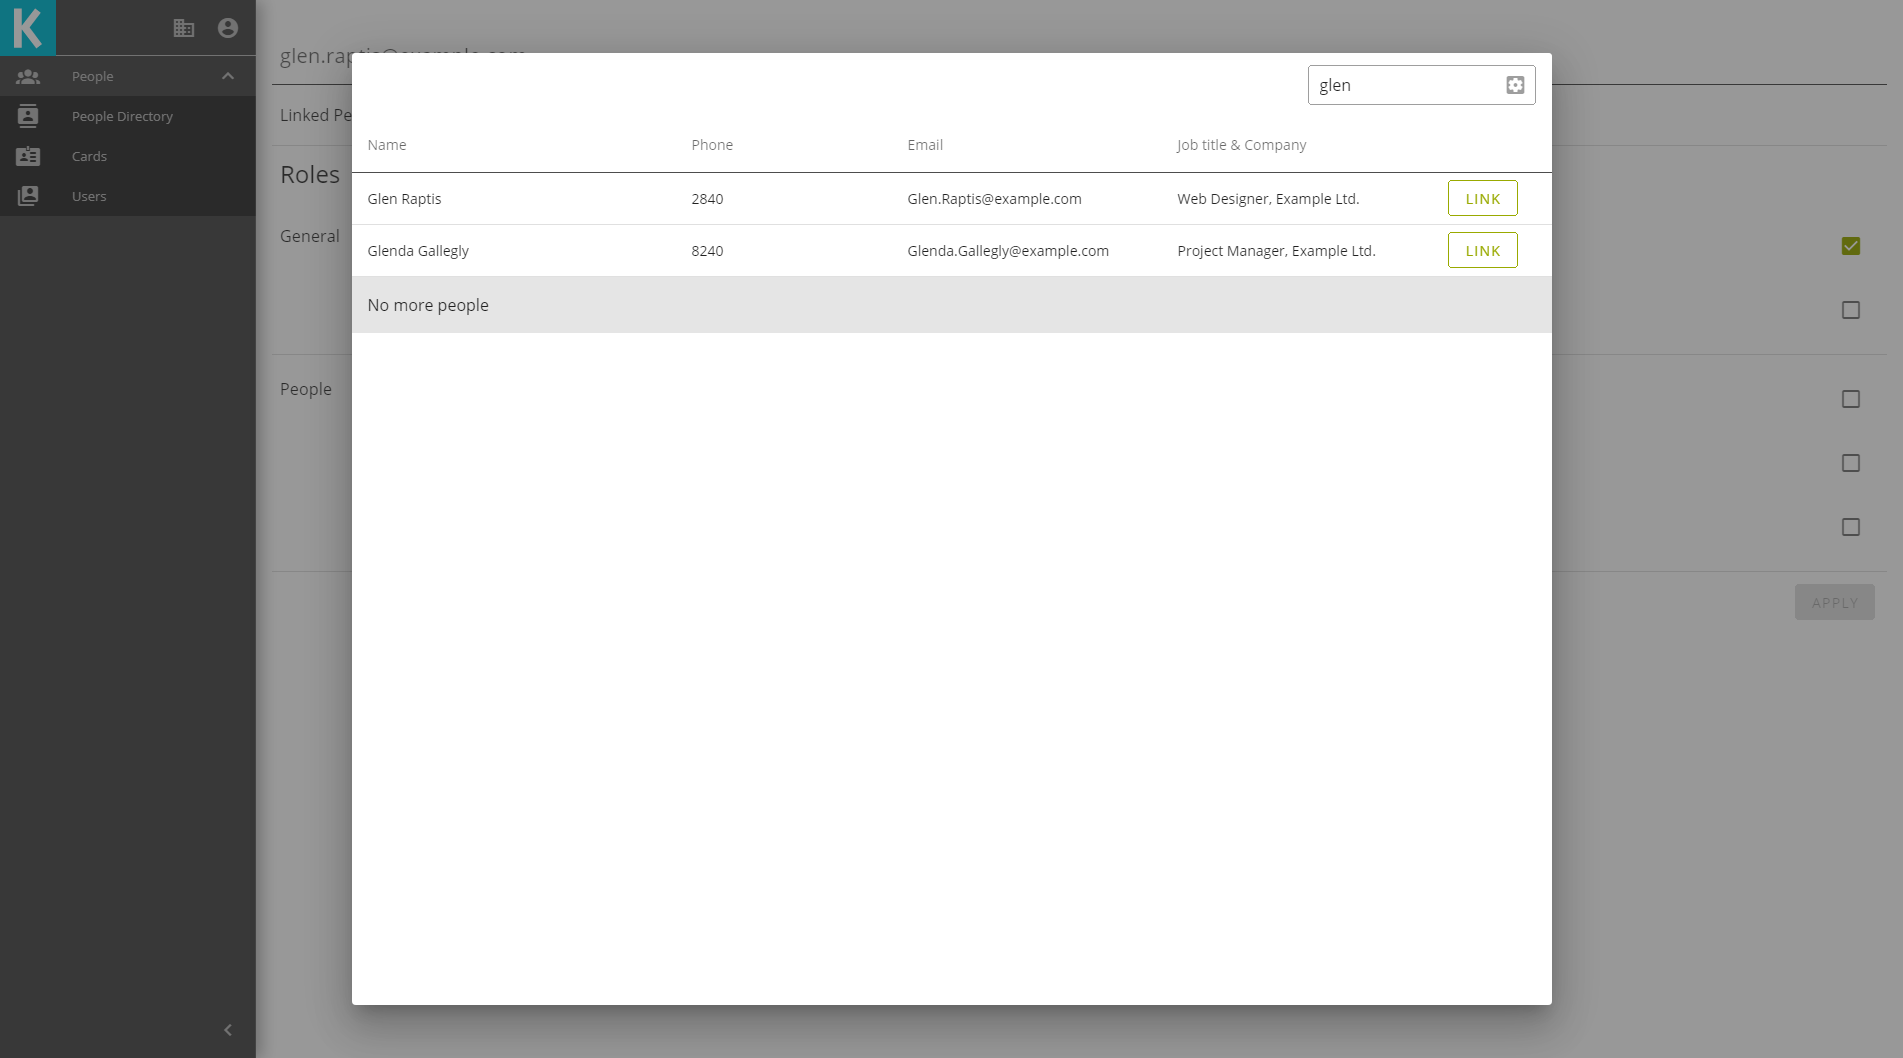
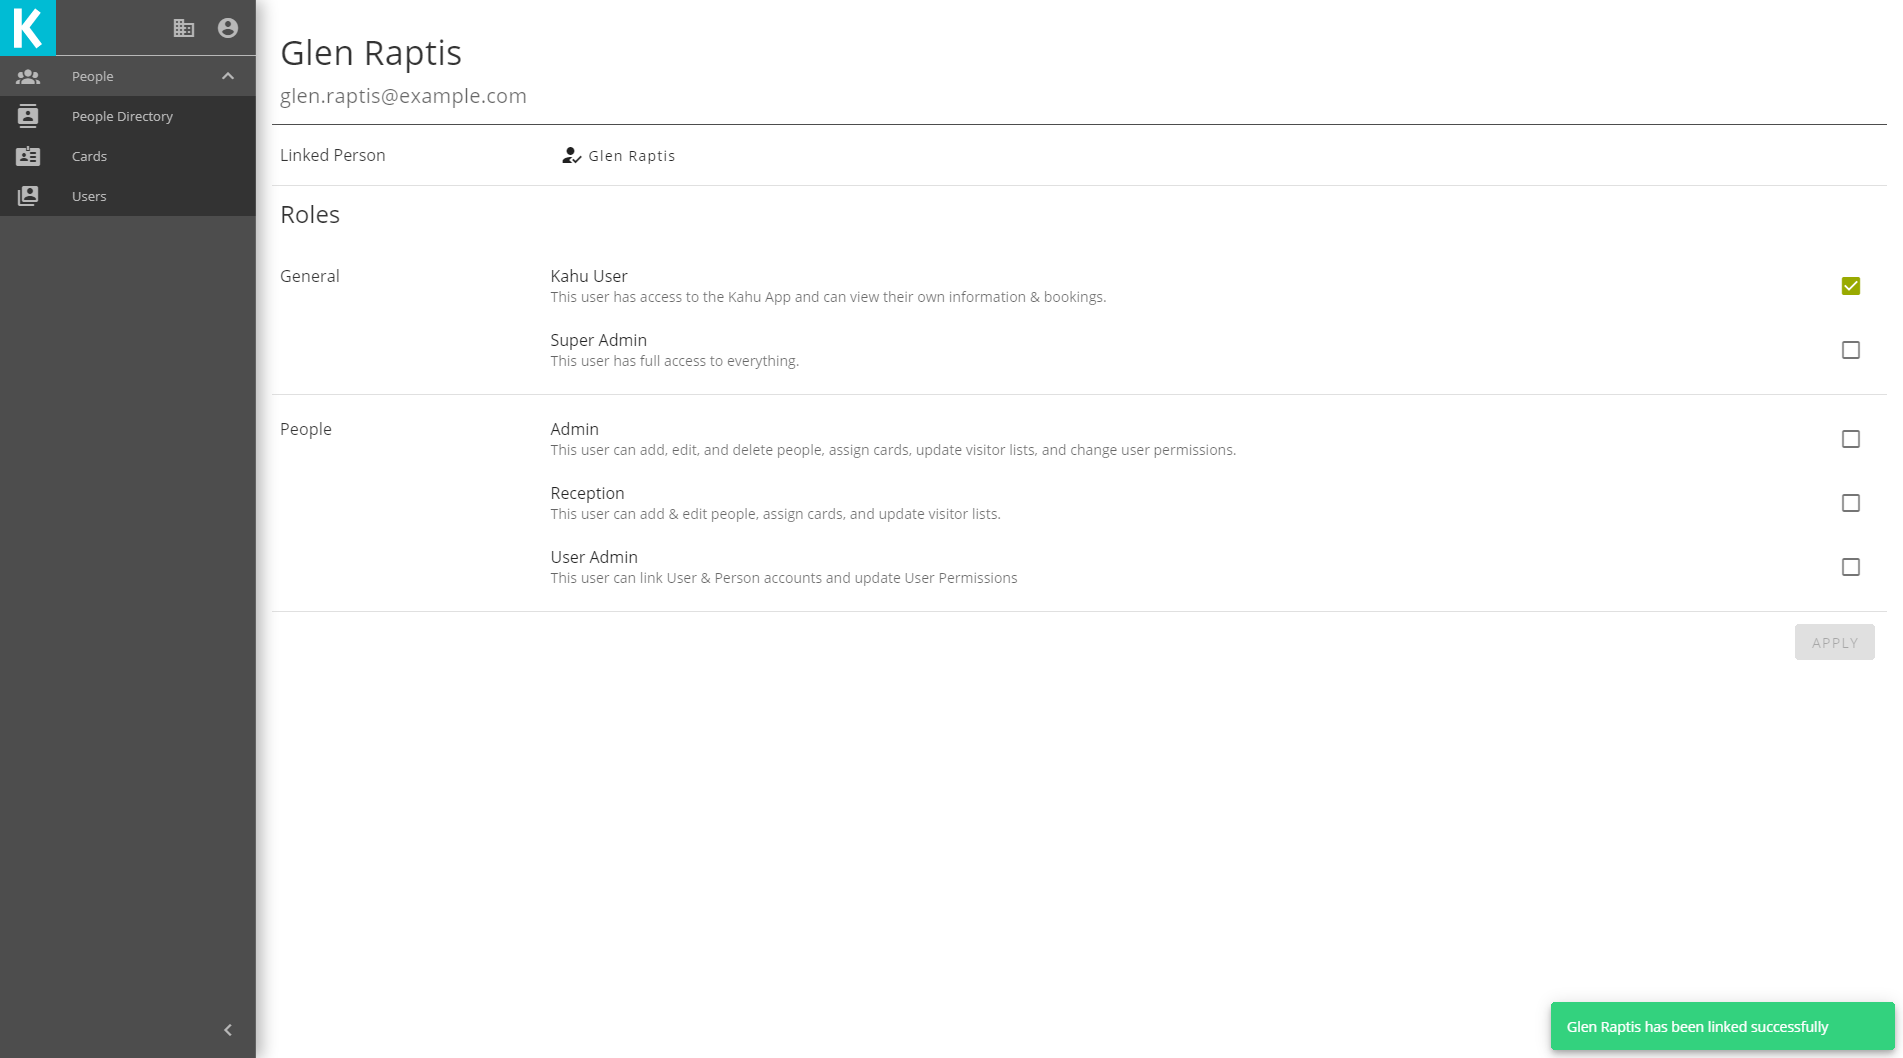
The dialog will close and you will be returned to the user view, there will be a confirmation message when the link has been completed.
# Desk Booking
The Workplace App can be used to manage desk bookings.
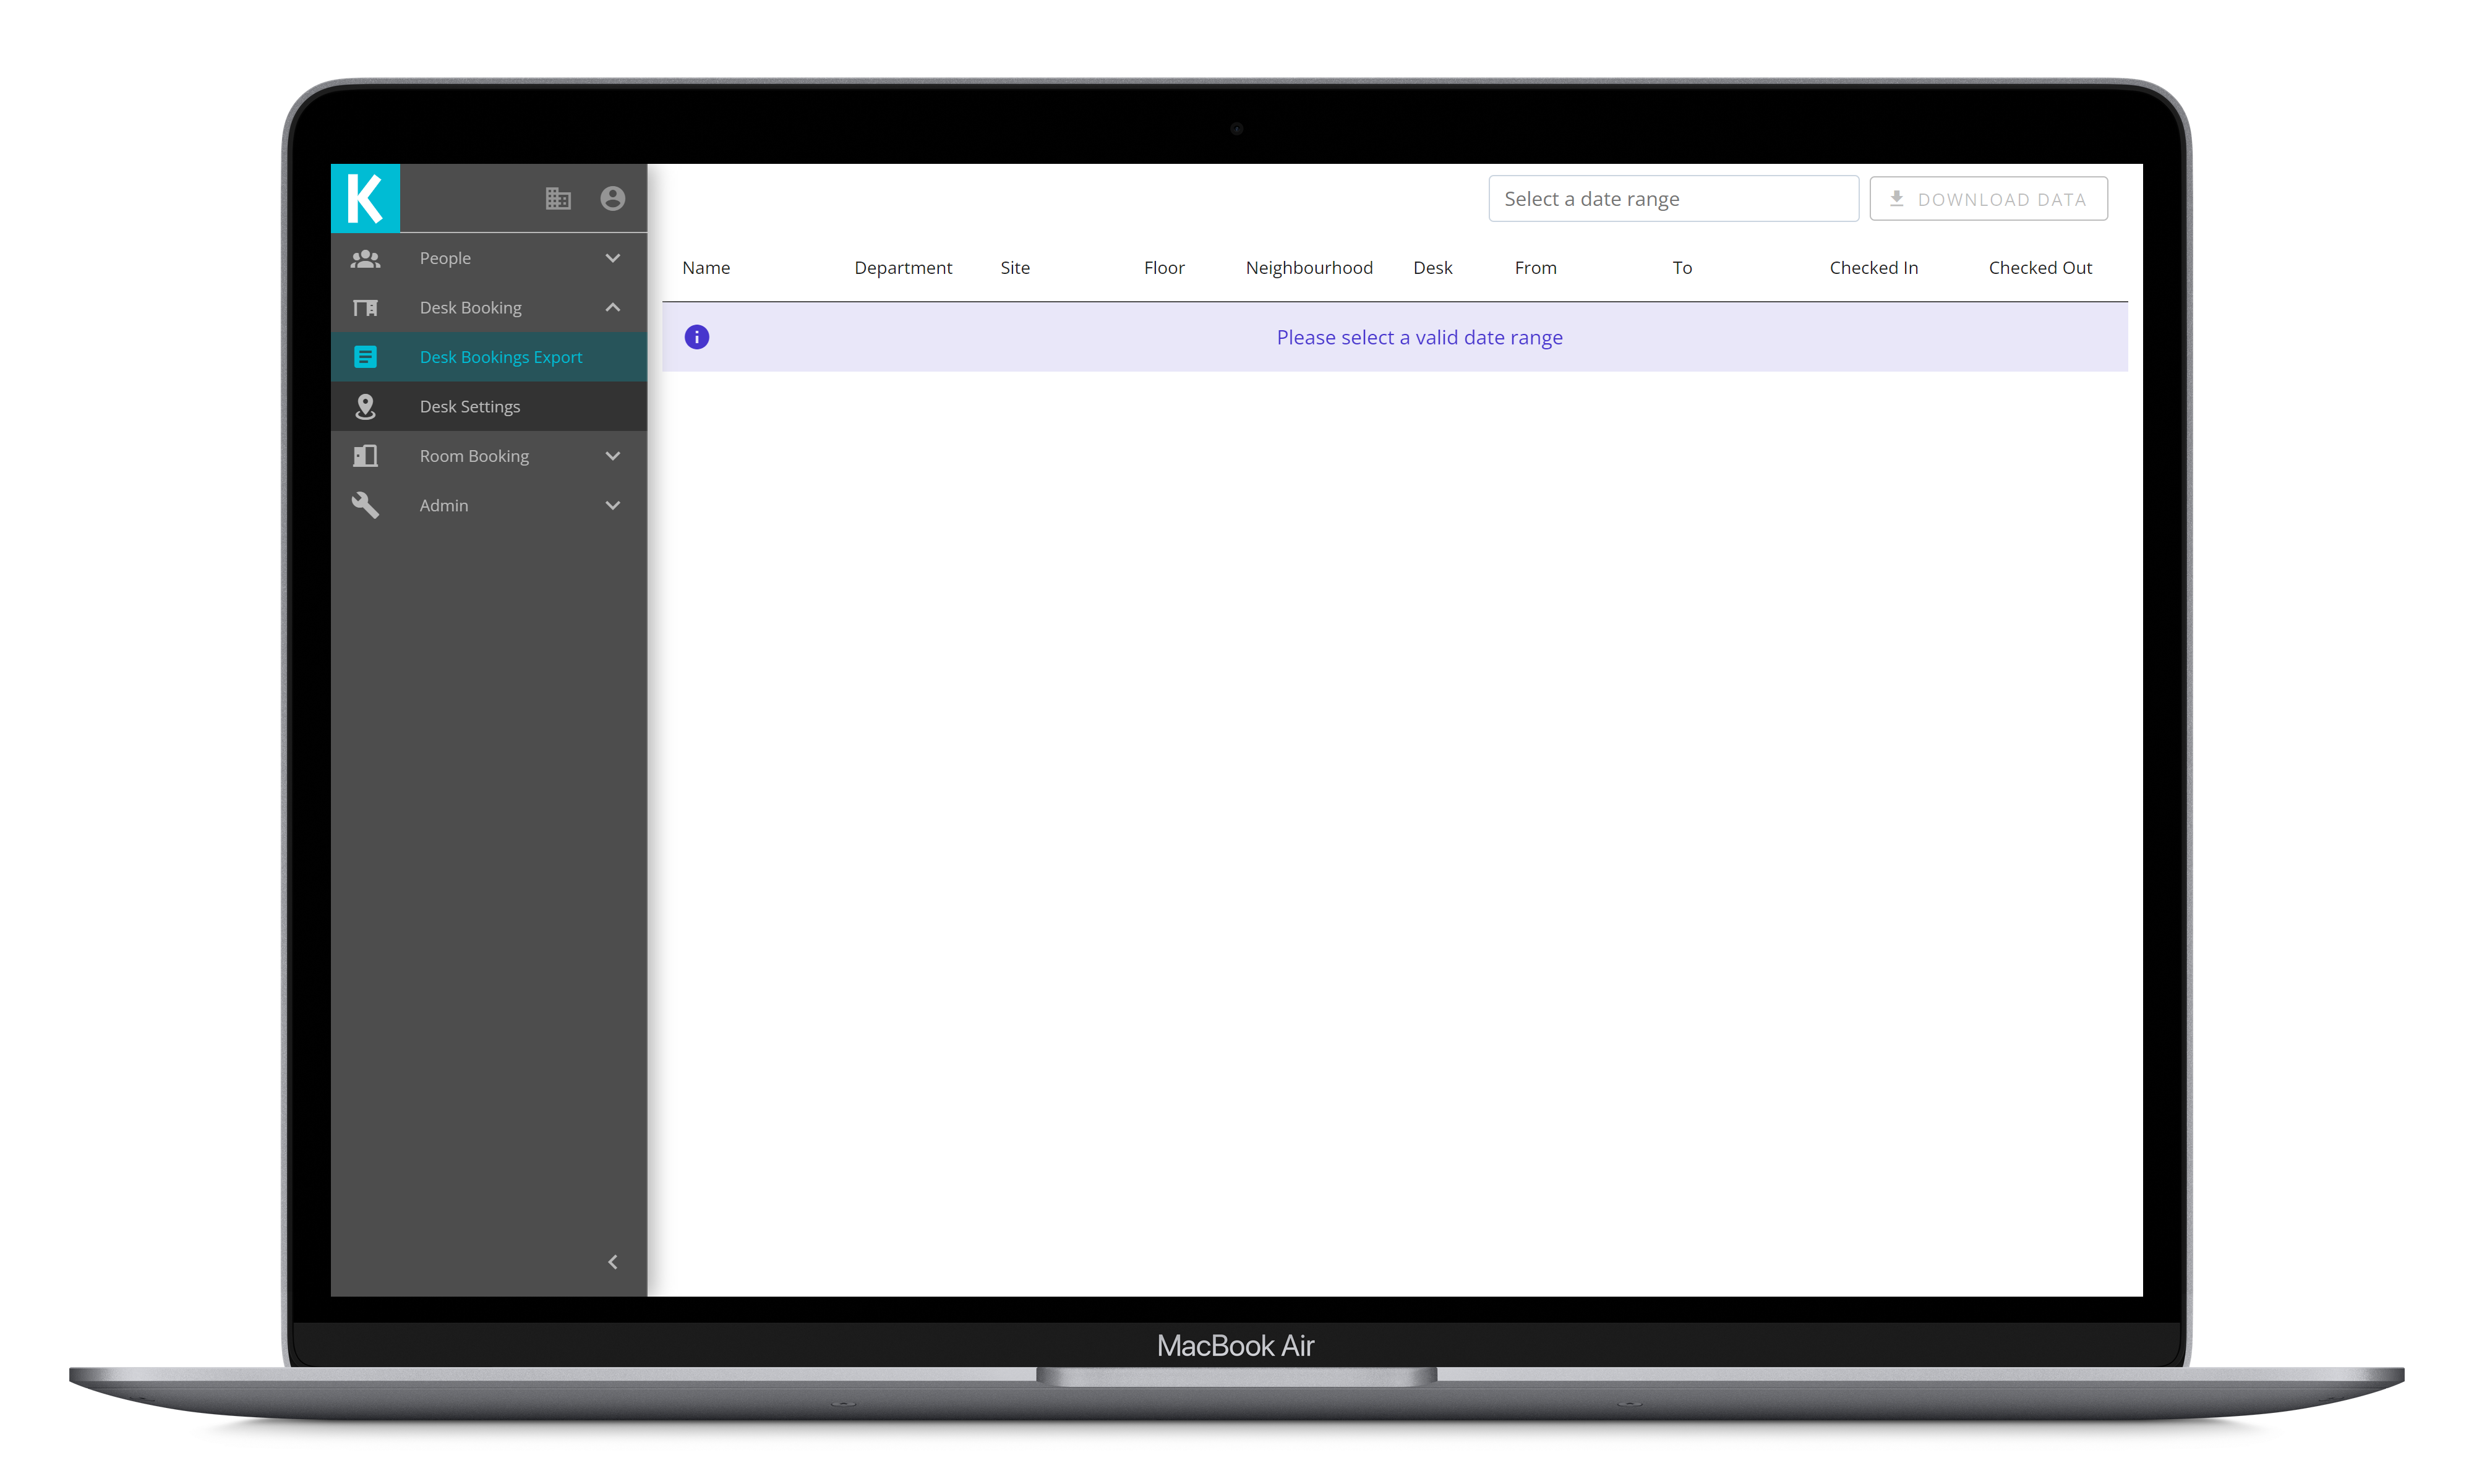
# Desk Bookings Export
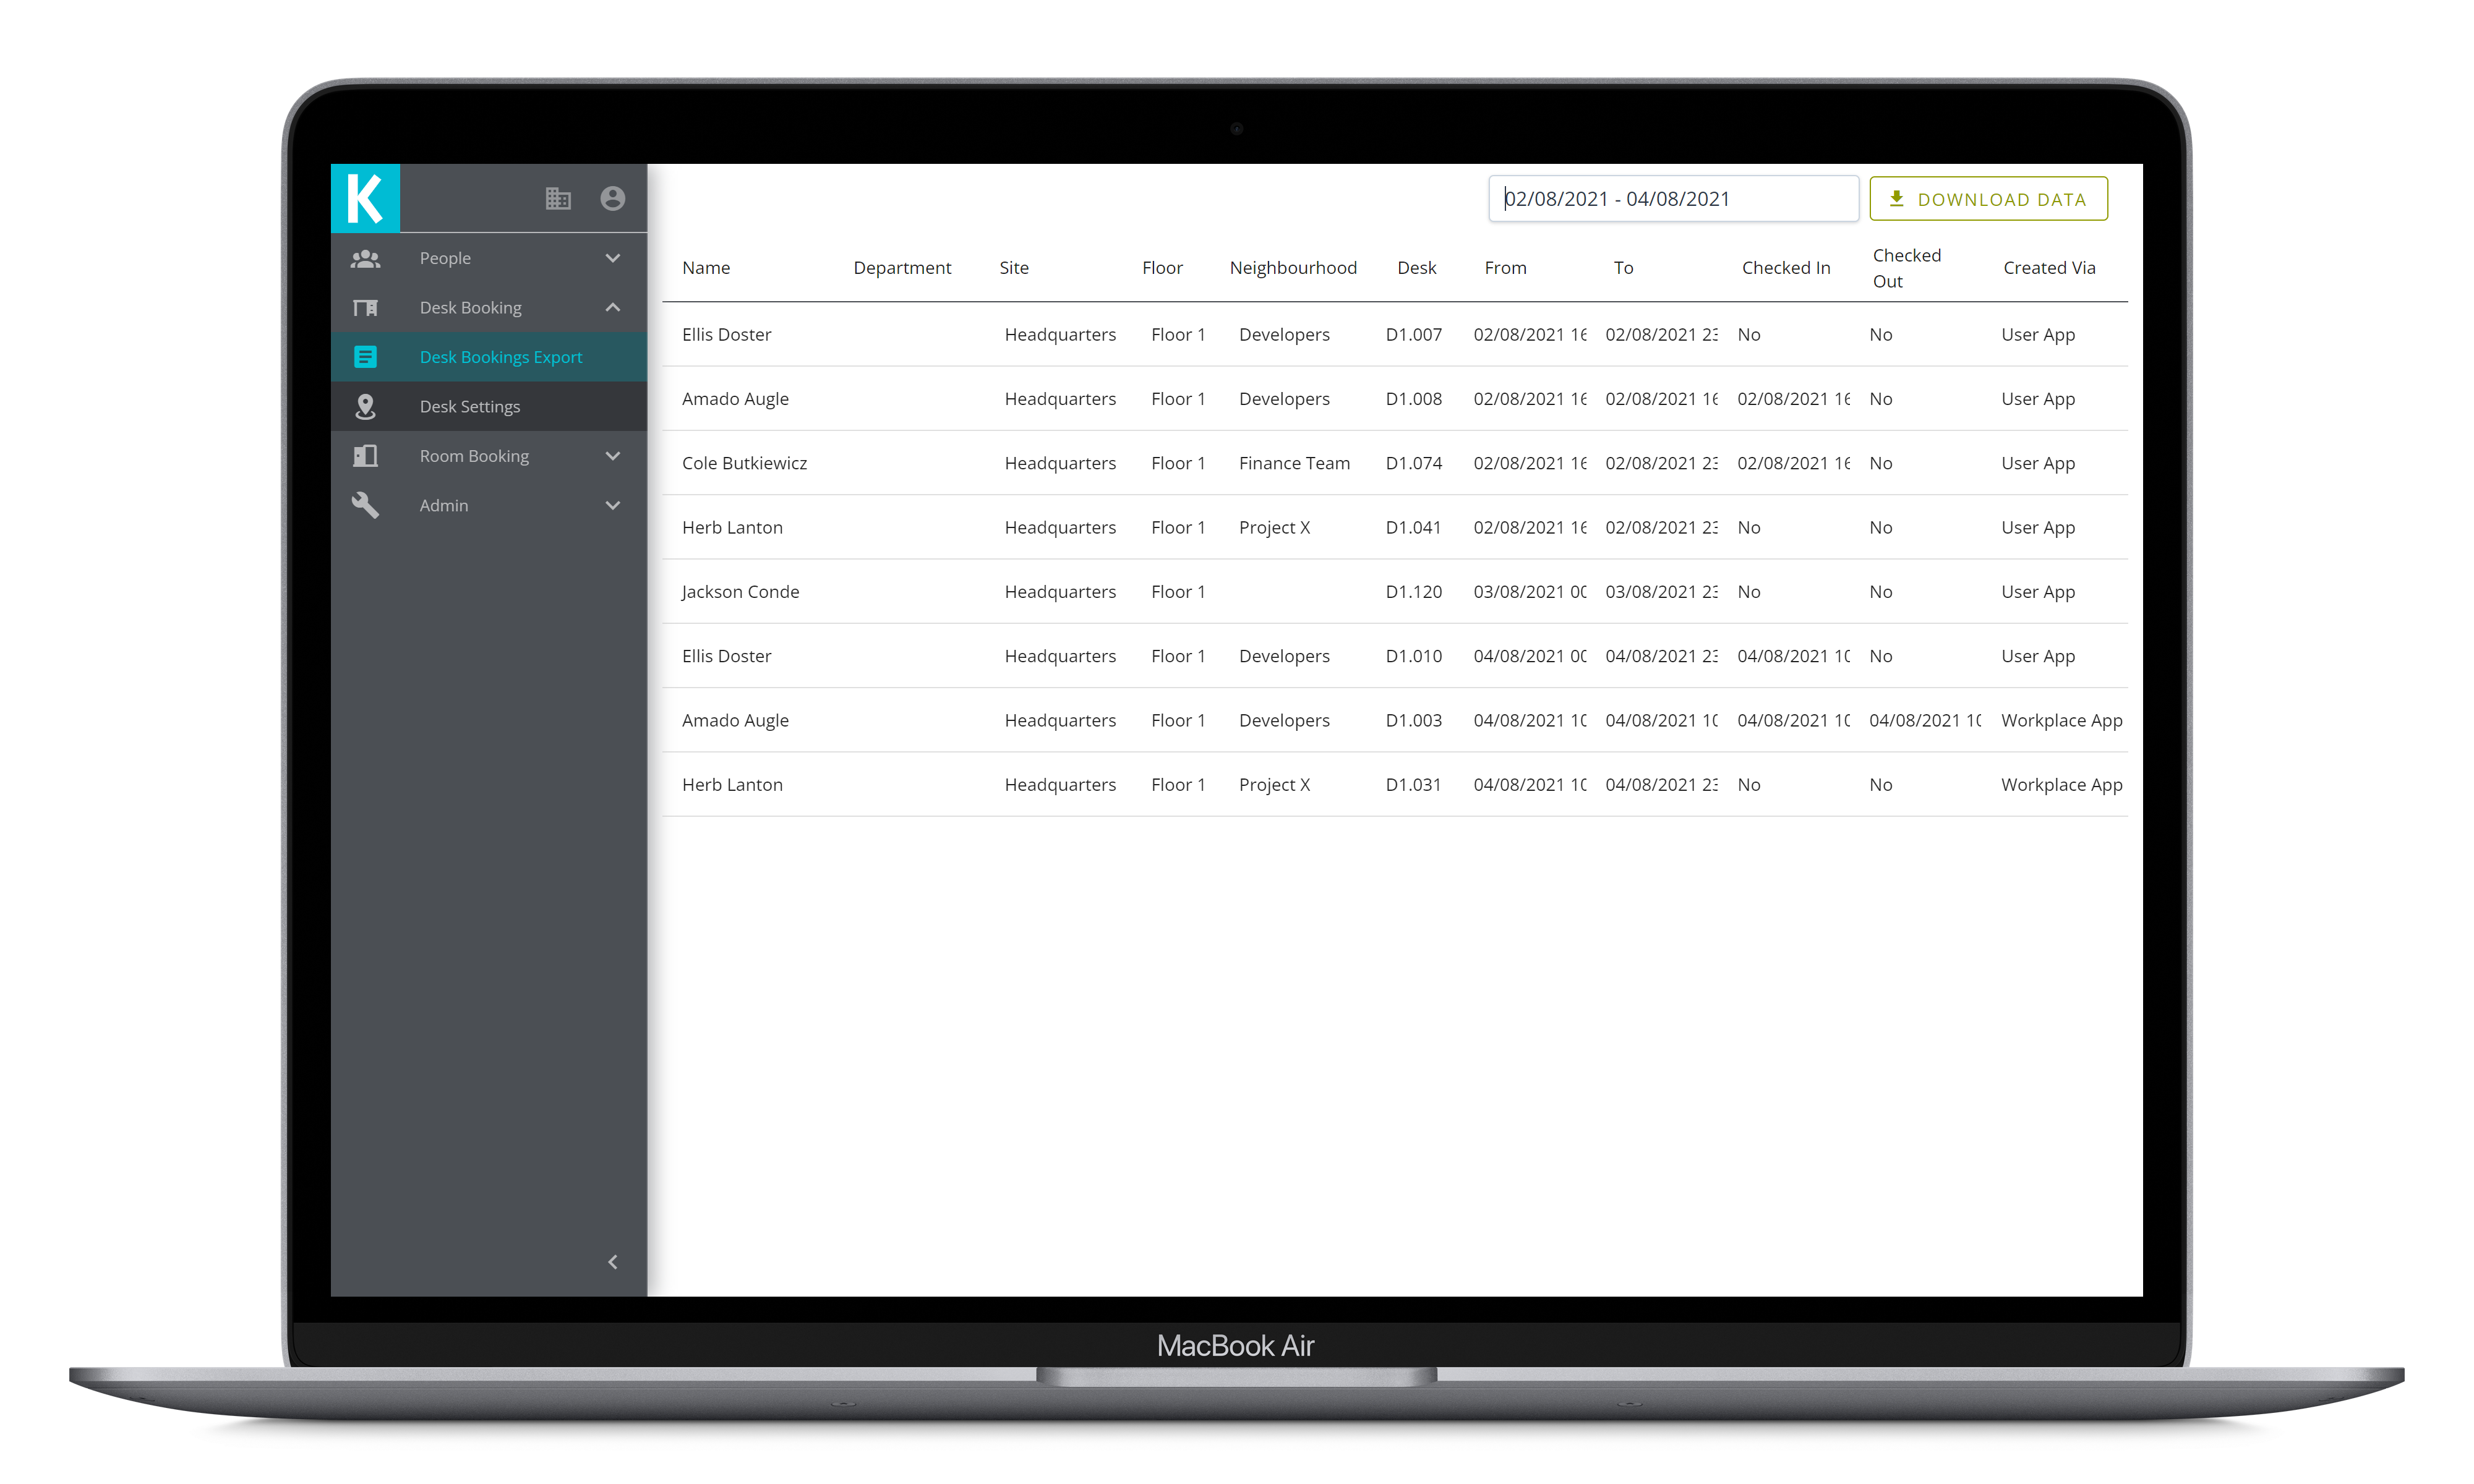
This page can help you gather desk booking statistics. Clicking on the "Select a date range" field in the top right will present you with a date picker where you can select your desired date range.
The table will then populate with the data from this date range for analysing. Clicking the "Download Data" button will take the bookings from that list and export them into a .csv file.
# Desk Settings

# Neighbourhoods
# Creating a Neighbourhood
In the top right corner of the neighbourhoods list, there is an " Add" button. Clicking this button will open a dialog allowing you to set the colour and name of the new neighbourhood; there is also the option to make the neighbourhood exclusive. This neighbourhood will then appear in the list, allowing you to select it and add/remove desks.
# Editing a Neighbourhood
# Changing Colour/Name
To change the colour of a neighbourhood, click the coloured circle and you will be presented with a colour picker, allowing you to select a new colour. Clicking the button will stage this change to be saved.
Changing the name can be done by clicking where the name is in the neighbourhood list, this will make the text editable and allow you to change the name.
# Adding/Removing Desks
Managing which desks are in the neighbourhood can be done through the map. Clicking a neighbourhood in the list will select this neighbourhood and any changes made on the map will relate to this selected neighbourhood. The map will automatically select the desks that are in this neighbourhood and these will be indicated by a marker icon on the desks.
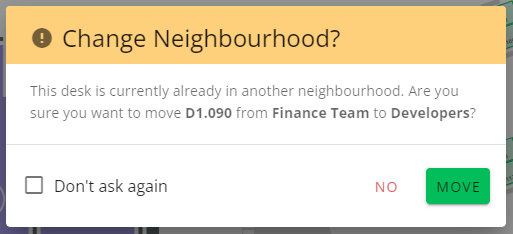
To add a desk to the neighbourhood, simply click a desk that is not in that neighbourhood on the map. If it is not already in a neighbourhood, this change will be staged immediately. If it is already in a neighbourhood, you will be presented with a dialog to confirm that you wish to move that desk out of its existing neighbourhood.
Removing a desk is done by deselecting the desk on the map, this will then stage the removal of that desk from the selected neighbourhood.
# Deleting a Neighbourhood
Clicking the button to the right of a neighbourhood will stage this neighbourhood for deletion.
# Neighbourhood Types
There are three main types of neighbourhood:
- Inclusive (the most common type)
- Exclusive (only bookable by people in the neighbourhood)
- Exclusive ad-hoc (like exclusive, but bookable by others on the day)
There are different restrictions for the different types, as per the tables below:
Key:
- ✅ - can book
- ⭐ - can book if the neighbourhoods match
- ❌ - can't book
User App
| Person Desk | inclusive neighbourhood | exclusive neighbourhood | exclusive ad-hoc neighbourhood | no neighbourhood |
| inclusive neighbourhood | ⭐ | ❌ | ❌ | ❌ |
| exclusive neighbourhood | ❌ | ⭐ | ⭐ | |
| no neighbourhood | ✅ | ❌ | ❌ | ✅ |
| "can book in other neighbourhoods" permission | ⭐ | ⭐ | ||
| Anyone, on the day | ⭐ | ✅ |
Booking Kiosk
| Person Desk | inclusive neighbourhood | exclusive neighbourhood | exclusive ad-hoc neighbourhood | no neighbourhood |
| inclusive neighbourhood | ✅ | ❌ | ✅ | ✅ |
| exclusive neighbourhood | ⭐ | |||
| no neighbourhood | ❌ | |||
| "can book in other neighbourhoods" permission | ⭐ |
# Desks
With no neighbourhood selected, selecting a desk on the map will allow you to change properties of the desk as well as creating bookings on behalf of other users.
# Selecting a Single Desk
# Settings
In the settings section of the sidebar, you will see options to disable the desk as well as changing the neighbourhood that the desk belongs in. Changing the values for either of these will stage that change and will be viewable in the changes list.
# Bookings
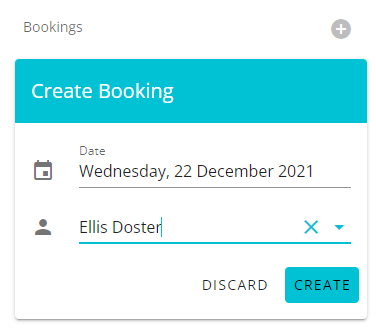
Under this section you can see the future bookings for this desk and also create new bookings for other people.
If there is a future booking that needs to be cancelled, you can do this by clicking the button next to that booking and then selecting the "Cancel Booking" option.
Clicking the
# Selecting Multiple Desks
When you select multiple desks, the sidebar will change and allow you to bulk edit the selected desks. You can add all desks to a certain neighbourhood, enable/disable all selected desks or create a new neighbourhood from the selection.
# Saving/Discarding the Changes
All changes made will be added to the changes list which can be shown by clicking the "Changes" panel at the bottom of the sidebar. Clicking "Discard" will revert all changes that you have made, clicking "Save" will commit all these changes.
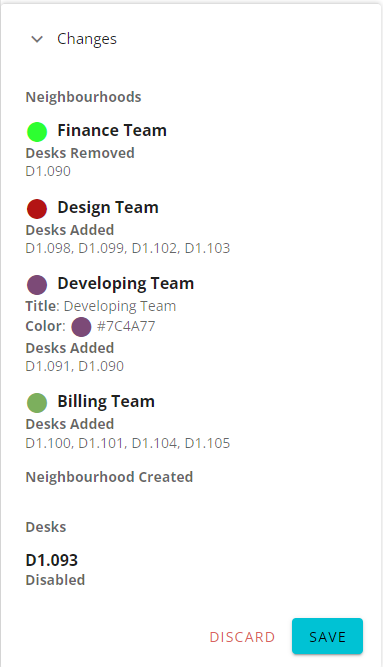
Please Note: Although the map reacts in real time to your changes, none of these will be reflected across other apps until they are saved.
# Room Booking
The Workplace App is used to manage room bookings. For more information on Kahu Room Booking, see the Room Booking guide. If Room Booking is enabled for the active site, then the Room Booking option will show in the sidebar.
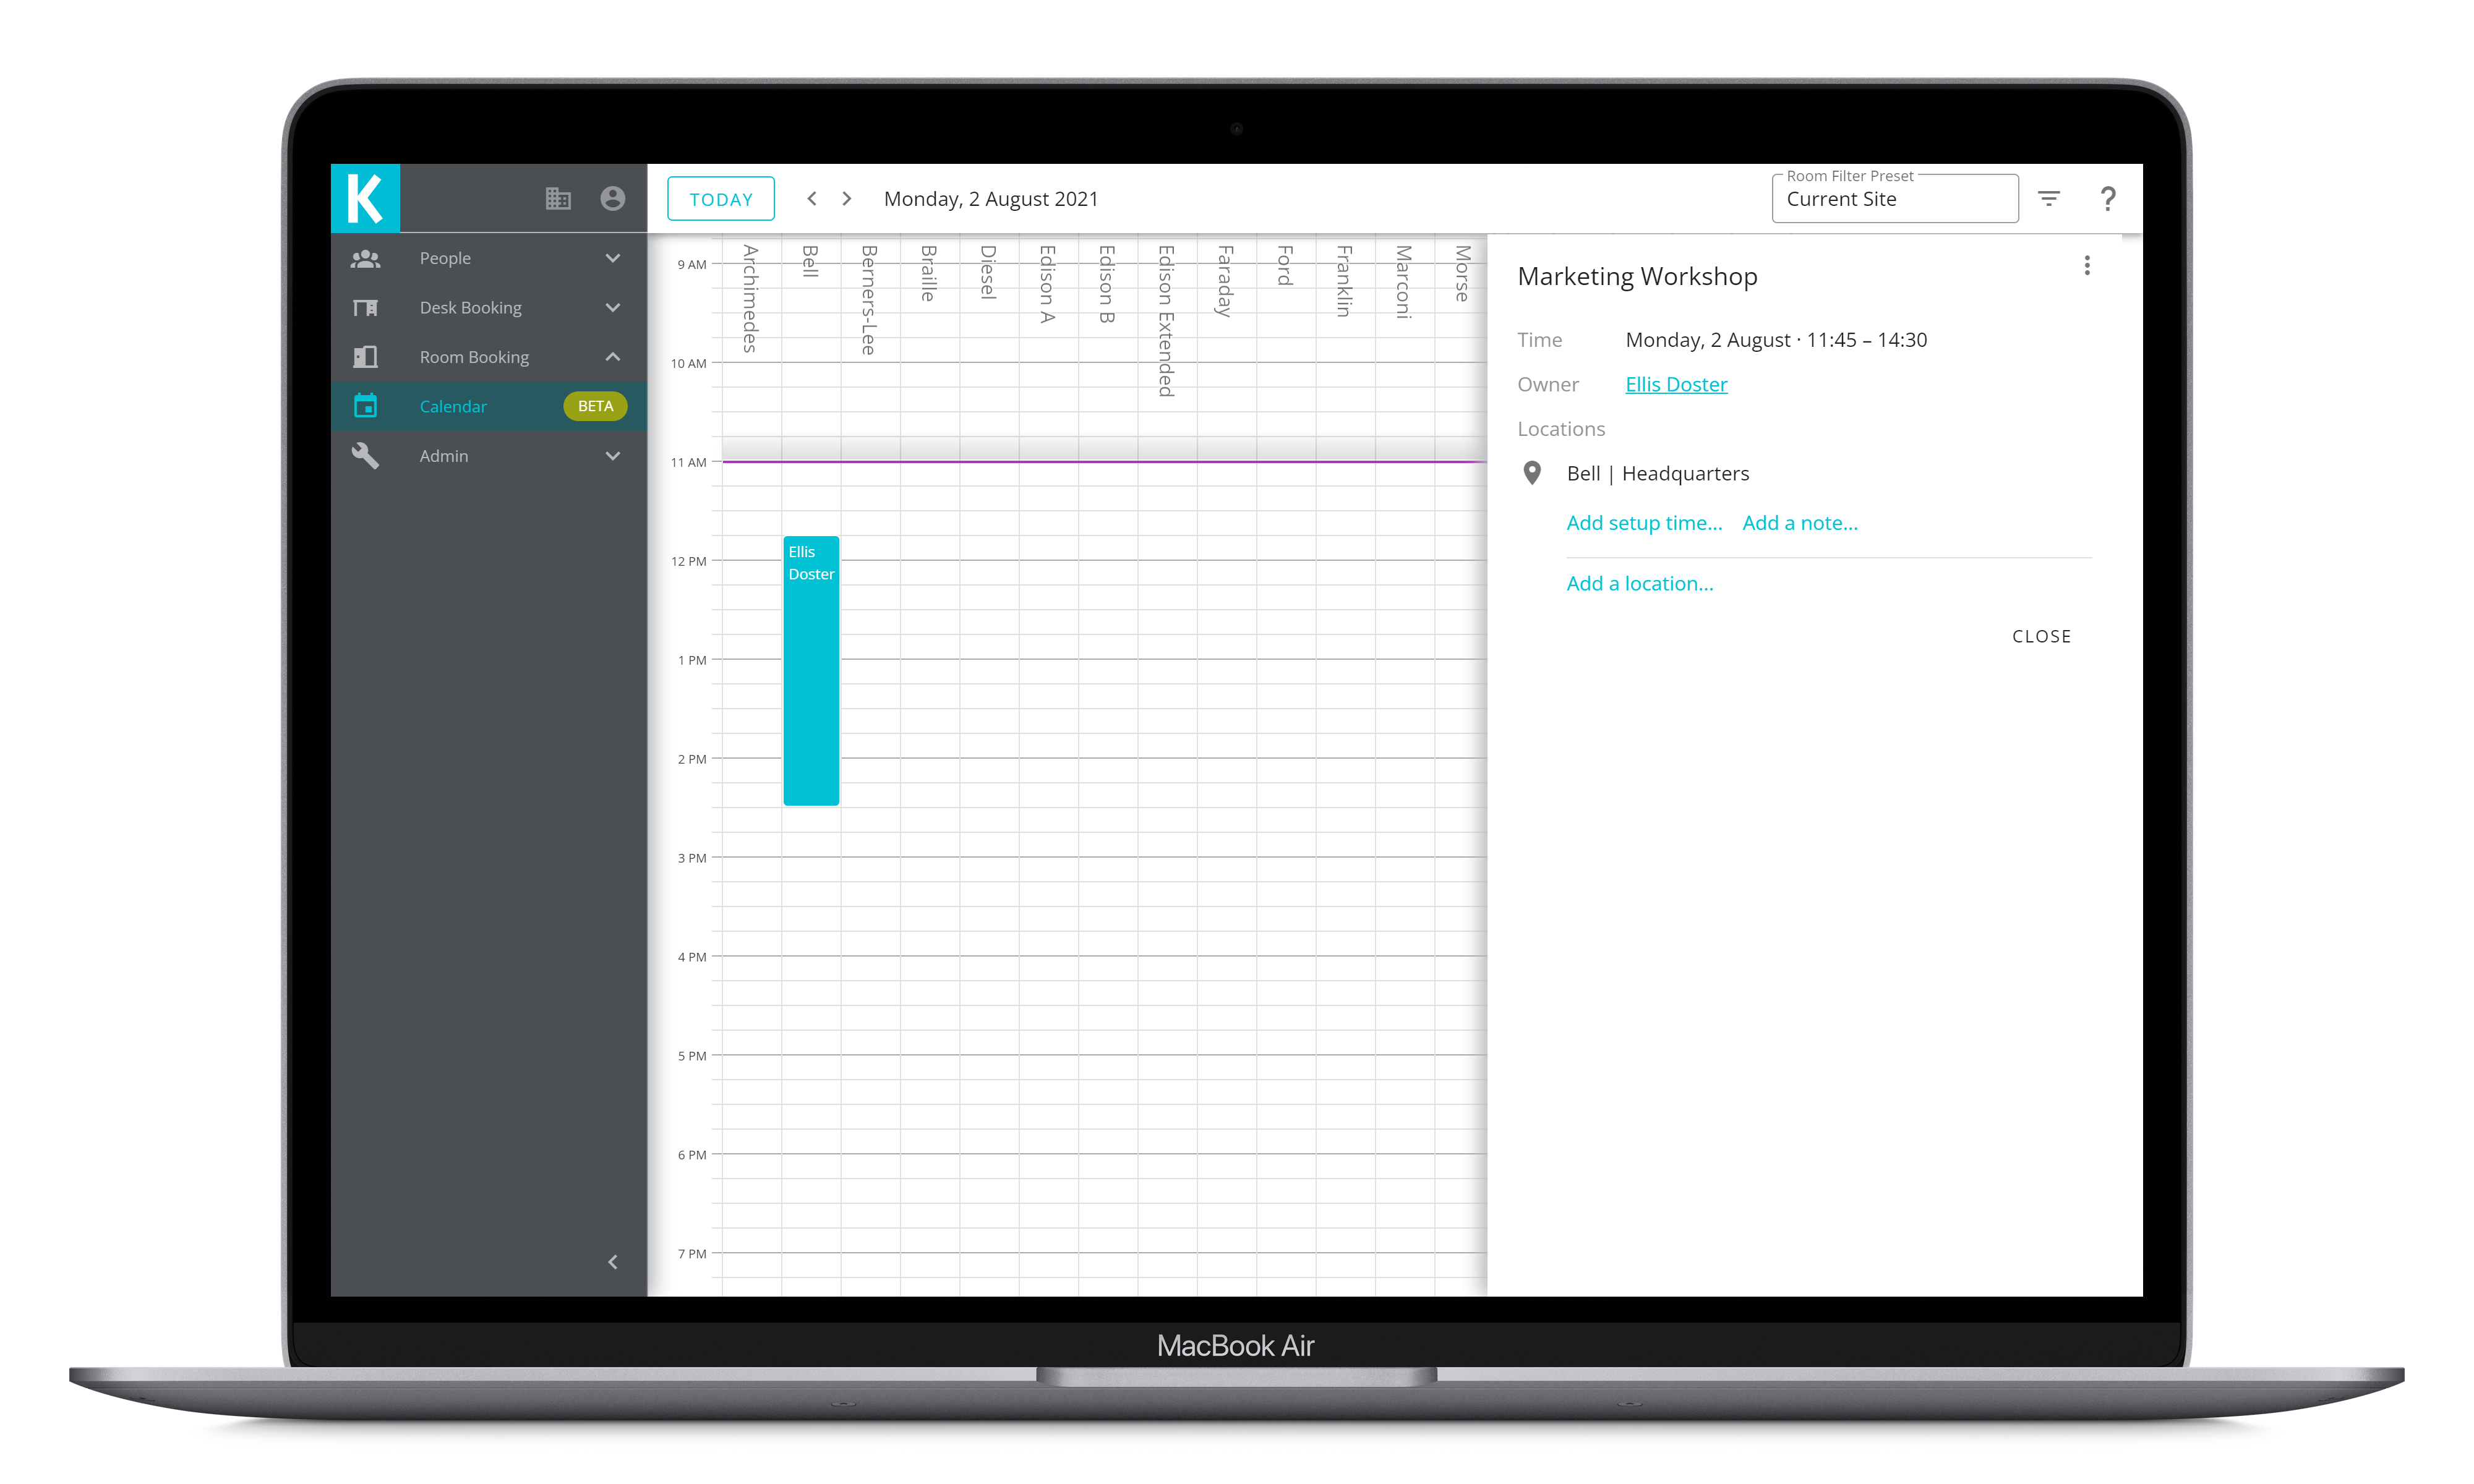
# Calendar View
Expand the Room Booking sidebar menu and click Calendar to see the calendar view.
The calendar view includes an overview of all bookings for the active site; the toolbar shows which day is selected. The calendar shows times along the left-hand side, with the current time highlighted with a purple line across the page. The calendar shows rooms along the top, with a column for each room.
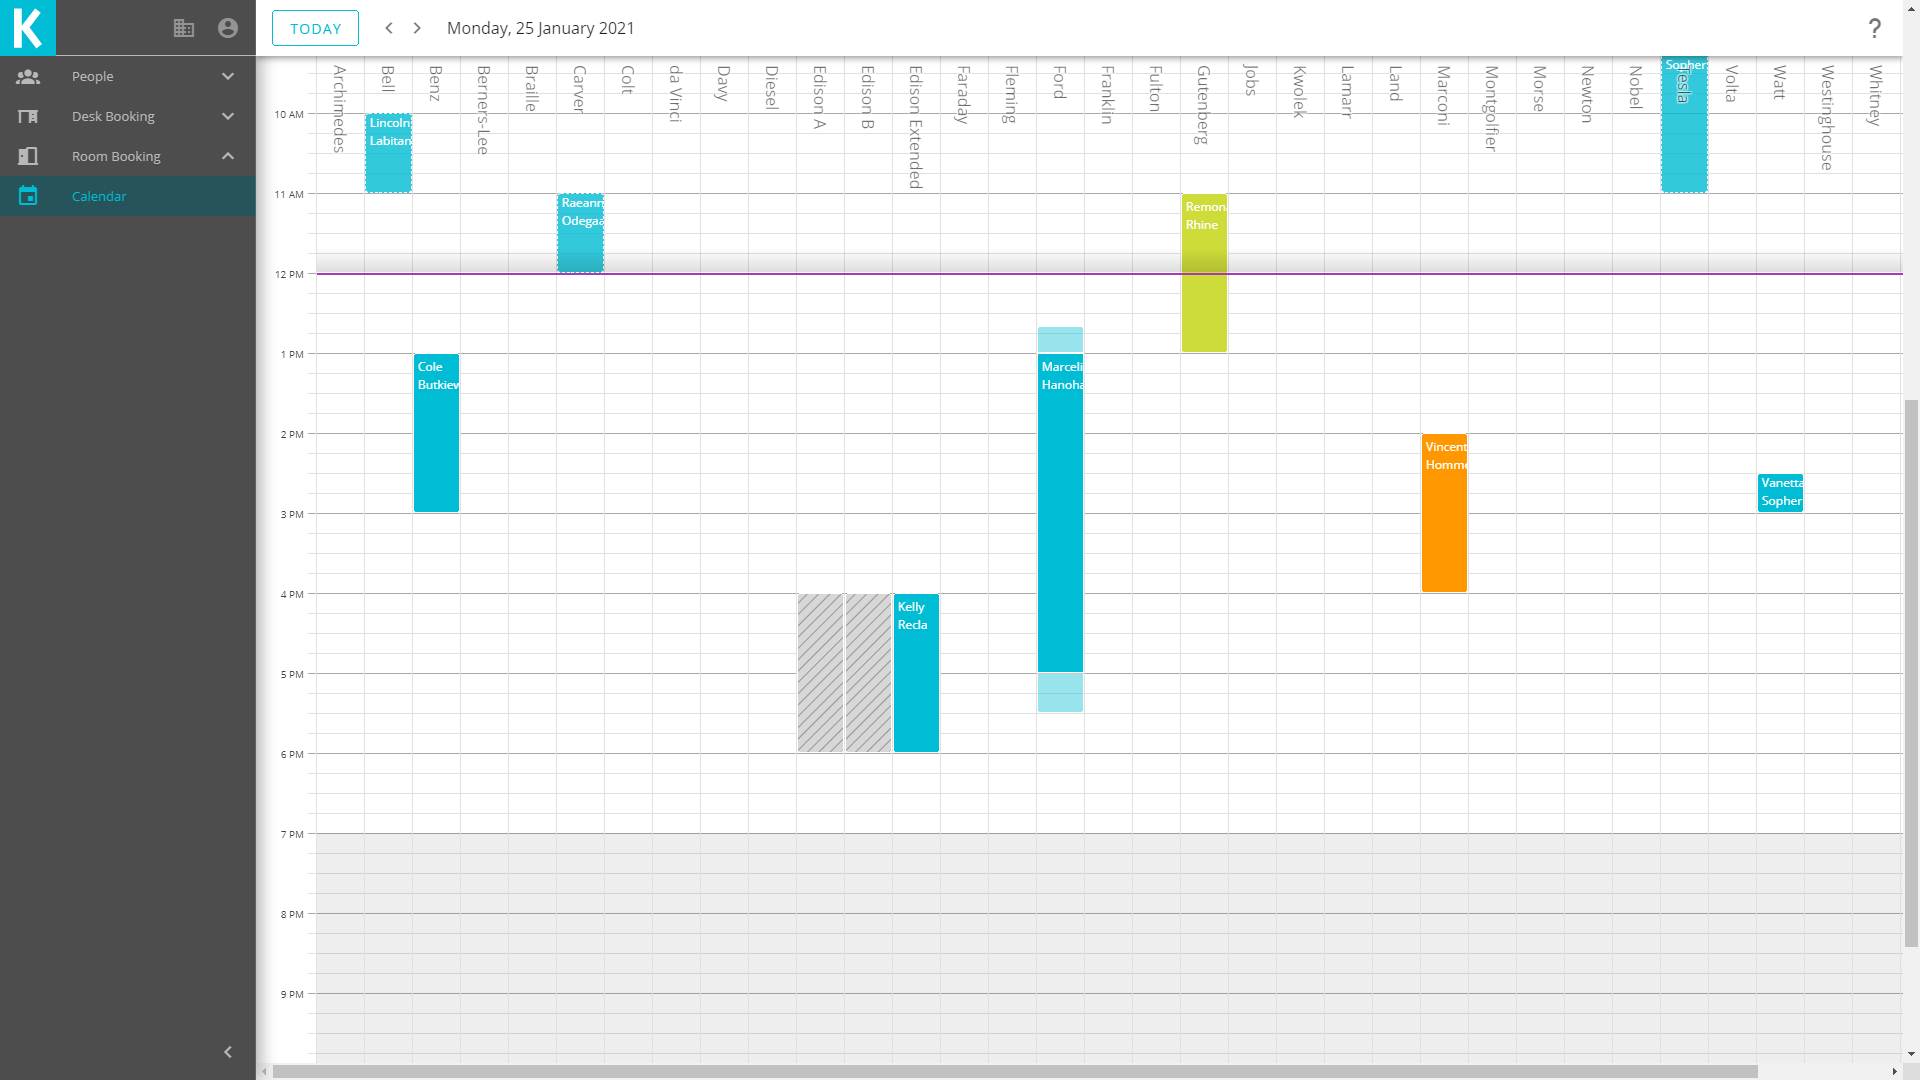
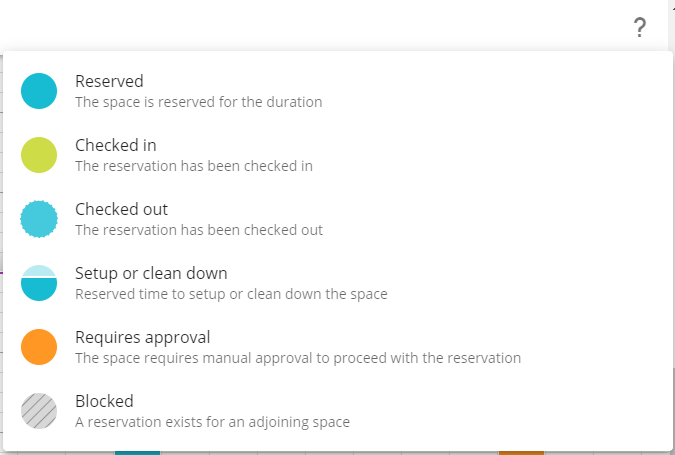
The bookings on the calendar are coloured to indicate different states; click the button located in the top right corner to see the key.
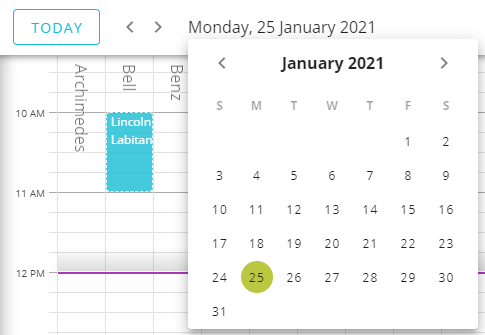
To view bookings for a different day, use the previous and next buttons () or click the date to open the date selector located in the toolbar at the top left of the calendar.
# Calendar Room Filter
If you have access to multiple sites, you can view rooms from different sites in the Room Booking Calendar. Clicking the in the top right will open up a list of all rooms that you have access to across all sites. Selecting these rooms will add them to the calendar view when you click "OK".
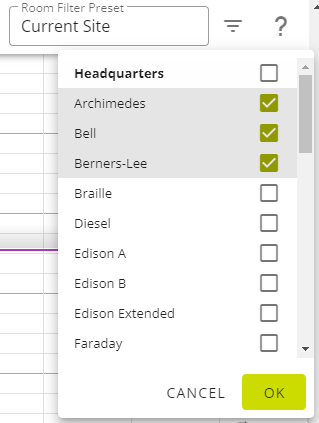
To save a filter as a preset, click the "Room Filter Preset" box and select the "Save current view" button. This preset will then appear in the list for you to reselect at a later date.

Clicking the next to the preset will delete that preset.
# Create a Booking
To create a new booking from the calendar view, click and drag over the desired time slot, in the column of the desired room.
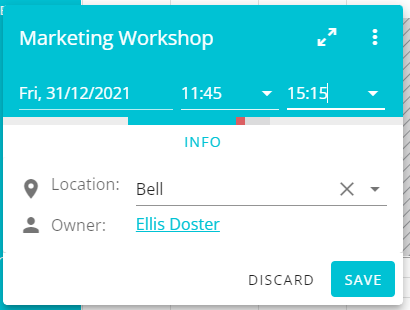
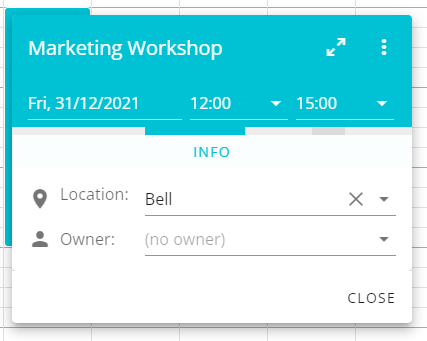
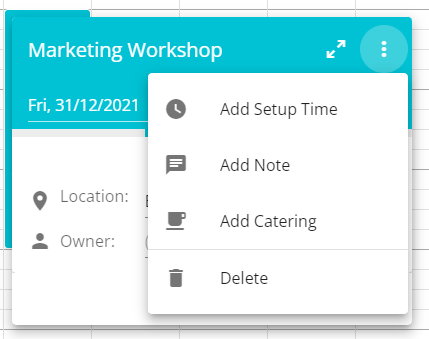
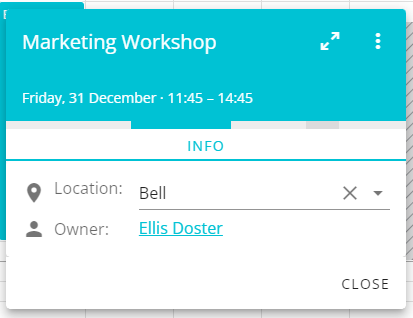
Upon release of the mouse a popup window will appear, this popup is for adding details to your newly created booking.
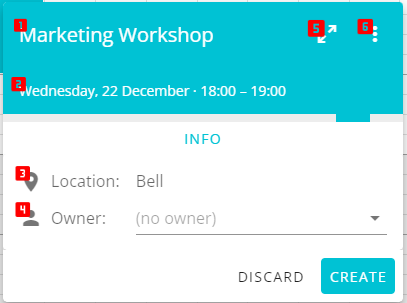
| See and easily change the title of the booking. | View and assign the owner of a booking. | ||
| Manage the day and time of the booking. | Open the selected booking in the sidebar for more detailed editing. | ||
| Conveniently see the room or space where the booking is being held. | Access the sub-menu to add more details or delete a booking. |
From this popup menu you are able to add details such as a booking title, owner, and setup times. Once all the required details have been added, select create and the booking will be added into Kahu. For more details on how to edit a booking see Edit a Booking.
# Edit a Booking
You are able to edit a booking at any point up until it has been checked out, e.g. adjusting the title of the booking, adding a note or even moving it to a different time or day.
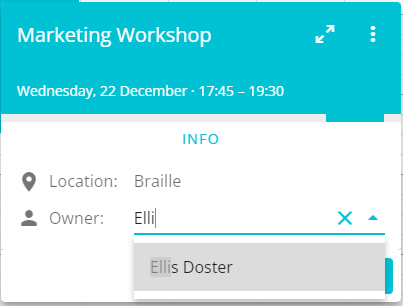
# Adding an Owner
An owner can be assigned by typing in the owner field; entering the first three letters of the desired persons name will display all entries that match, allowing you to select your desired individual. After an owner is added their name will be displayed in the slot in the calendar view.
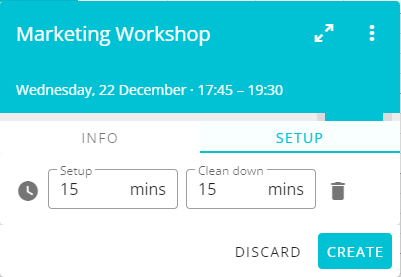
# Adding Setup/Clean Down Time
Kahu Room Booking includes the ability to add time either side of a booking for setup and clean down. This is for situations where a booking may require preparation or clean up, such as setting up equipment setup or seating. To do this, select Add Setup Time from the dropdown menu. This will then add a tab to the popout with two selectors, one for setup and another for clean down time.
The initial time is always set to 15 minutes for each, should this need to be adjusted you are able to do so by either using the arrows when hovering over the times or typing in the desired length of time.
Removing setup/clean down times can be done by clicking the button next to the time selectors.
Adding setup and clean down times will result in two additional bookings being created. These appear before and after the booking currently being created/edited and can be edited separately.
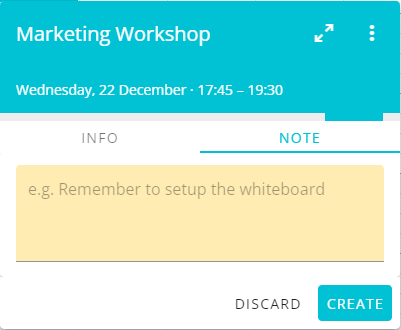
# Adding Notes
The notes section allows extra detail to be added to the booking, such examples include required equipment or other details. To add a note, select Add Note from the dropdown menu. This will then add a tab to the popout with a text field, allowing you to enter the detail you wish to add.
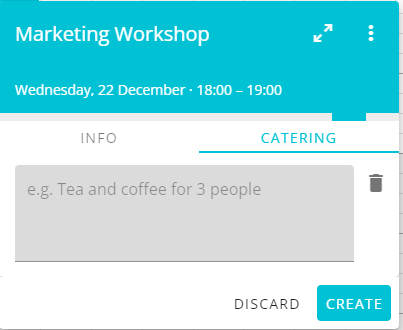
# Adding Catering
Catering requests can be added to bookings to indicate any catering requirements that are needed for this booking. To add a catering request, select Add Catering from the dropdown menu. This will then add a catering tab to the popout with a text field, allowing you to enter the detail you wish to add. If the selected room does not support catering requests, you will not see the option in the dropdown.
# Discarding Changes
If for any reason during creation or editing of a booking you wish to discard your changes, you can select discard. Alternatively you may click outside the popup twice, on the first click the popup will shake to signify you are about to discard the changes. The second click will confirm the action.
# Moving a Booking
Sometimes bookings may need to be moved around to different a time, room or day because of availability or resource management. The next section will detail how to achieve this through the popup window or calendar view.
# Changing a Booking's Location
To move a booking to a different room, click and hold the block of the booking. Then drag this to the column of the room you wish to move it to.
# Changing a Booking's Time
Booking times can be changed in two different ways, the first option is from the popup menu. Click the date and time section underneath the title and you will be presented with a way to adjust the start and end time of the booking; it is also possible to change the length of the booking, and the date on which it will occur.
The second way to achieve this is from the calendar view. By clicking on the booking and dragging it up or down the column to the new time position. Once at the new time slot release the mouse button, the booking will be assigned a new start and end time.
# Changing the length of a Booking
Changing the length of a booking can be done through the booking's popup menu, in the same way as changing a booking's time, see Changing a Booking's time. This can also be achieved by dragging the top or bottom edges of the bookings block on the calendar view.
NOTE: You are able to change the increments from 15 to 5 minutes by holding the CTRL key while dragging.
# Booking Sidebar
Clicking the button on the popout will open up the sidebar, allowing you to view and edit more information for this booking.
Here you can edit the name and date/time of the booking, as well as adding setup times, notes or catering requests. You can also add another room for this booking if it is to occur in multiple locations, this could be across multiple sites as well as multiple rooms in the same site.
You can also get a direct link to the booking by clicking the three dots at the top right and selecting "Copy Link".
# Delete a Booking
Deleting a booking is done through the popout menu. First select the booking you wish to delete, then click the symbol in the top right corner and confirm by selecting delete. The booking will be removed and will disappear from the calendar view.
# Approving a Booking
Some spaces may need to go through an approval processes before bookings are confirmed. Unapproved bookings show up in Kahu as orange in the calendar view; these bookings can be approved by selecting the booking and using the icon in the top right corner. Once this is selected and the changes have been confirmed, the meeting will be approved.

# Divisible Rooms
Divisible rooms are those that can be combined into larger spaces. Kahu defines the combined space as a room in the calendar view. When booking out this room, the Kahu system will automatically place reserved blocks in the rooms that make up that space.

When selecting the reserved block the title will show details on why this space is reserved.
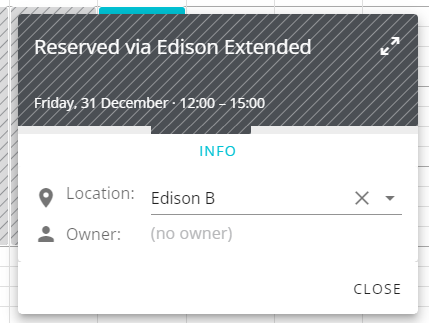
This also occurs in the opposite manner, booking one of the rooms that make up a divisible space places a reserved block to the divisible room's column to signify the larger space is unavailable at that time.

# Busy Bar
The busy bar can be found on the popup underneath the title and booking time details when selecting a booking from the calendar. This bar is a timeline representation of the room's schedule, much like the columns on the calendar view.
When creating a booking, this makes it easier to see room availability for the day. Darker grey sections of this line represent other bookings while the blue shows the selected booking; by hovering over those sections the start and end times for those bookings are displayed.
This feature also serves as a warning when creating or extending a booking by showing clashes that will occur if the bookings times overlap, this is displayed in red.